Page 3
OUTPUT SCALING
The CO
2
output signal is scaled such that 4-20 mA (or 0-5 / 0-10 Vdc) equals 0-2000 ppm by default. The
signal span may be changed via the Setup Menu from 1000 to 10,000 ppm in 500 ppm increments.
START-UP MODE
Verify the device is properly wired and connections are tight. Ensure the mA / VOLT switch is set for the
correct signal type. Apply power and the LCD will indicate the software version number, the output
signal type and then the sensor will begin a one minute warm-up countdown. When the warm-up time
expires the device will enter normal mode.
NORMAL MODE
The sensor will begin reading the CO
2
level (and temperature if it is installed), output the correct analog
signal and display the values on the LCD. If the relay is installed, the measurements will be compared to
the setpoint and appropriate action taken. The keypad is monitored and if the <MENU> key is pressed
the device will enter the Setup Menu. If the setpoint option is installed, then pressing either the <UP>
or <DOWN> keys will cause the device to enter the setpoint mode. The Setup Menu can be accessed to
configure the device for required operation.
RELAY MODE
The optional relay can be used as an alarm signal to indicate that a setpoint has been exceeded. For
the basic CO
2
product, the relay may be configured via the Setup Menu as a high or low alarm and the
setpoint value, hysteresis and on-delay time may be set. The relay will activate and close the contacts
if the CO
2
measurement goes above the setpoint (for a high alarm) or below the setpoint (for a low
alarm). If required, this action can be delayed by a time period (relay delay time) to prevent false alarms.
After the relay is activated, the measurement must fall below the setpoint - hysteresis value (for a high
alarm) or go above the se hysteresis value (for a low alarm) to deactivate the relay and open the
contacts. The high/low assignment, setpoint, delay time and hysteresis values may all be programmed
via the Setup Menu as required.
If the optional temperature sensor is installed, the relay operation may be assigned to operate as a
temperature high or low alarm instead of a CO
2
alarm. All the same relay parameters may be configured
to set up the alarm as required.
SETPOINT MODE
The optional setpoint control is operated by two front panel switches for <UP> and <DOWN> and the
resistive output signal simulates a slidepot action with + and - 10 steps from the midpoint. For example,
if the device is ordered with a 0-10KΩ resistance value, then the resistive output midpoint is 5KΩ and
each press of the <UP> key will increase the output resistance by 500Ω up to 10KΩ and each press of
the <DOWN> key will decrease the output resistance down to 0Ω. There are several optional “slidepot”
values available for the product such as 20-30KΩ, 475-10,475Ω, etc and each range may be set as direct
or reverse acting via the Setup Menu.
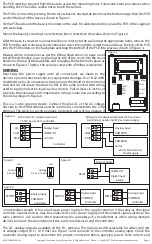
voltage signals are referenced to the COM terminal. The current output operates in the active mode and
does not require a loop power supply (the signal current is generated by the transmitter and must not be
connected to a powered input or device damage will result).
The optional relay output connects to the RELAY terminals. The relay output is completely isolated and
has a Normally Open (NO) signal. This signal can be used to directly control an alarm or ventilation fan. See
specifications for contact ratings. See Figure 8.
The optional override signal is a two-wire dry contact normally open switch connected to the SWITCH
terminals. See Figure 9.
The optional setpoint signal is a resistive signal that can vary from 0-10K ohms (for example) to simulate
a slidepot action. It is available on the SETPNT terminal and is referenced to COM. Several resistive values
are available and the operation may be configured as normal or reverse acting via the Setup Menu. See
Figure 9
The optional two-wire temperature sensor output is available with various RTDs and thermistors to suit all
control applications and is available on the TEMP terminals. See Figure 9.
Copyright © Greystone Energy Systems, Inc. All Rights Reserved Phone: +1 506 853 3057 Web: www.greystoneenergy.com
IN-GE-CD2RMCXXX-04


