76
V1.0.0 | 20180101
Faltschiebeladen
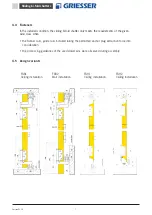
Kein Flügelüberstand | mit Anschlagpuffer
Flügelüberstand > 1/3 der Leibungstiefe | mit Winkel und Anschlagpuffer
Flügelüberstand
≤
1/3 der Leibungstiefe | mit Anschlagpuffer
Ausführungsbeispiele
Anschlagpuffer
Anschlagpuffer
Winkel mit
Anschlagpuffer
76
V1.0.0 | 20180101
Faltschiebeladen
Kein Flügelüberstand | mit Anschlagpuffer
Flügelüberstand > 1/3 der Leibungstiefe | mit Winkel und Anschlagpuffer
Flügelüberstand
≤
1/3 der Leibungstiefe | mit Anschlagpuffer
Ausführungsbeispiele
Anschlagpuffer
Anschlagpuffer
Winkel mit
Anschlagpuffer
Version 01.18
13
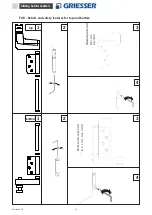
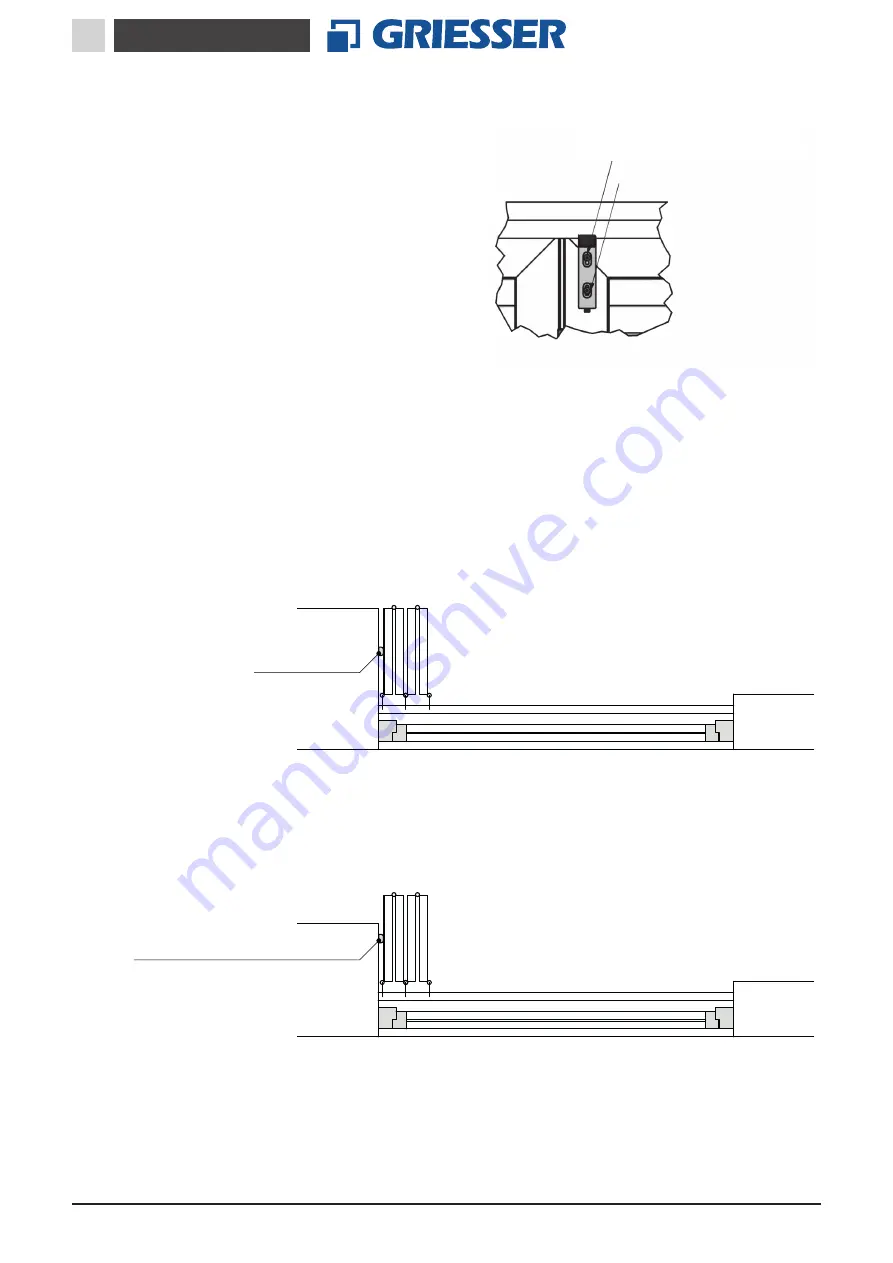
4.9 Pull latch installation
The pull latch is installed on the building after
the system has been properly aligned:
Things to bear in mind during installation:
• The position is determined using Screw 1
• Then fasten right at the top using Screw 2 to
secure the pull latch towards the bottom
Pull latch overlap
ROB approx. 4 mm - HAWA approx. 6 mm
then Screw 2
Screw 1 first
Sliding bi-fold shutters
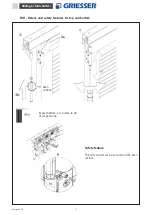
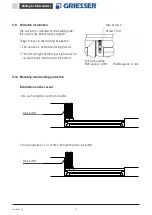
4.10 Mounting Overwinding protection
Installation on the reveal
• No sash projection | with stop buffer
• Sash projection
≤
1/3 of the soffit depth | with stop buffer
Stop buffer
Stop buffer


