COMPONENT MAINTENANCE MANUAL
IN 1502H RADAR INDICATOR
TM109102
4-11
May/01
NOTE
ANODE VOLTAGE ADJUSTMENT - The HVPS Module may be aligned and
tested on the HVPS test fixture before installation into the IN-1502H. If so, then
the following three steps should be skipped. If the HVPS Module has not been
pre-aligned on the HVPS test fixture, then the following three steps must be
performed.
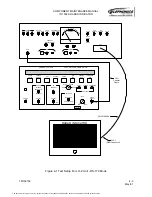
5. Switch the UUT power switch on the test panel to the ON position.
6. Adjust the High Voltage control, R12 on the HV Regulator Module, until a voltage of
+3.92 ± 0.15 VDC is obtained at TP4. This corresponds to an anode voltage of
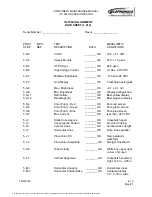
approximately 22kV. Check the data sheet.
7. Return the UUT power switch on the test panel to the OFF position.
E. Brightness Control MIN / MAX Preliminary Settings
NOTE: The 066-01170-0200 and the 066-10070-0400 units are equipped with a CRT
filter that is designed to operate with NVG. The NVG filter will not transmit the
color red correctly, and red will appear orange through this filter. Due to this
distortion of the red color, white may appear slightly blue through the NVG filter.
1. Switch the UUT power switch on the test panel to the ON position.
2. Set the COLOR BAR switch on the test panel to the UP position.
3. Rotate the UUT BRT control fully CW.
4. Adjust the Maximum Brightness control, R83 on the Video Module, for -85 VDC at
TP15. Verify that no "Blooming" of the image is present.
5. Rotate the UUT BRT control fully CCW.
6. Adjust the Minimum Brightness control, R86 on the Video Module, for -140 VDC at
TP15.
7. Repeat the previous four steps as necessary until -140VDC is present on TP15 with
the UUT BRT control fully CCW and -85V is present with the UUT BRT control fully
CW. Check the data sheet.
8. Set the COLOR BAR switch on the test panel to the DOWN position.
F. Grid 2 Adjustment
1. Set the CROSSHATCH FINE switch to the up position.
2. Rotate the UUT BRT control fully CW.
3. Adjust the Grid 2 control, R30 on the HV Regulator Module, until the background of
the crosshatch pattern just extinguishes. Check the data sheet.
4. Set the CROSSHATCH FINE switch to the down position.
The document reference is online, please check the correspondence between the online documentation and the printed version.


