background image

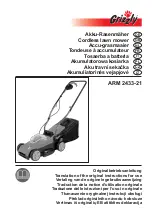
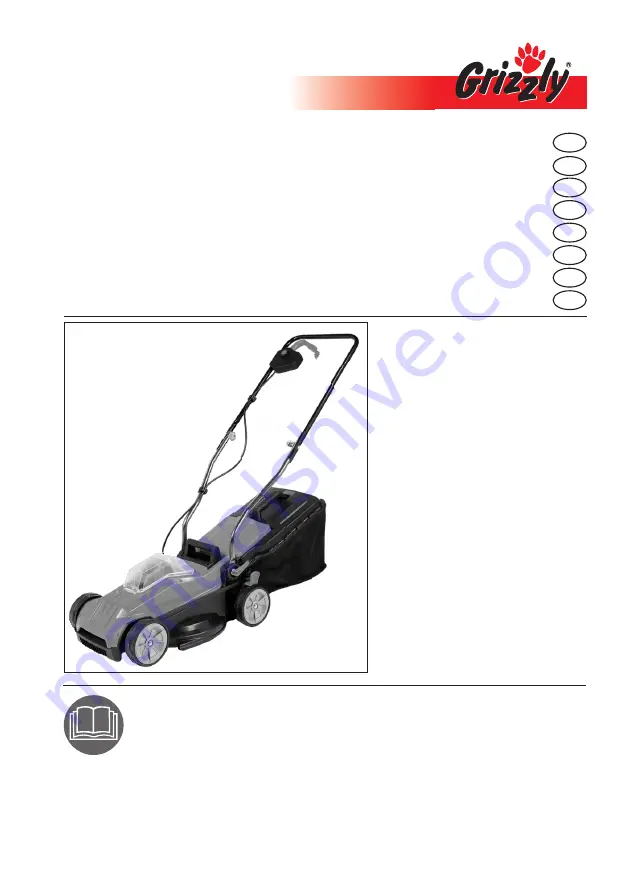
Akku-Rasenmäher

Cordless lawn mower

Accu-grasmaaier

Tondeuse à  accumulateur

Tosaerba a batteria

Akumulatorowa   kosiarka

Aku travní sekačka

Akumuliatorinės  vejapjovė

DE

GB

Originalbetriebsanleitung

Translation of the original instructions for use

Vertaling van de originele gebruiksaanwijzing

Traduction de la notice d’utilisation originale

Traduzione delle istruzioni per l’uso in originale

Tłumaczenie oryginalnej instrukcji obsługi

Překlad originálního návodu k obsluze

Vertimas iš originalių EB atitikties deklaracija 

FR

IT

NL

PL

CZ

LT

ARM 2433-21

Summary of Contents for ARM 2433-21

Page 1: ...inalbetriebsanleitung Translation of the original instructions for use Vertaling van de originele gebruiksaanwijzing Traduction de la notice d utilisation originale Traduzione delle istruzioni per l uso in originale Tłumaczenie oryginalnej instrukcji obsługi Překlad originálního návodu k obsluze Vertimas iš originalių EB atitikties deklaracija FR IT NL PL CZ LT ARM 2433 21 ...

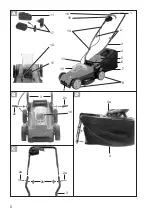
Page 2: ...2 11 17 7 6 4 3 3 2 1 2b 2a 3 9 10 5 10 13 15 16 14 11 12 8 4 2c 2c 4a 2a ...

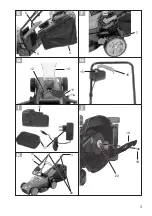
Page 3: ...3 10 11 12 11a 7 5 4 9 15 16 17 18 19 20 11 4 2b 1 3 13 ...

Page 4: ... Vertaling van de originele gebruiksaanwijzing 30 Traduction de la notice d utilisation originale 43 Traduzione delle istruzioni per l uso in originale 56 Tłumaczenie oryginalnej instrukcji obsługi 69 Překlad originálního návodu k obsluze 82 Vertimas iš originalių eksploatavimo instrukcijoje 93 DE GB ...

Page 5: ...chtig aus der Packung und prüfen Sie ob die nachfol genden Teile vollständig sind Rasenmäher und Bügelgriff 2 unterere Holme Grasfangkorb Handgriff des Grasfangkorbs Montagematerial Fangkorb Kabelklemmen Montagematerial Bügelgriff Akku Ladegerät Betriebsanleitung Ladegerät und Akku Betriebsanleitung Verwendungszweck Das Gerät ist nur für das Mähen von Rasen und Grasflächen im häuslichen Bereich be...

Page 6: ...le in der Anleitung Gefahrenzeichen mit Angaben zur Verhütung von Personen oder Sachschäden Gebotszeichen anstelle des Aus rufungszeichens ist das Gebot er läutert mit Angaben zur Verhütung von Schäden Hinweiszeichen mit Informationen zum besseren Umgang mit dem Gerät Sicherheitshinweise Dieser Abschnitt behandelt die grundlegenden Sicherheitsvor schriften bei der Arbeit mit dem Akku Rasenmäher Al...

Page 7: ...chädigt sind Zur Vermeidung einer Unwucht dürfen beschä digte Werkzeuge und Bolzen nur satzweise ausgetauscht werden Seien Sie vorsichtig bei Ge räten mit mehreren Schneid werkzeugen da die Bewegung eines Messers zur Rotation der übrigen Messer führen kann Benutzen Sie nur Ersatz und Zubehörteile die vom Her steller geliefert und empfoh len werden Der Einsatz von Fremdteilen führt zum sofor tigen ...

Page 8: ...urf schacht stehen Achtung Gefahr Messer läuft nach Es besteht Ver letzungsgefahr Das Gerät darf nicht angeho ben oder transportiert werden solange der Motor läuft Schal ten Sie das Gerät ab wenn es zum Transport gekippt werden muss wenn andere Flächen als Rasen überquert werden und wenn das Gerät zu und von den zu mähenden Flächen gebracht wird Halten Sie die Grasauswurf öffnung stets sauber und ...

Page 9: ...in die Nähe oder unter rotierende Teile Stellen Sie sich nie vor die Grasauswurf öffnung Ziehen Sie den Stromkreisun terbrecher Kontaktschlüssel immer wenn Sie sich vom Gartengerät entfernen vor dem Beseiti gen von Blockierungen wenn Sie das Gartengerät überprüfen reinigen oder an ihm arbeiten nach der Kollision mit einem Fremdkörper Überprüfen Sie das Gerät sofort auf Be schädigungen und lassen S...

Page 10: ...hren Heizungen Herden und Kühlschränken Es besteht ein erhöhtes Risi ko durch elektrischen Schlag wenn Ihr Körper geerdet ist Halten Sie Elektrowerkzeuge von Regen oder Nässe fern Das Eindringen von Wasser in ein Elektrowerkzeug erhöht das Risiko eines elektrischen Schlages Allgemeine Beschreibung Funktionsbeschreibung Der Akku Rasenmäher besitzt ein par allel zur Schnittebene sich drehendes Schne...

Page 11: ...gelgriff montieren 4 Befestigen Sie den Bügelgriff 1 mit den beiliegenden Flü gelmuttern 2b und den Befes tigungschrauben 2a an den unteren Holmen 3 Kabelhalter montieren 5 Klipsen Sie die Kabelhalter A 14 am unteren Holm 3 und Bügelgriff 1 ein und fixie ren Sie damit das Gerätekabel A 13 Wenn Sie die Flügelmuttern 2b lockern können Sie den Bügelgriff zur Aufbewahrung des Gerätes nach unten klappe...

Page 12: ... der Sai son sollte eine hohe Schnitthöhe gewählt werden Beachten Sie den Lärmschutz und örtliche Vorschriften Akku einsetzen entnehmen Schalten Sie das Gerät aus zie hen Sie den Kontaktschlüssel 12 und warten Sie den Stillstand des Messers ab Es besteht die Gefahr von Personenschäden G 1 Zum Einsetzen des Akkus 11 in das Gerät schieben Sie den Akku entlang der Führungs schiene in das Gerät Er ras...

Page 13: ...Kapitel Reinigung Wartung Lagerung beschrieben Nach dem Ausschalten des Gerätes dreht sich das Messer noch für einige Sekunden Be rühren Sie das laufende Messer nicht Es besteht die Gefahr von Personenschäden Reinigung Wartung Lagerung Lassen Sie Arbeiten die nicht in dieser Anleitung beschrieben sind von einer von uns er mächtigten Kundendienststelle durchführen Verwenden Sie nur Originalteile Tr...

Page 14: ...bzudecken Öff nen Sie den Akku nicht Entsorgen Sie Akkus nach den loka len Vorschriften Geben Sie Akkus an einer Altbatteriesammelstelle ab wo schädigte Teile Prüfen Sie den festen Sitz aller Muttern Bolzen und Schrau ben Überprüfen Sie Abdeckungen und Schutzeinrichtungen auf Beschädi gungen und korrekten Sitz Tauschen Sie diese gegebenenfalls aus Messer austauschen Ist das Messer stumpf so kann e...

Page 15: ...n worden und kann zum Vergleich eines Elektrowerkzeugs mit einem anderen verwendet werden Der angegebene Schwingungsemissionswert kann auch zu einer einleitenden Einschät zung der Aussetzung verwendet werden Warnung Der Schwingungsemissionswert kann sich während der tatsäch lichen Benutzung des Elektro werkzeugs von dem Angabewert unterscheiden abhängig von der Art und Weise in der das Elektro wer...

Page 16: ...ind wer den unentgeltlich durch Ersatzliefe rung oder Reparatur beseitigt Voraus setzung ist dass das Gerät unzerlegt und mit Kauf und Garantienachweis an den Händler zurückgegeben wird Reparatur Service Sie können Reparaturen die nicht der Garantie unterliegen gegen Berech nung von unserem Service Center durchführen lassen Unser Service Center erstellt Ihnen gerne einen Kos tenvoranschlag Wir kön...

Page 17: ...ben Motor setzt aus Blockierung durch Fremd körper Fremdkörper entfernen Arbeitsergebnis nicht zufriedenstellend oder Motor arbeitet schwer Schnitthöhe zu niedrig Größere Schnitthöhe einstellen Messer 18 stumpf Messer schleifen lassen oder austauschen Messerbereich verstopft Gerät reinigen Messer 18 falsch mon tiert Messer korrekt einbauen Messer rotiert nicht Messer 18 durch Gras blockiert Gras e...

Page 18: ... user so that the information is always available Scope of Delivery Carefully remove the equipment from the packaging and check whether the follow ing parts are complete Lawn mower and curved handle 2 Lower bars Grass box Handle of the grassbox Mounting material grass catcher Cable hooks Mounting material curved handle Battery Battery charger Instruction manual recharger and battery Instructions f...

Page 19: ...orma tion on prevention of personal injury and property damage Precaution symbol explanation of precaution instead of exclamation mark with information on preven tion of harm damage Notice symbol with information on how to handle the device properly Safety Information This section covers the basic safe ty regulations when working with the electric lawnmower General Safety Information This equipmen...

Page 20: ...use of non original parts will immediately invalidate the guarantee Worn or damaged information signs must be replaced Working with the Equipment Do not place feet or hands near or under rotating parts when working Risk of injury Switch on the motor accord ing to the instructions and only when your feet are at a safe distance from the cutting tools Do not use the equipment in the rain in poor weat...

Page 21: ... damaged incomplete or has been modified without the authorisation of the manu facturer Do not use the equip ment with damaged safety devices or screens or with missing safety equipment such as deflection and or grass col lection devices Do not overload the equip ment Work only within the specified power range and do not change the regulator set tings on the motor Do not use low powered machines f...

Page 22: ... cutting blade on it that even if the volt age source is switched off the cutting blade can be moved Ensure that all nuts bolts and screws are tightened firmly and the equipment is in safe work ing condition Do not attempt to repair the equipment yourself unless you have been trained to do so Any work not specified in these instructions is to be carried out only by customer service cen tres that w...

Page 23: ...g 10 Cover for rechargeable battery compartment 11 Battery 12 Contact key 13 Equipment cable 14 Cable holder 15 Locking button 16 Start lever 17 Battery charger 18 Blade 19 Blade bolt 20 Motor spindle Assembling instructions Alwayas wear cut protection gloves Undertake only work with which you are confident In case of uncertainty contact a spe cialist or contact our service directly Assembling the...

Page 24: ...ox 4 2 Lower the collision guard 5 onto the grass box 4 it will keep it in place 3 To remove the grass box 4 lift the collision guard 5 and unhook the grass box from the mounting bracket Flap down the collision guard to the hous ing 9 Adjusting the Cut Height There are 5 different cutting heights 65 mm large cutting height 55 mm medium cutting height 45 mm medium cutting height 35 mm low cutting h...

Page 25: ...ncrease the density of the lawn it also produces an evenly resilient lawn The first cut is to be made in around April at a growth height of 70 80 mm In the main vegetation period the lawn is to be mowed at least once a week Run the equipment at a walking pace in tracks that are as even as possi ble For gap free mowing the tracks should always overlap by a few centi metres Adjust the cut height so ...

Page 26: ...kwise off of the motor spin dle 20 using a screwdriver 3 Install the new blade in the reverse order Ensure that the blade 18 is positioned correct ly and the screw 19 tightened firmly Storage K Loosen the tensioning levers 2a and fold down the handle bar 1 so the equipment takes up less space Ensure that the cable 13 is not caught Keep the equipment dry and out of reach of children Allow the motor...

Page 27: ... this instruction manual are therefore without guarantee Legal claims which are made on the ba sis of the instruction manual cannot thus be considered as valid Dispose of the equipment with the battery discharged Do not open the equipment or the battery Dispose of the equipment in ac cordance with the local regulations Take the equipment to a collection point where it will be recycled in an enviro...

Page 28: ...rial or manufacturing faults will be made good free of charge by replacement delivery or repair This requires that the appliance is re turned to the merchant undismantled and with proof of purchase and guar antee Repair Service Repairs which are not covered by the guarantee can be carried out for charge by our service center Our ser vice center will be glad to provide you with a cost estimate We c...

Page 29: ...wheels slightly by pressing down on the handle bar Motor stops Blockage by foreign object Remove the foreign object Result unsatisfactory or motor labours Cut height too low Set a higher cut height Blade 18 blunt Have the blade sharpened or replace it Blade area blocked Clean the equipment Blade 18 assembled incorrectly Install the blade correctly Blade fails to turn Blade blocked by grass Remove ...

Page 30: ...n een ernstig gevaar voor de gebruiker vormen Het apparaat is voor het gebruik door volwassenen bestemd Kinderen en ook personen die met deze handleiding niet vertrouwd zijn mogen het apparaat niet gebruiken De bediener of gebruiker van het apparaat is verantwoor delijk voor ongelukken of schades aan an dere personen of hun eigendom De fabrikant is niet aansprakelijk voor schade die door onregleme...

Page 31: ...de gebruiksaanwijzing Gevaarsymbool met informatie over de preventie van personen of zaakschade Gebodsteken in plaats van het uitroepingsteken wordt het gebod toegelicht met informatie over de preventie van schade Aanduidingsteken met informatie over hoe u het apparaat beter kunt gebruiken Veiligheidsinstructies Deze paragraaf behandelt de es sentiële veiligheidsvoorschriften bij het werk met het ...

Page 32: ...ting of bouten ontbreken versleten of beschadigd zijn Ter preventie van een onba lans mogen beschadigde werk tuigen en bouten slechts per set uitgewisseld worden Wees voorzichtig bij apparaten met meerdere snoeiwerktui gen omdat de beweging van een mes tot een rotatie van de overige messen kan leiden Gebruik enkel reserveonderde len en toebehoren die door de fabrikant geleverd en aanbe volen worde...

Page 33: ...t staat Opgelet gevaar Mes loopt na Er bestaat gevaar voor verwondingen Het apparaat mag niet opgetild of getransporteerd worden zo lang de motor draait Schakel het apparaat uit als het voor het transport gekanteld moet worden als andere oppervlak ten dan gazons overgestoken moeten worden en wanneer het apparaat naar en weg van de te maaien oppervlakten ge bracht wordt Houd de grasuitwerpopening s...

Page 34: ...en nooit vóór de grasuitwerpopening gaan staan Trek de zekering contactsleutel steeds uit Als u het tuinierapparaat verlaat of voordat u blokke ringen gaat verwijderen Wanneer u het tuinierappa raat controleert reinigt of er werkzaamheden aan verricht Na een botsing met een vreemd voorwerp Contro leer het apparaat meteen op beschadigingen en laat het indien nodig repareren wanneer het op een onge ...

Page 35: ...n krachtige elektrische mo tor een robuuste behuizing van kunststof een veiligheidsschakelaar een stootbe scherming en een grasvangzak uitgerust Bovendien is het apparaat 5 voudig in de hoogte verstelbaar en heeft het gemakke lijk te bedienen wielen Gelieve voor de werking van de bedie ningsonderdelen de hierna volgende be schrijvingen te raadplegen De afbeeldingen voor de bediening en het onderho...

Page 36: ...aat snoer A 13 Als u de beide vleugelmoeren 2b losdraait kunt u de beugelhand greep naar beneden klappen om hetapparaat te bewaren Let erop dat het apparaatsnoer A 13 niet gekneld is Grasvangzak monteren D 1 Steek de greep 4a van de grasvangzak 4 in de houders bovenaan het deksel Klik deze stevig vast 2 Stulp de verbindingsstukken van kunststof over het buison derstel Met de grasmaaier mag er niet...

Page 37: ... Steek de contactsleutel 12 in de daartoe voorziene opening 4 Let er vóór het inschakelen op dat het apparaat geen voorwer pen raakt H 5 Om in te schakelen drukt u de ontgrendelknop 15 aan de hand greep in en houdt u gelijktijdig de starthefboom 16 ingedrukt Laat de ontgrendelknop 15 los 6 Om uit te schakelen laat u de starthefboom 16 los Na het uitschakelen van het ap paraat draait het mes nog en...

Page 38: ...omgang met het mes handschoenen Schakel vóór alle onderhouds en reinigingswerkzaamheden het appa raat uit trek de contactsleutel 12 uit en wacht de stilstand van het mes af Er bestaat gevaar voor lichame lijke letsels Algemene reinigings en on derhoudswerkzaamheden Spuit de grasmaaier niet met water schoon Gevaar voor elek trische schokken Houd het apparaat steeds netjes Ge bruik voor de reiniging...

Page 39: ...zie Grizzly Service Center 1 Draai het apparaat om 2 Gebruik vaste handschoenen en houd het mes vast 18 Draai de messchroef 19 tegen de richting van de wijzers van de klok van de motorspil 20 3 Monteer het nieuwe mes 18 weer in omgekeerde volgorde Let erop dat het mes correct gepositioneerd en dat de schroef vast aangedraaid is Opslag K Draai de spanhefbomen 2a los en klap de beugelgreep 1 samen o...

Page 40: ...rische werktuig van de vermelde waarde afwijken afhankelijk van de manier waarop het elektrisch werk tuig wordt gebruikt Er is de nood zaak veiligheidsmaatregelen voor de bescherming van de gebruiker vast te leggen die gebaseerd zijn op een inschatting van de blootstel ling tijdens de werkelijke gebruiks omstandigheden hierbij moeten alle onderdelen van de bedrijfscy clus in acht worden genomen bi...

Page 41: ...epaling is wel dat het apparaat intact en met koop en garantiebewijs aan ons servicecenter wordt overhan digd Reparatieservice U kunt reparaties die niet onder de garantie vallen tegen betaling laten uitvoeren door ons servicecenter Zij brengen graag eerst een offerte uit Wij bewerken alleen apparaten die voldoende zijn verpakt en voldoende gefrankeerd worden opgestuurd Wij kunnen apparaten slecht...

Page 42: ...es optillen Motor wordt uitgescha keld Blokkering door vreemde voorwerpen Vreemd voorwerp verwijderen Resultaat van het werk niet bevredigend of motor werkt moeilijk Gras te kort of te hoog Snoeihoogte wijzigen Mes 18 stomp Mes op laten scherpen of uit wisselen Uitwerpkanaal verstopt Gras verwijderen Mes 18 niet correct gemonteerd Mes correct monteren Mes roteert niet Mes door gras geblokkeerd Gra...

Page 43: ...lume de la livraison Retirez l appareil prudemment de l embal lage et vérifiez si les parties suivantes sont complètes Tondeuse à gazon et poignée en arceau 2 Longeron inférieur Panier collecteur d herbe Fixations de câble Matériel de montage de la poignée en arceau Matériel de montage du panier collec teur Batterie Chargeur Notice d utilisation batterie chargeur Notice d utilisation Domaine d emp...

Page 44: ...rdures ménagères N utilisez pas l appareil par temps de pluie Portez une protection pour les yeux et les oreilles Remarque clé de contact Symboles utilisés dans le mode d emploi Signes de danger avec conseils de prévention des accidents sur les personnes ou des dégâts matériels Signes indicatifs l impératif est expliqué à la place des points d exclamation avec conseils de prévention des dégâts Sig...

Page 45: ... avec des lanières ou des ceintures Avant chaque utilisation effectuez un examen visuel de l appareil N utilisez pas la ton deuse si certains appareillages de protection par exemple la protection anti chocs ou le sac de ramassage des parties du dispositif de coupe ou des bou lons manquent sont usés ou sont endommagés Remplacer les jeux de composants usés ou endommagés afin de conserver un bon équi...

Page 46: ...asculez l appareil en appuyant sur la barre de poignée de telle sorte que les roues avant de l appareil se soulèvent légèrement Ne pas incliner l appareil plus que nécessaire et ne pas soulever les roues les plus proches de l utilisateur Contrôlez toujours que les deux mains se trouvent en position de travail avant que l appareil ne soit reposé à nou veau sur le sol Ne travaillez jamais sans le sa...

Page 47: ...rifiez la présence de dégâts sur l appareil et effectuez les réparations nécessaires avant de le faire redémarrer et de travailler avec lui si l appareil commence à vibrer de manière inhabituel lement forte il faut le vérifier immédiatement veillez à ce que tous les écrous boulons et vis soient serrés examinez l appareil du point de vue des éventuelles dégra dations effectuez les réparations né ce...

Page 48: ... n utilisez que des lames de rechange autorisées par le fabri cant Lors de la maintenance des lames veillez à ce qu elles puissent bouger même lorsque la source de tension est éteinte Description générale Description du fonctionnement La tondeuse à accumulateur est équipée d un outil tranchant tournant parallèlement au niveau de coupe Elle est équipée d un électromoteur haute performance d un soli...

Page 49: ...ns le sens inverse des aiguilles d une montre Monter la poignée en arceau 4 Fixez à la barre inférieure 3 la poignée en arceau 1 avec les vis jointes 2a et les écrous d aile 2b Deux positions sont possibles Enclipsez le support de câble 5 Enclipsez les supports de câble A 14 sur la barre inférieure 1 et fixez l ensemble au câble de l appareil A 13 Si vous desserrez les deux écrous d aile 2b vous p...

Page 50: ...hauteur de coupe souhaitée La hauteur de coupe correcte pour un gazon d ornement est environ 25 45 mm pour un gazon utilitaire d environ 45 65 mm Pour la première coupe en début de saison nous conseillons de choisir une haute hauteur de coupe Respectez les lois de protection contre le bruit et les prescriptions locales Mettre sous et hors tension G 1 Posez la tondeuse sur une sur face plane 2 Reti...

Page 51: ...e belle tonte les chemins parcourus doivent toujours se chevaucher de quelques centimètres Réglez la profondeur de coupe de telle façon que l appareil ne soit pas surchargé Dans le cas contraire le moteur peut être endommagé En cas de terrain en pente travaillez toujours transversalement Soyez particulièrement prudent lorsque vous reculez avec l appareil ou que vous le tirez Nettoyez l appareil ap...

Page 52: ...eil avec les Conservez l appareil toujours propre Pour le nettoyage utilisez une brosse ou un chiffon mais aucun produit de nettoyage ou de solvant Une fois la tonte terminée avec une spatule en bois ou en matière plas tique éliminez les restes de plantes qui adhèrent aux parois et aux roues aux buses d aération dans l ouverture d éjection et autour de la lame N uti lisez aucun objet dur ou acéré ...

Page 53: ...onformément à une méthode d essai normalisée et peut êtreu tilisée pour comparer un outil à un autre L indication du fait que la valeur totale de vibrations déclarée peut également être utilisée pour une évaluation préliminaire de l exposition Avertissement L émission de vibration au cours de l utilisation réelle de l outil électrique peut dif férer de la valeur totale déclarée selon les méthodes ...

Page 54: ...es de nettoyage et d entretien aient été res pectés Les dommages dus à un défaut de matériel ou à un vice de fabrication seront éliminés gratuitement soit par un remplacement soit par une répa ration La condition préalable est de rapporter au détaillant l appareil dans son intégrité avec le justificatif d achat et de garantie Service de réparation Vous pouvez faire exécuter les répa rations qui ne...

Page 55: ...la pression sur les roues avant Le moteur s arrête Blocage par corps étranger Retirer le corps étranger Les résultats de la coupe ne sont pas satisfaisants ou le moteur ne tourne pas correctement Hauteur de coupe trop basse Régler la hauteur de coupe Lame 18 émoussée Faire aiguiser la lame ou la changer Zone autour de la lame bou chée Nettoyer l appareil Lame 18 mal montée Monter la lame correctem...

Page 56: ...Volume di fornitura Rimuovere delicatamente l apparecchio dall imballaggio e controllare se i seguenti componenti sono completi Tosaerba e impugnatura ad arco 2 Sbarre inferiore Cestello raccoglierba Fermacavi Materiale di montaggio impugnatura ad archetto Materiale di montaggio cesto racco glierba Batteria Caricabatteria Istruzioni per l uso Batteria Caricabatteria Istruzioni per l uso Destinazio...

Page 57: ...rotezione per gli occhi e l udito Avvertenza chiave dell accensione Norme de sicurezza nelle istruzioni Simboli di pericolo con indicazioni relative alla prevenzione di danni a cose e persone Simboli di divieto al posto del punto esclamativo il divieto viene delucidato con indicazioni relative alla prevenzione di danni Simboli di avvertenza con infor mazioni relative ad un uso corretto dell appare...

Page 58: ...iù utensili da taglio in quando il movimento della lama può provocare la rotazio ne delle restanti lame Usare solo ricambi e accessori forniti e consigliati dal produtto re L impiego di corpi estranei comporta l immediata esclusio ne del diritto di garanzia I segni usurati o danneggiati devono essere sostituiti Lavorare con l apparecchio Non tenere i piedi e le mani vicino o sotto alle parti rotan...

Page 59: ...rse dal prato e l apparecchio venga condotto verso le e lontano dalle superfi ci da tagliare Tenere l apertura di espulsione dell erba sempre pulita e libera Rimuovere l erba tagliata solo quando l apparecchio è fermo Non lasciare mai l apparecchio incustodito sul posto di lavoro Non lavorare con l apparecchio danneggiato incompleto o trasformato senza il consenso del produttore Non usare mai l ap...

Page 60: ...e in modo sospetto controllarlo immediatamente Manutenzione e stoccaggio Lasciare raffreddare il motore prima di riporre l apparecchio in un ambiente chiuso Durante gli interventi di manu tenzione delle lame da taglio assicurarsi che le lame da taglio siano movibili anche quando la fonte di tensione è spenta Assicurarsi che tutti i dadi viti e bulloni siano ben stretti e l ap parecchio sia in cond...

Page 61: ...gnatura ad arco 2a Vite 2b Dado a galletto 2c Leva di serraggio 3 Sbarra inferiore 4 Cestello raccoglierba 5 Protezione antiurto 6 Impugnatura 7 Leva per la regolazione dell al tezza di taglio 8 Ruote 9 Alloggiamento apparecchio 10 Copertura per vano batteria 11 Batteria 12 Chiave dell accensione 13 Cavo dell apparecchio 14 Serracavo 15 Pulsante di sblocco 16 Leva di avviamento 17 Caricabatteria 1...

Page 62: ...lazioni del to saerba solo a motore spento e con la lama ferma Pericolo di lesioni Spegnere l apparecchio estrarre la chiave dell accensione 12 e attendere che la lama si fermi Inserimento rimozione cestello di raccolta erba E 1 Per agganciare il cestello rac coglierba 4 sollevare la pro tezione antiurto 5 e inserire il cestello raccoglierba 4 2 Posizionare la protezione antiur to 5 sul cestello r...

Page 63: ...ma in movimento Rischio di danni a persone Inserimento rimozione batteria Spegnere l apparecchio estrarre la chiave dell accensione 12 e attendere che la lama si fermi Pericolo di lesioni G 1 Per inserire la batteria 11 nell apparecchio spingerla al suo interno agendo lungo la bar ra di guida Si innesta emettendo un suono 2 Per rimuovere la batteria 11 dall apparecchio premere i tasti di sblocco 1...

Page 64: ...apertura di espulsione dell erba e dalla zona della lama Non usare oggetti duri o appuntivi possono dan neggiare l apparecchio Controllare il tosaerba prima di ogni uso per verificare la presenza di even tuali difetti evidenti come parti allenta te usurate o danneggiate Controllare la corrette sede di tutti i dadi bulloni e viti Controllare le coperture e i dispositivi di sicurezza per verificare ...

Page 65: ... acustica LWA misurato 89 1 dB A KWA 2 17 dB garantito 91 dB A Vibrazione ah 1 45 m s2 K 1 5 m s2 Conservare l apparecchio in un luogo asciutto e fuori dalla portata di bambi ni Lasciare raffreddare il motore prima di riporre l apparecchio in un ambiente chiuso Rimuovere l accumulatore dall appa recchio prima di un periodo prolun gato di stoccaggio p es nel periodo invernale Decliniamo ogni respon...

Page 66: ...ione di conformità Modifiche tecniche ed estetiche possono essere apportate nel corso dello sviluppo ulteriore di questo senza annuncio Tutte le misure indicazioni e dati di queste istru zioni per l uso sono perciò senza garanzia Le rivendicazioni di diritti che si dovessero far valere in base alle istruzioni per l uso sono da ritenersi perciò non valide Garanzia Per questo apparecchio forniamo 24...

Page 67: ...orto sono a carico del mittente Attenzione siete pregati di non in viare mai attrezzature con il serbatoio dell olio pieno È di massima impor tanza svuotare il serbatoio Eventuali danni alle cose l olio fuoriesce quando si appoggia l attrezzatura lateralmente o testa in giù ossia danni d incendio durante il trasporto sono a carico del mittente Attrezzature inviate con tassa a carico del destinatar...

Page 68: ...eriori premendo l impugnatura Il motore si spegne Bloccaccio da parte di corpi estrane Rimuovere il corpo estraneo Il risultato del lavoro non è soddisfacente oppure il motore è lento Altezza di taglio troppo bassa Impostare un altezza di taglio inferiore Lama 18 smussata Fare arrotare o sostituire la lama Zona lama 18 intasata Pulire l apparecchio Lama 19 montata in modo errato Montare correttame...

Page 69: ...tawy Proszę ostrożnie wyciągnąć urządzenie z opakowania i sprawdzić czy dostarczone zostały wszystkie poniższe części Kosiarka do trawy i rączka prowadzenia 2 Dolny trzonek Kosz na trawę Uchwyt kabla Materiał do montażu uchwytu pałąko wego Materiał do montażu kosza Akululator Ładowarka Instrukcja obsługi Akululator Ładowarka Instrukcja obsługi Przeznaczenie Urządzenie jest przeznaczone wyłącznie d...

Page 70: ...oci i wody Noś okulary ochronne i nauszniki Wskazówka dotycząca kluczyka startowego Symbole w instrukcji obsługi Symbol niebezpieczeństwa z informacjami na temat ochrony osób i zapobiegania szkodom materialnym Znak nakazu w miejscu wykrzyk nika objaśnienie nakazu z infor macjami na temat zapobiegania szkodom Znak informacyjny ze wskazówka mi ułatwiającymi posługiwanie się urządzeniem Wskazówki bez...

Page 71: ...i urządzenia tną cego lub trzpienie są zużyte lub uszkodzone W celu unik nięcia niewyważenia uszko dzone narzędzia i trzpienie można wymieniać jedynie jako zestawy W przypadku urządzeń z wie loma narzędziami tnącymi za chować ostrożność gdyż ruch jednego noża może prowadzić do rotacji pozostałych noży Proszę używać wyłącznie części zamiennych i części wyposażenia które zostały do starczone i są za...

Page 72: ... odstawieniem urządzenia na podłożu zawsze sprawdzać czy obydwie ręce znajdują się pozycji roboczej Nigdy nie należy wykonywać pracy bez worka do zbierania skoszonej trawy lub osłony odbojowej Proszę zawsze trzymać się z dale od otworu wylotowego Nie uruchamiać silnika stojąc przed otworem wylotowym Uwaga niebezpieczeństwo Nóż obraca się jeszcze przez pewien czas Istnieje niebezpieczeństwo obrażeń...

Page 73: ... nie umieszczać rąk i nóg w pobliżu obracających się części lub pod nimi W przypadku kosze nia przy użyciu sierpowatych noży nie wolno się nigdy usta wiać przed otworem wyrzuto wym trawy Należy zawsze wyciągnąć wy łącznik prądu kluczyk startowy gdy oddalamy się od urządzenia przed zdjęciem blokad podczas kontroli urządzenia czyszczenia lub wykonywania innych prac na urządzeniu po kolizji z ciałem ...

Page 74: ...ona w silnik elektryczny dużej mocy wytrzymałą obudowę z tworzywa sztucznego wyłącz nik bezpieczeństwa zderzak oraz kosz na skoszoną trawę ze wskaźnikiem poziomu Dodatkowo urządzenie można przesta wiać na 5 różnych wysokości i jest ono wyposażone w lekkobieżne kółka Sposób działania części obsługi proszę zaczerpnąć z poniższych opisów Ilustracje sposobu obsługi i kon serwacji znajdziesz na stronie...

Page 75: ... urządzenie A 13 Jeżeli zostaną odkręcone dwie nakrętki motylkowe 2b to uchwyt pałąkowy można na potrzeby prze chowywania urządzenia złożyć w dół Zwrócić uwagę aby kabel 14 sieciowy nie został zakleszczony Montaż kosza na trawę D 1 Włożyć uchwyt 4a kosza na trawę 4 do uchwytów na wierzchniej stronie pokrywy Za trzasnąć go mocno 2 Nasuń plastikowe zaczepy na stelaż Uwaga Nie używaj urządzenia bez p...

Page 76: ...cić uwagę na to aby urządzenie nie dotykało do żadnych przed miotów H 5 W celu włączenia proszę na cisnąć przcisk odryglowujący 15 znajdujący się przy uchwy cie i jednocześnie przytrzymać dźwignię włączającą 16 Zwol nić przycisk odryglowujący 11 6 W celu wyłączenia urządzenia dźwignię włączającą należy zwolnić 16 Po wyłączeniu urządzenia nóż obraca się jeszcze przez parę sekund Proszę nie dotykać ...

Page 77: ...niejszej instrukcji przez upoważnioną przez nas placówkę serwisową Proszę stosować wyłącznie ory ginalne części zamienne W trakcie manipulowania nożem należy nosić rękawice Przed czyszczeniem lub wyko naniem wszelkich prac konser wacyjnych wyłączyć urządzenie wyciągnąć kluczyk zapłonu 12 i odczekać do zatrzymania się noża Niebezpieczeństwo dla osób Ogólne czyszczenie i prace konserwacyjne Nie spry...

Page 78: ...nie Przekaż wycięty materiał do kompo stowania nie wyrzucaj go do kontene ra na śmieci Wymiana noża Jeżeli nóż jest tępy to jego ostrzenie może wykonać warsztat specjalistyczny Jeżeli nóż jest uszkodzony lub wykazuje niewyważenie to należy go wymienić patrz rozdział Części zamienne 1 Proszę obrócić urządzenie 2 Używać odpornych rękawic ochronnych i przytrzymać nóż 18 Odkręcić śrubę noża 19 w kieru...

Page 79: ...o zależne od sposobu używania urządzenia Proszę spróbować maksymalnie ograniczyć narażenie na wibracje Przykładowymi sposobami zmniej szenia narażenia na wibracje jest noszenie rękawic w trakcie pracy z narzędziem i ograniczenie czasu pracy Należy przy tym uwzględnić wszystkie elementy cyklu eksplo atacji na przykład czas w którym elektronarzędzie jest wyłączone oraz czas w których jest ono wprawd...

Page 80: ...i zostaną bez płatnie usunięte przez dostarczenie zastępczego urządzenia bądź przez naprawę Warunkiem skorzystania ze świadcze nia gwarancyjnego jest przekazanie nierozmontowanego urządzenia wraz z dowodem zakupu i gwarancji nasze mu Centrum Serwisowemu Serwis naprawczy Naprawy nie objęte gwarancją można zlecać odpłatnie naszemu centrum serwisowemu Nasze Centrum Ser wisowe chętnie sporządzi koszto...

Page 81: ...ed nie kółka poprzez naciśnięcie na pałąk uchwytowy Silnik wyłącza się Blokada przez obce ciało Usunąć obce ciała Wynik koszenia nie jest zadawalający lub utrud niona praca silnika Wysokość koszenia jest za mała Ustawić mniejszą wysokość koszenia Nóż 18 jest tępy Zlecić naostrzenie noża lub go wymienić Komora noża jest zatkana Wyczyścić urządzenie Nóż 18 jest zamonto wany w nieprawidłowy sposób Za...

Page 82: ...troj vybaltej a zkontrolujte je li kom pletní Obalový materiál řádně zlikvidujte Sekačka na trávu a rukojeť 2 Spodní držadlo Sběrný koš Držáka kabelů Montážní materiál rukojeti Montážní materiál Sběrný koš Akumulátor Nabíječka Návod k obsluze Akumulátor Nabíječka Návod k obsluze Účel použití Přístroj je určen pouze pro sekání tráv níků a trávy v domácí oblasti Přístroj je určen pro použití domácím...

Page 83: ... škodám Příkazové značky namísto výkřič níku je vysvětlován příkaz s údaji pro prevenci škod Informační značky s informacemi pro lepší zacházení s nástrojem Bezpečnostní pokyny Tato část pojednává o základních bezpečnostních předpisech při práci s benzínovou sekačkou Obecné bezpečnostní pokyny Tento stroj může způsobit při neodborném užití vážná zra nění K zamezení poškození osob a věcí si bezpodm...

Page 84: ...u Opotřebované nebo poškoze né informační štítky je nutné vyměnit Práce s přístrojem Nohy a ruce nesmíte mít v blízkosti nebo pod rotujícími díly Hrozí nebezpečí pora nění Motor nastartujte podle poky nů a jen tehdy máte li nohy v dostatečné vzdálenosti od řez ných nástrojů Přístroj nepoužívejte v dešti při špatném počasí ve vlhkém prostředí nebo na mokré trávě Pracujte jen při denním světle či do...

Page 85: ...zpeč nostními zařízeními jako jsou usměrňovací zařízení a nebo zařízení k zachytávání trávy Přístroj nepřetěžujte Pracujte jen v uvedeném výkonovém rozsahu a neměňte nastavení regulátoru na motoru Pro těž ké práce nepoužívejte stroje se slabým výkonem Přístroj ne používejte k účelům pro které není určen Přístroj nepoužívejte v blízkosti hořlavých kapalin nebo plynů V opačném případě může dojít k p...

Page 86: ...držbě Měníte li řezací zařízení na vlékněte si ochranné rukavice Pravidelně kontrolujte sběrný koš na trávu zda není opo třebován nebo zdeformován Z bezpečnostních důvodů vy měňte opotřebované nebo po škozené části Při nastavování nožů obzvlášť opatrní abyste si nepřiskřípli prsty mezi rotující nože a pevné části sekačky Zkontrolujte zda jsou použity náhradní řezné nástroje schvá lené výrobcem Obe...

Page 87: ...ručiček nebo ji povolit proti směru hodinových ručiček Montáž rámové rukojeti 4 Upevněte rukojeť 1 pomocí přiložených šroubů 2a a křídla tých matic 2b na spodní části držadla 3 Jsou možné dvě polohy Uchycení kabelových držáků sponami 5 Kabelové držáky A 14 spona mi uchyťte ke spodnímu držadlu 3 a zafixujte jimi přístrojový kabel A 13 Po uvolnění obou křídlových matic 2b můžete držadlo zařízení skl...

Page 88: ...ýt zvolena vysoká výška sekání Dbejte na odpovídající akustickou ochranu a místní předpisy Zapnutí a vypnutí G 1 Postavte sekačku na rovný pod klad 2 Zdvihněte průhledný kryt 10 na krytu zařízení a zasuňte na bitý akumulátor 11 po vodicí liště do zařízení Slyšitelně za klapne 3 Zasuňte kontaktní klíč 12 do připraveného otvoru 4 Před zapnutím dbejte aby se přístroj nedotýkal žádných před mětů H 5 K...

Page 89: ...něte kontaktní klíč 12 a vyčkejte než se nůž zastaví Hrozí nebezpečí zranění osob Čištění a obecná údržba Neostřikujte tento nástroj vodou a nečistěte ho pod tekoucí vo dou Existuje nebezpečí elektric kého úderu Udržujte přístroj stále v čistotě K čištění použijte kartáček nebo hadřík ale žádné agresivní čisticí prostředky nebo rozpouštědla Po sekání odstraňte kusem dřívka nebo plastu přichycené z...

Page 90: ...dujte s vybitým akumulátorem Přístroj ani akumulátor neotevírejte Přístroj likvidujte podle místních před pisů Přístroj odevzdejte ve sběrném středisku které zajistí jeho ekologic kou recyklaci Zeptejte se ohledně tohoto svého místního likvidátora odpadů anebo v našem servisním středisku Posekaný materiál uložte na kompost neodhazujte jej do popelnice Likvidaci vašich zaslaných poškoze ných přístr...

Page 91: ...zasla né přístroje nebudou přijaty Likvidaci vašich zaslaných poškozených přístrojů provádíme bezplatně uvedené hodnoty v závislosti na způsobu kterým je elektrický pří stroj používán Je zde nutné aby byla stanovena bezpečnostní opatření k ochraně uživatele která by se opírala o od had vystavení emisím během sku tečných provozních podmínek při tom musí být zohledněny všechny části provozního cyklu...

Page 92: ...dlouhá Nastavte větší výšku řezu Stlačením rámové rukojeti lehce nadzvedněte přední kolečka Motor vypadává Zablokování cizím tělesem Odstraňte cizí těleso Výsledek práce není uspokojivý nebo motor těžce pracuje Příliš nízká výška řezu Nastavte menší výšku řezu Nůž 18 tupý Nože lze brousit nebo vyměnit Oblast nože ucpaná čistící stroje Nůž 18 špatně namon tován Nůž správně namontujte Nůž se netočí ...

Page 93: ...ija Pristatomas komplektas Prietaisą atsargiai išimkite iš pakuotės ir patikrinkite ar yra visos toliau nurodytos dalys Vejapjovė ir lenkta rankena 2 Apatinis lankas Žolės surinkimo dėžė Kabelio apkabos Lenktos rankenos montavimo medžiaga Surinkimo dėžės montavimo medžiaga Akumuliatorius Kroviklis Eksploatavimo instrukcijoje Akumulia torius Kroviklis Eksploatavimo instrukcijoje Účel použití Šis pr...

Page 94: ...rukcijoje pateikiami saugos nuro dymai Pavojaus ženklas su duomeni mis kaip išvengti žalos žmo nėms ir materialiniam turtui Privalomasis ženklas vietoje žen klo su šauktuku pateiktas reikalavi mas su duomenimis kaip išvengti žalos materialiniam turtui Informacinis ženklas kuriame pa teikiama informacijos kaip geriau naudoti prietaisą Saugos nurodymai Šiame skyriuje pateikiami pagrin diniai saugos ...

Page 95: ... pristaty tas ir rekomenduojamas atsar gines dalis ir kitus priedus Jei naudosite kitų gamintojų dalis neteksite teisės prašyti garanti jos suteikimo Nešioti ar sugadinti ženklai turi būti pakeisti Darbas su įrenginiu Dirbdami kojas ir rankas laikykite atokiai nuo besisu kančių dalių ir nelaikykite po jomis Galite susižeisti Įjunkite variklį pagal instrukciją ir tai atlikite tik tada kai Jūsų kojo...

Page 96: ...ba ekranai yra pažeisti jei nėra saugos įrenginių pavyzdžiui nukreipimo ir arba žolės surin kimo mechanizmo Prietaiso apkrova negali būti per didelė Dirbkite tik nurody tame galios diapazone ir ne keiskite variklio reguliatoriaus nustatymų Sunkiems darbams nenaudokite mažos galios įren ginių Prietaiso nenaudokite ki tiems tikslams nei jis pritaikytas Nenaudokite prietaiso netoli užsiliepsnojančių ...

Page 97: ...echninės priežiūros potvarkius Keisdami pjovimo įtaisą dėvėki te apsaugines pirštines Reguliariai tikrinkite ar žolės surinkimo įtaisas nenusidėvė jo ar nedeformuotas Saugos sumetimais pakeiskite susidė vėjusias arba pažeistas dalis Nustatydami peilius būkite labai atsargūs kad besisukantys peiliai ir pritvirtintos mašinos dalys neprispaustų Jūsų pirštų Patikrinkite kad būtų naudo jami tik atsargi...

Page 98: ...eikia prisukti pagal laikrodžio rodyklę arba atlaisvinti sukant prieš laikrodžio rodyklę Lenktos rankenos montavimas 4 Apatinę lenktą rankeną 1 pri dedamais varžtais 2a ir spar nuotąja veržle 2b pritvirtinkite prie apatinio lanko 3 Galima nustatyti vieną iš dviejų padėčių Kabelio laikiklio užlenkimas 5 Užlenkite kabelio laikiklį A 14 esantį ant apatinio lanko 3 ir juo užfiksuokite prietaiso kabelį...

Page 99: ...kštį Dekoratyvinei vejai pjauti nustatykite maž daug 25 45 mm pjovimo aukšti o vaikš čiojamajai vejai maždaug 45 65 mm Kai sezono pradžioje pjaunate pirmą kartą nustatykite didesnį pjovimo aukštį Atkreipkite dėmesį į apsaugą nuo triukšmo ir vietoje galiojančius po tvarkius Įjungimas ir išjungimas G 1 Pastatykite vejapjovę lygioje vietoje 2 Kilstelėkite permatomą prietaiso korpuso uždangalą 10 ir s...

Page 100: ...techninė priežiūra laikymas Išjungus prietaisą peiliai kelias sekundes dar sukasi Nelieskite besisukančio peilio Kyla pavo jus sužeisti žmones Valymas techninė priežiūra laikymas Šioje instrukcijoje nenurodytus darbus paveskite atlikti vieno iš mūsų įgaliotojo techninės priežiūros centro darbuotojams Naudokite tik originalias dalis Dirbdami su peiliu užsidėkite piršti nes Prieš atlikdami techninės...

Page 101: ...ei jie buvo netin kamai suremontuoti arba buvo naudoja mas ne originalios dalys ir prietaisas buvo naudojamas ne pagal paskirtį Utilizavimas aplinkos apsauga Išimkite akumuliatorių iš prietaiso ir prie taisą akumuliatorių priedus ir pakuotę perduokite aplinką tausojančiai utilizavimo įstaigai Elektros prietaisų negalima išmesti kartu su buitinėmis atliekomis Prietaiso su įmontuotu akumulia toriumi...

Page 102: ...es neužtikriname kad atitiks visi šioje eksploatavimo instrukcijoje pateikti matmenys nurodymai ir duomenys Dėl to mes nepriimame teisinių pretenzijų dėl eksploatavimo instrukcijoje pateikiamų duomenų Jei neturite interneto kreipkitės telefonu į aptarnavimo centrą žr Grizzly Servi ce Center Techniniai duomenys Akumuliatorinės vejapjovė ARM 2433 21 Variklio įtampa 24 V 3 0 Ah Sūkių skaičius esant t...

Page 103: ...is suremontuojamas Būtina sąlyga prietaisas prekybininkui pristatomas neišardytas su pirkimo čekiu ir garantijos patvirtinimu Remonto tarnyba Remonto darbus kuriems nesutei kiama garantija už tam tikrą atlygį galite pavesti atlikti mūsų techninės priežiūros centro darbuotojams Mūsų techninės priežiūros centro darbuoto jai Jums mielai pateiks darbų sąmatą Mes galime remontuoti tik tuos prie taisus ...

Page 104: ...Spausdami rankenos lanką truputį kilstelėkite prieki nius ratukus Variklis išsijungia Blokuoja svetimkūnis Išimkite svetimkūnį Netinka darbo rezulta tas arba variklis veikia sunkiai Per mažas pjovimo aukštis Nustatykite mažesnį pjovimo aukštį Atbuko peilis 18 Pagaląskite arba pakeiskite peilį Užsikišo peilio sritis Nuvalykite prietaisą Netinkamai sumontuotas peilis 18 Tinkamai įmontuokite peilį Pe...

Page 105: ...EN 60335 1 2012 A11 2014 EN 60335 2 77 2010 EN 62233 2008 Zusätzlich wird entsprechend der Geräuschemissionsrichtlinie 2000 14 EG bestätigt Schallleistungspegel Garantiert 91 dB A Gemessen 89 1 dB A Angewendetes Konformitätsbewertungsverfahren entsprechend Anhang VI 2000 14 EG Die alleinige Verantwortung für die Ausstellung dieser Konformitätserklärung trägt der Hersteller Grizzly Tools GmbH Co KG...

Page 106: ... EN 60335 1 2012 A11 2014 EN 60335 2 77 2010 EN 62233 2008 The following are also confirmed as complying with Noise Emissions Directive 2000 14 Guaranteed sound power level 91 dB A Measured sound power level 89 1 dB A The conformity evaluation procedure employed is compliant with appendix VI of 2000 14 CE This declaration of conformity is issued under the sole responsibility of the manufacturer Gr...

Page 107: ...0335 2 77 2010 EN 62233 2008 Bovendien wordt in overeenstemming met de geluidsemissierichtlijn 2000 14 EC bevestigd akoestisch niveau Gegarandeerd 91 dB A Gemeten 89 1 dB A Toegepaste conformiteitbeoordelingsprocedure in overeenstemming met Annex VI 2000 14 EC De exclusieve verantwoordelijkheid voor de uitgifte van deze conformiteitsverklaring wordt gedragen door de fabrikant Grizzly Tools GmbH Co...

Page 108: ... 2014 EN 60335 2 77 2010 EN 62233 2008 De plus conformément à la directive sur les émissions de bruit 2000 14 EC nous confirmons Niveau de puissance sonore garanti 91 dB A mesuré 89 1 dB A Procédé utilisé pour l évaluation de la conformité en fonction de l annexe VI 2000 14 EC Le fabricant assume seul la responsabilité d établir la présente déclaration de conformité Grizzly Tools GmbH Co KG Stocks...

Page 109: ...2321 2009 EN 60335 1 2012 A11 2014 EN 60335 2 77 2010 EN 62233 2008 Si dichiara inoltre in conformità alla direttiva 2000 14 EC sull emissione acustica ambien tale Livello di potenza sonora garantita 91 dB A misurata 89 1 dB A Procedura della valutazione della conformità applicata come da allegato VI 2000 14 EC Il produttore è il solo responsabile della stesura della presente dichiarazione di conf...

Page 110: ...A2 2011 EN 55014 2 2015 EN 62321 2009 EN 60335 1 2012 A11 2014 EN 60335 2 77 2010 EN 62233 2008 Ponadto potwierdzono zgodnie z dyrektywą w sprawie emisji hałasu 2000 14 poziom mocy akustycznej gwarantowany 91 dB A zmierzony 89 1 dB A Zastosowana procedura oceny zgodności odpowiada załącznikowi VI 2000 14 EC Wyłączną odpowiedzialność za wystawienie tej deklaracji zgodności ponosi producent Grizzly ...

Page 111: ... A2 2011 EN 55014 2 2015 EN 62321 2009 EN 60335 1 2012 A11 2014 EN 60335 2 77 2010 EN 62233 2008 Navíc se na základě směrnice pro emise hluků 2000 14 EC potvrzuje Zaručená úroveň akustického výkonu 91 dB A Měřená 89 1 dB A Použitý způsob postupu pro ohodnocení konformity dle dodatku VI 2000 14 EC Výhradní odpovědnost za vystavení tohoto prohlášení o shodě nese výrobce Grizzly Tools GmbH Co KG Stoc...

Page 112: ...112 ...

Page 113: ...12 A11 2014 EN 60335 2 77 2010 EN 62233 2008 Remiantis 2000 14 EB dėl valstybių narių įstatymų reglamentuojančių lauko sąlygomis naudojamos įrangos į aplinką skleidžiamą triukšmą suderinimo papildomai patvirtinama Garso galingumo lygis Numatyta 91 dB A Išmatuota 89 1 dB A Taikytas atitinkamas 2000 14 EB priede nurodytas atitikties įvertinimo metodas Tiktai gamintojas yra atsakingas už šio atitikti...

Page 114: ...114 20181015_rev00_mt ...

Page 115: ...mail itsw planet nl SAV03 ZA de la verrerie 03210 Souvigny Tel 04 70 48 13 20 Fax 09 72 43 63 96 e mail contact sav03 fr Homepage www sav03 fr Boutique en ligne www sav03 fr boutique NL FR DE GB ITSw bv BE Tel 03 54 13760 Fax 03 54 15651 e mail forteam esther skynet be Garden Italia SPA Via Zaccarini 8 29010 San Nicolò a Trebbia PC Tel 0523 764811 Fax 0523 768689 e mail info gardenitalia it Krysia...

Page 116: ......

Reviews: