G0641 Double Miter Saw
-35-
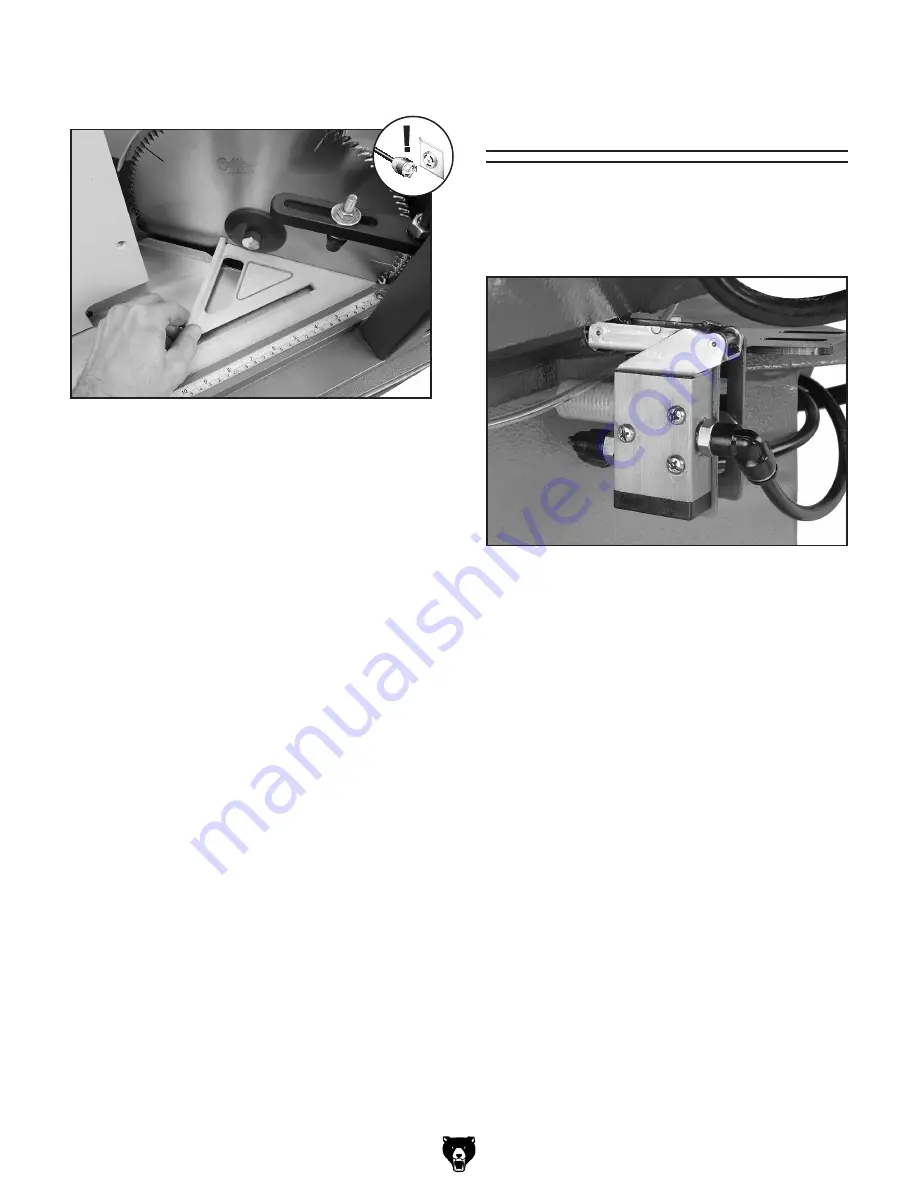
Figure 47.
Using a 45° square to align blade.
7.
Loosen the aligning bolt on one side and
tighten the one on the other to move the
angle of the blade so that it is precisely 45°
to the fence.
8.
Lift your foot from the pedal actuator to raise
the blades, then re-tighten the aligning jam
nuts and both motor mounting bolts to secure
the setting.
9.
Repeat
Steps 3–8
for the opposite pivot arm
assembly if necessary.
10.
Reinstall the inner blade guard and secure
the front guard in the down position.
11.
Make a cut to confirm that the blades cut a
45° angle. Repeat the steps above if neces-
sary.
Pneumatic Limit
Switch
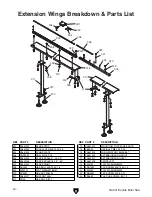
The pneumatic limit switch (see
Figure 48
) is
activated when the blades and pivot arms raise to
their uppermost position. This switch then raises
the hold-downs and releases the workpiece.
Figure 48.
Pneumatic limit switch (right rear of
machine).
Generally this switch does not need service or
adjustment. However, if necessary to adjust its
position on the bracket, make sure that the hold-
downs raise up only after the blades have reached
their uppermost position.
6.
Place a 45° square against the fence and the
blade, as shown in
Figure 47
.
limit switch
Summary of Contents for G0641
Page 2: ......
Page 5: ...G0641 Double Miter Saw 3 Machine Data Sheet machine data sheet...
Page 7: ...G0641 Double Miter Saw 5 Safety Instructions for Machinery...
Page 8: ...6 G0641 Double Miter Saw...
Page 41: ...G0641 Double Miter Saw 39 SECTION 8 PARTS Cabinet Breakdown...
Page 43: ...G0641 Double Miter Saw 41 Drive System Breakdown table inserts...
Page 47: ...G0641 Double Miter Saw 45 Electrical Lubrication Systems Breakdown...
Page 49: ...G0641 Double Miter Saw 47 Pneumatic System Breakdown pneumatic system breakdown...
Page 52: ...50 G0641 Double Miter Saw...
Page 53: ......
Page 54: ......
Page 55: ...WARRANTY AND RETURNS WARRANTY AND RETURNS...
Page 56: ......


