Model G0678 (Mfd. Since 06/15)
-23-
Loading/Unloading
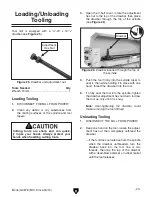
Tooling
Your mill is equipped with a
7
⁄
16
"-20 x 12
3
⁄
8
"
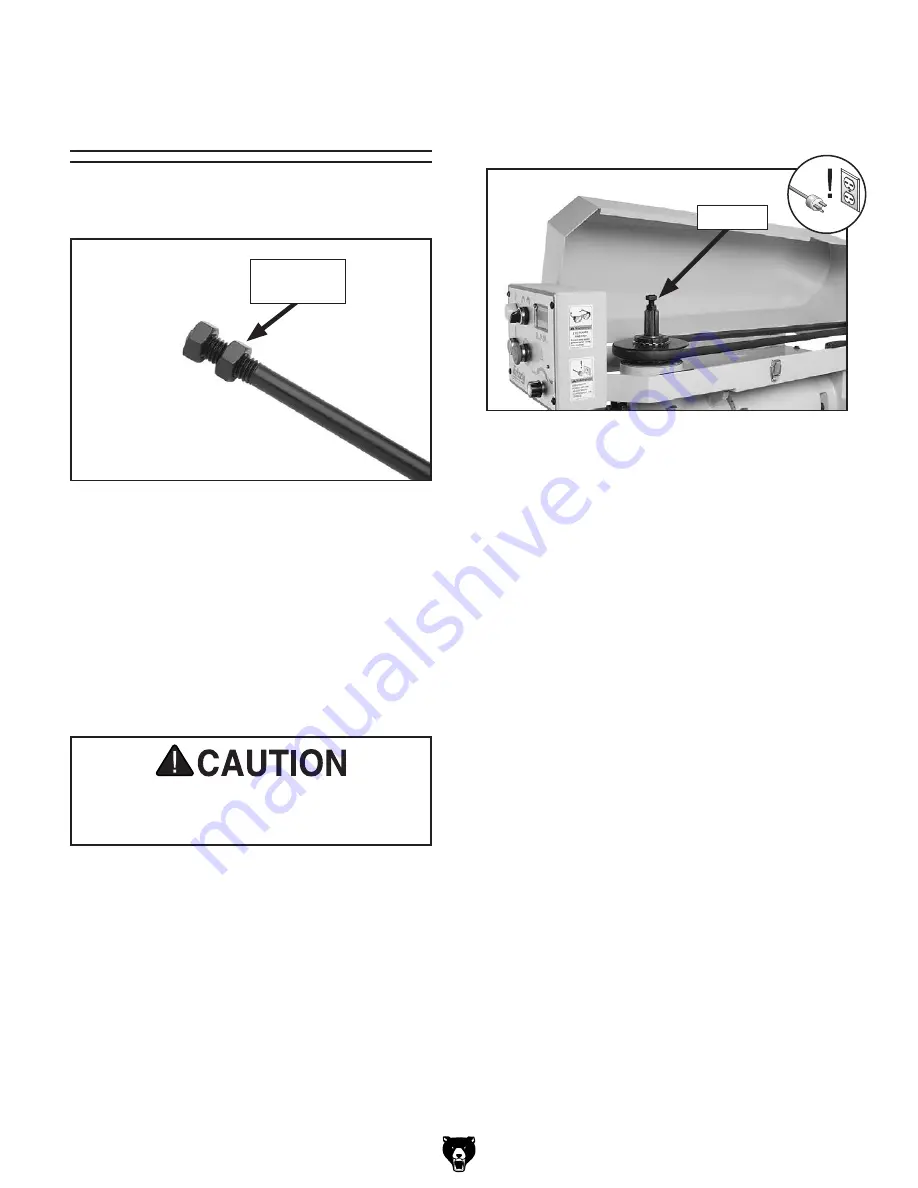
drawbar (see
Figure 25).
Tools Needed
Qty
Wrench 19mm ................................................... 1
Loading Tooling
1. DISCONNECT THE MILL FROM POWER!
2. Clean any debris or oily substances from
the mating surfaces of the spindle and tool
tapers.
3. Open the V-belt cover, rotate the adjustment
hex nut to the top of the drawbar, then place
the drawbar through the top of the spindle
(see
Figure 26).
Cutting tools are sharp and can quick-
ly injure your hands. Always protect your
hands when handling cutting tools.
Figure 26. Drawbar inserted through the top of
the spindle.
Drawbar
4. Push the tool firmly into the spindle taper to
seat it, then while holding it in place with one
hand, thread the drawbar into the tool.
5. To fully seat the tool into the spindle, tighten
the drawbar adjustment hex nut down to draw
the tool up only until it is snug.
Note: Over-tightening the drawbar could
make removing the tool difficult.
Unloading Tooling
1. DISCONNECT THE MILL FROM POWER!
2. Keep one hand on the tool, loosen the adjust-
ment hex nut, then completely unthread the
drawbar.
— If the tool does not release from the spindle
when the drawbar unthreaded, turn the
drawbar back into the tool one or two
threads, then tap the top of the drawbar
with a dead-blow hammer or rubber mallet
until the tool releases.
Figure 25. Drawbar and adjustment nut.
Adjustment
Hex Nut

