-78-
Model G0699 (Mfd. Since 5/15)
Rip Fence
Adjustments
There are three adjustments that affect the accu-
racy and operation of the rip fence: 1) Height
above the table, 2) parallelism to the blade, and
3) rip fence scale position. If your cuts are not
square when using the rip fence, check these
adjustments.
Height Above Table
The rip fence and body should ride as close to the
table surface as possible without touching it and
with an even gap along the length. This is accom-
plished by adjusting the rip fence rail and the roller
at the end of the fence body.
Tools Needed
Qty
Hex Wrench 2.5mm ........................................... 1
Wrench 17mm.................................................... 1
Wrench 19mm ................................................... 1
To adjust rip fence height above the table:
1. Observe the gap between the fence body and
the table along the entire length.
— If the near end of the fence body is too low,
loosen the hex nuts that secure the rail,
raise the rail until the fence body gap is
even, then re-tighten the rail hex nuts.
— If the far end of the fence body is too low,
pull the body up from the table to access
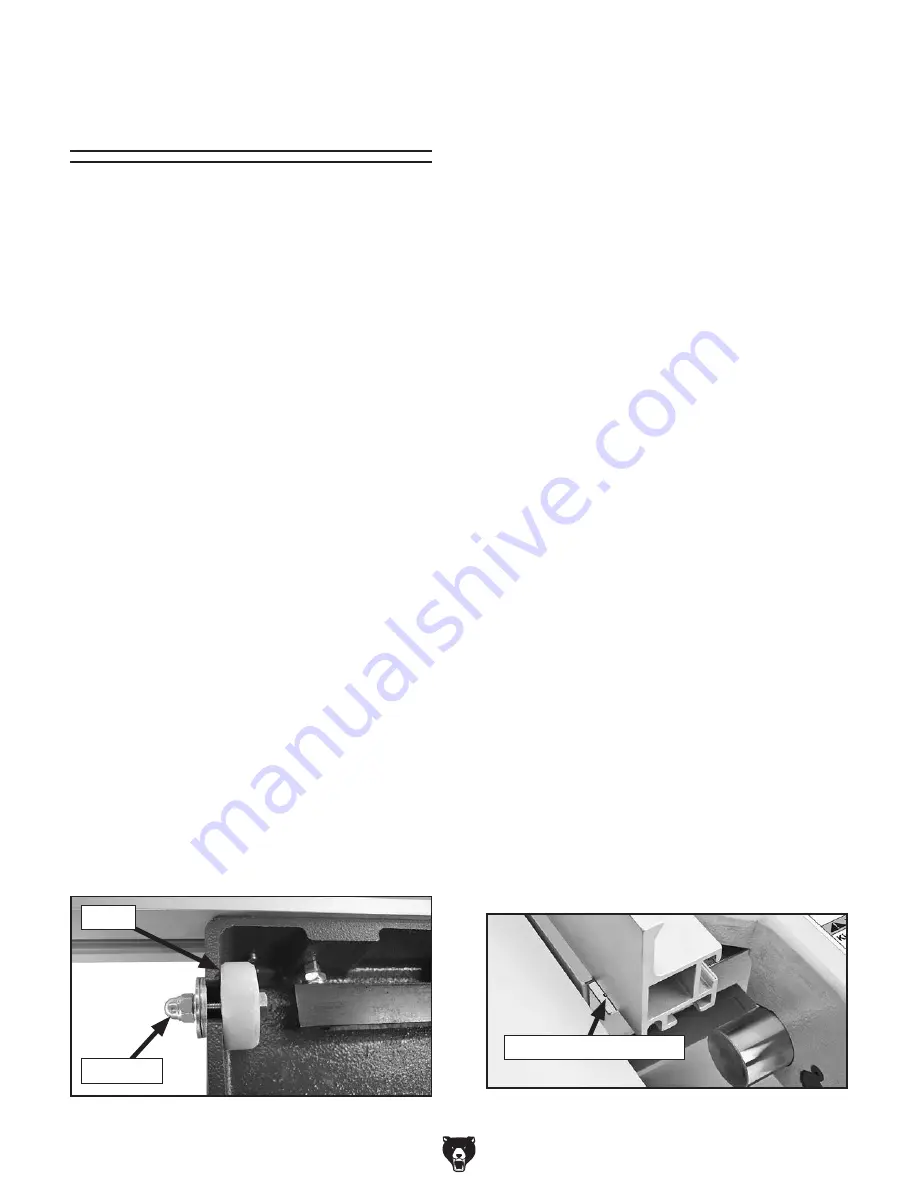
wheel underneath. Loosen acorn nut (see
Figure 148), adjust wheel position, retight-
en acorn nut, and place rip fence base
back on table.
Parallelism To Blade
Tool Needed
Qty
Wrench 19mm ................................................... 1
To adjust the rip fence parallel to the main
blade:
1. DISCONNECT SAW FROM POWER!
2. Raise the main blade all the way up and bring
the tilt to 0°.
3. Slide the rip fence against the main blade
and check if it touches both ends of the blade
evenly.
— If the rip fence does not touch both ends of
the blade evenly, loosen the rail hex nuts
and adjust one end in or out until the rip
fence is parallel with the blade, then re-
tighten the hex nuts.
Calibrating Rip Fence Scale
Tool Needed
Qty
Phillips Screwdriver #2 ...................................... 1
To calibrate the rip fence scale:
1. DISCONNECT SAW FROM POWER!
2. Make sure the rip fence is parallel to the main
blade, then move it against the blade so that
it just touches the teeth.
3. Observe the reading on the scale underneath
the rip fence (see
Figure 149).
— If the scale reading is not zero, loosen the
screws that secure it to the table, adjust it
so that it does read zero, then re-tighten
the screws to secure the setting.
Figure 149. Rip fence scale zero mark.
Fence Scale Zero Mark
Figure 148. Rip fence body roller controls.
Acorn Nut
Wheel
Summary of Contents for G0699
Page 21: ...Model G0699 Mfd Since 5 15 19 5mm Hardware Recognition Chart...
Page 108: ......

