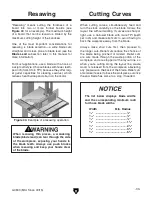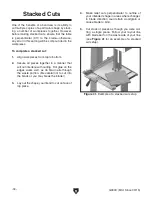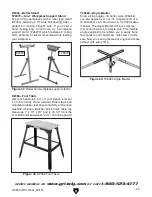
-22-
G0803
(Mfd. Since 09/15)
3. Position support bearing approximately 0.016"
away from the back of the blade, as illustrated
in
Figure 23. This can be measured with a
feeler gauge or a dollar bill.
0.016''
Figure 23. Bearing positioned 0.016" away from
back of blade.
Adjusting Blade
Support Bearings
The support bearings are positioned behind the
blade near the blade guides and prevent the blade
from pushing backward during cutting operations.
Proper adjustment of the support bearings helps
you make accurate cuts and prevents the blade
teeth from coming in contact with the blade guides
while cutting. If this happens the blade "tooth
set" can be ruined, which will greatly reduce the
blade's ability to make good cuts.
There are support bearings on the upper and
lower blade guide assemblies. Both adjust in the
same manner. The following instructions refer to
the upper support bearings. To access the lower
support bearing, you must open the lower wheel
cover (see
Page 3 for reference).
Important: To ensure best results while cutting,
make sure the blade is tracking and tensioned
correctly before performing this procedure.
Tip:
To quickly measure this setting, fold
a crisp dollar bill in half twice (when folded
tightly, four thicknesses of a dollar bill is
approximately 0.016"). Place the folded dol-
lar bill between the support bearing and the
blade, as shown in
Figure 24.
4. Tighten adjustment cap screw to lock support
bearing in place.
Note: When securing adjustment of lower
support bearing, make sure it is parallel to
blade.
Figure 24. Dollar bill folded twice to make a
quick 0.016" gauge.
Tool Needed
Qty
Hex Wrench 4mm .............................................. 1
Feeler Gauge 0.016" (or Dollar Bill) ................... 1
To adjust support bearings:
1. DISCONNECT MACHINE FROM POWER!
2. Open blade cover and loosen support bear-
ing adjustment screw (see
Figure 22).
Figure 22. Upper support bearing assembly and
controls.
Support Bearing
Support Bearing
Adjustment Screw
Blade
Cover
Summary of Contents for G0803
Page 56: ...54 G0803 Mfd Since 09 15...
Page 60: ......


