-42-
Model G0815 (Mfd. Since 09/18)
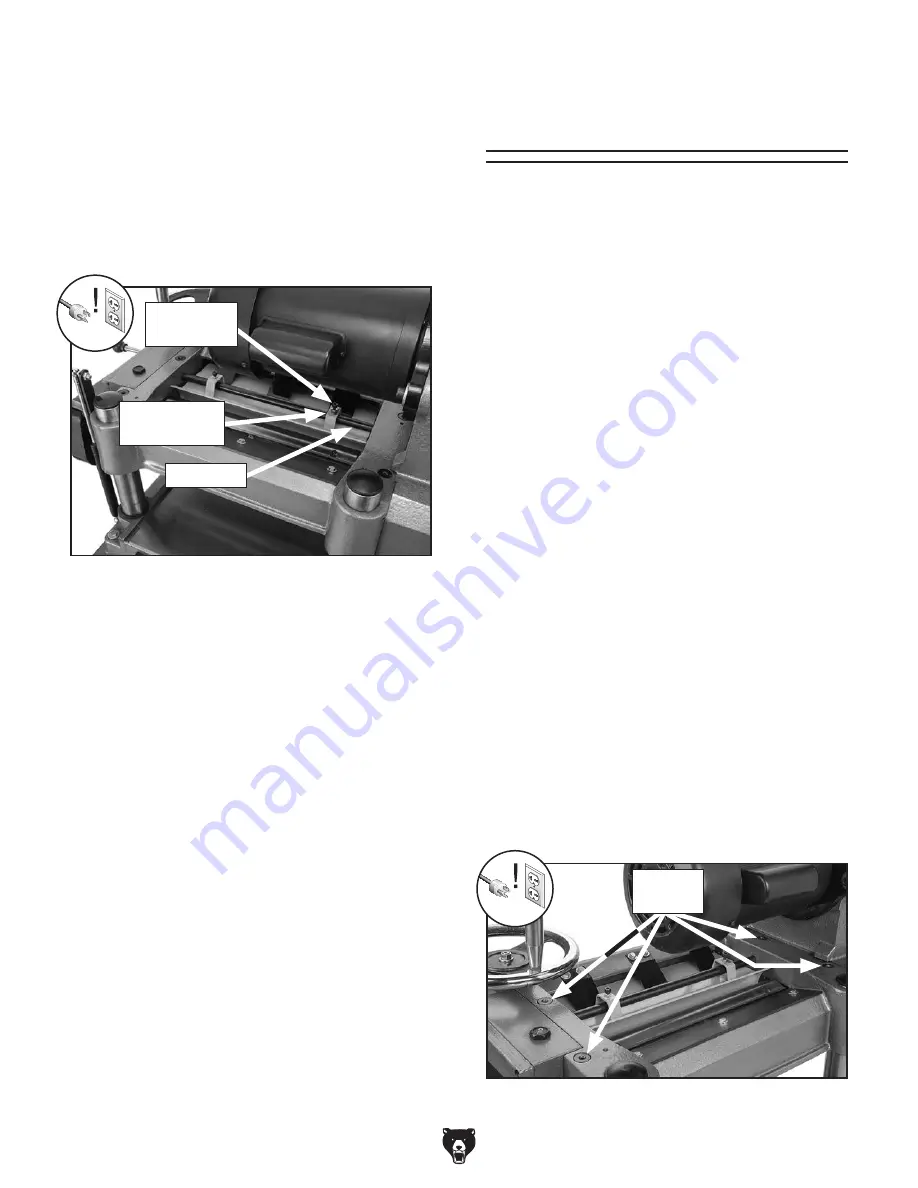
12. Repeat Steps 10–11 with outfeed roller, only
adjust the gaps to 0.020".
13. Loosen jam nuts and cap screws on each
side of chip breaker (see
Figure 57).
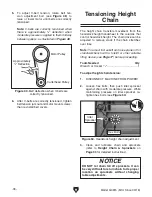
14. Using a feeler gauge, adjust cap screw so
it is 0.040" from cross bar (see
Figure 57),
then tighten jam nut. Repeat on other side of
chip breaker.
Adjusting Roller
Spring Tension
The infeed and outfeed rollers keep the workpiece
moving through the planer. There are springs that
exert downward pressure on the rollers while still
allowing them to raise with an uneven workpiece
surface. Proper roller spring tension is crucial to
keep the workpiece moving through the planer
during operation.
Roller spring tension will vary depending upon the
type of wood you are planing. When adjusting the
roller spring tension keep the following in mind:
•
If you are planing milled lumber with a rela-
tively consistent surface, use less spring ten-
sion.
•
If you are planing rough lumber with incon-
sistent surfaces, use greater spring tension
to keep the stock moving through the planer.
•
If the workpiece consistently stops feeding
during operation, the roller spring tension
may need to be increased.
Tools Needed
Qty
Hex Wrench 6mm .............................................. 1
To adjust roller spring tension:
1. DISCONNECT MACHINE FROM POWER!
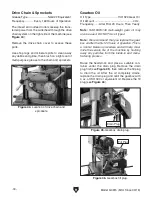
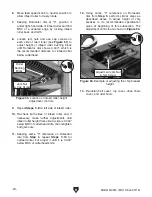
2. Rotate tension screws clockwise to increase
tension, and counterclockwise to decrease
tension (see
Figure 58).
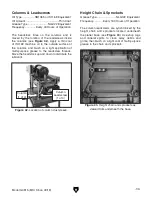
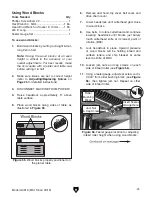
Figure 57. Feeler gauge location for adjusting
chip breaker height when using wood blocks.
Insert Feeler
Gauge Here
Cross Bar
15. Re-install belt cover, top cover, drive chain
cover, and dust hood.
Cap Screw
& Jam Nut
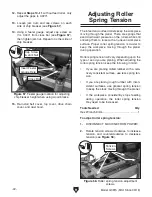
Figure 58. Roller spring tension adjustment
screws.
Tension
Screws
Summary of Contents for G0815
Page 56: ......

