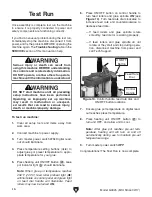
-18-
Model G0825 (Mfd. Since 02/17)
Material Inspection
& Edgebander
Preparation
Some workpieces may not be suitable for edge-
banding operations. Before edgebanding, con-
sider the following:
•
Material Type: This machine is intended for
edgebanding natural and man-made wood
products, laminate-covered wood products,
and some plastics.
•
Workplace Humidity & Temperature:
Always store workpiece materials and edge-
banding at room temperature to ensure maxi-
mum adhesion. Avoid edgebanding in highly
humid environments, as this may affect glue
adhesion.
•
Glue Storage: Store glue pot adhesives in a
cool, dry place.
•
Glue Adjustment Knob: DO NOT rotate
glue adjustment knob while heating unit is off,
or when glue pot temperature is below 250°F
(120°C). Glue adheres to glue pot internal
components when cool. Turning adjustment
dial when glue pot is cool may break internal
components.
•
Workpiece Radius: The minimum inner radi-
us of workpiece for banding operation is 1".
Edgebanding thickness may affect minimum
radius capabilities.
•
Test Piece: We highly recommend testing
edgebanding setup (edgebanding settings,
glue adjustment setting, and material type)
on a test workpiece similar to the final product
to ensure proper adhesion and finish.
Checking/Adding
Glue
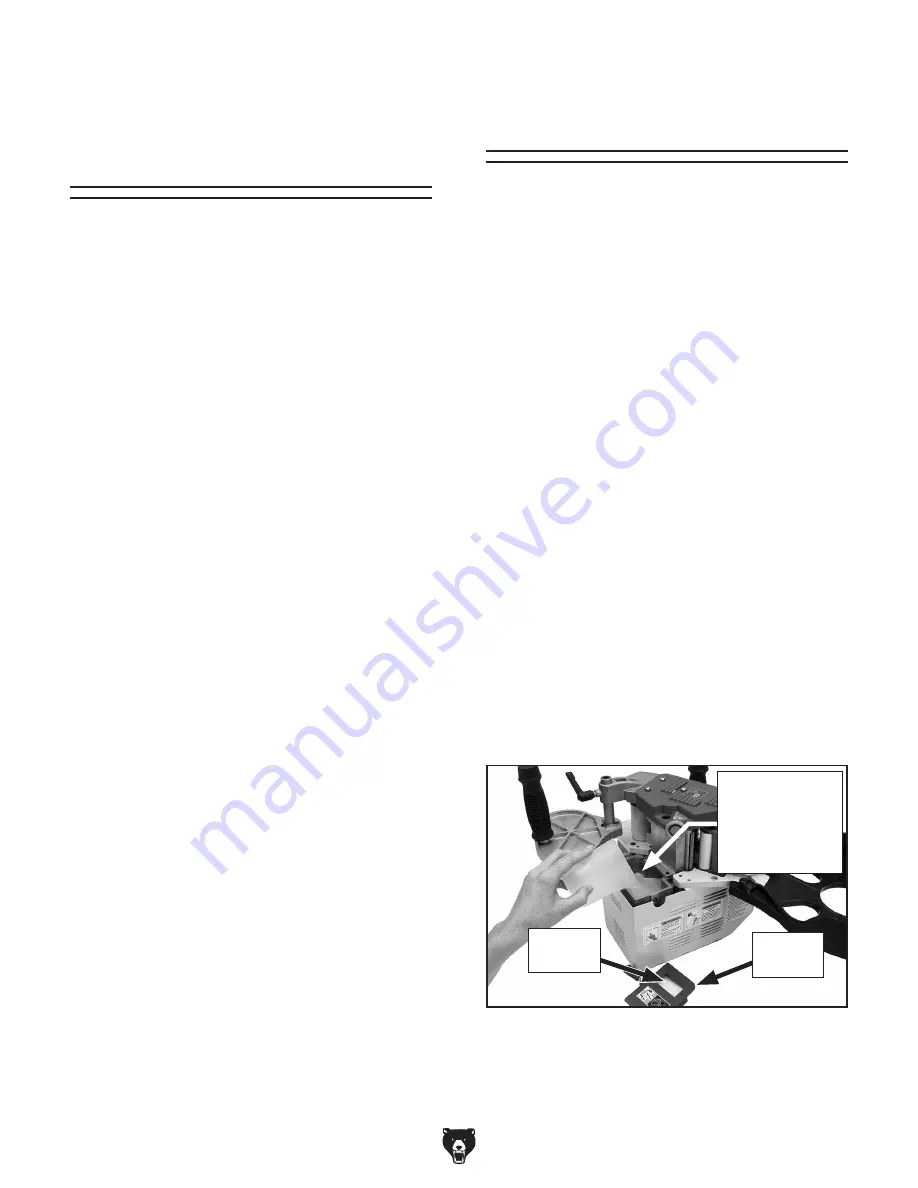
Always check the glue level and, if necessary, add
glue pellets before operations. The glue pot is full
when the glue level is within
3
⁄
8
" (10mm) of the top
of the pot. Avoid leaving glue pot lid off when not
adding glue, as this can cause dust or other mate-
rial to contaminate glue pot.
IMPORTANT: Glue pot lid is very hot! Allow glue
pot to fully cool before adding glue.
Items Needed
Qty
Glue Pellets ....................................... As Needed
Gloves ........................................................1 Pair
To check/add glue:
1. DISCONNECT MACHINE FROM POWER!
2. Check glue depth by looking through viewing
window on top of glue pot.
— If glue is within
3
⁄
8
" (10mm) of top of glue
pot, glue pot is full. Do not add more.
— If glue is more than
3
⁄
8
" (10mm) below top
of glue pot, proceed to
Step 3.
3. Unscrew and remove glue pot lid (see
Figure 11).
4. Carefully add glue pellets until they are within
3
⁄
8
" (10mm) of top of glue pot, then re-install
and secure glue pot lid.
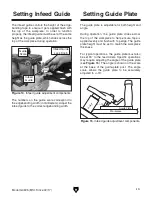
Figure 11. Checking glue level in glue pot.
Glue Pot is Full
When Glue
Reaches
3
⁄
8
"
Below Top of
Glue Pot
Glue
Pot Lid
Viewing
Window
Summary of Contents for G0825
Page 44: ......

