

Model G0843P (Mfd. Since 11/17)
-13-
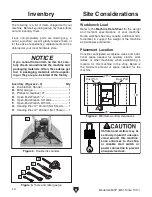
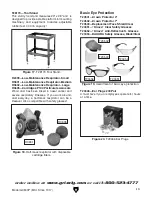
Bench Mounting
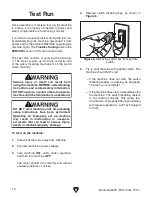
Figure 6. "Direct Mount" setup.
Machine Base
Workbench
Lag Screw
Flat Washer
Another option is a "direct mount" (see example
below) where the machine is secured directly to
the workbench with lag screws and washers.
The base of this machine has mounting holes
that allow it to be fastened to a workbench or
other mounting surface to prevent it from moving
during operation and causing accidental injury or
damage.
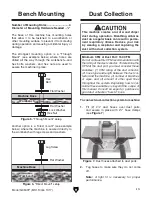
The strongest mounting option is a "Through
Mount" (see example below) where holes are
drilled all the way through the workbench—and
hex bolts, washers, and hex nuts are used to
secure the machine in place.
Machine Base
Workbench
Hex
Bolt
Flat Washer
Flat Washer
Lock Washer
Hex Nut
Figure 5. "Through Mount" setup.
Number of Mounting Holes ............................ 4
Diameter of Mounting Hardware Needed ..
1
⁄
2
"
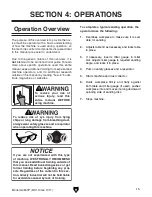
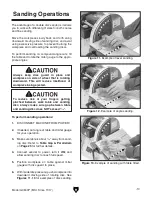
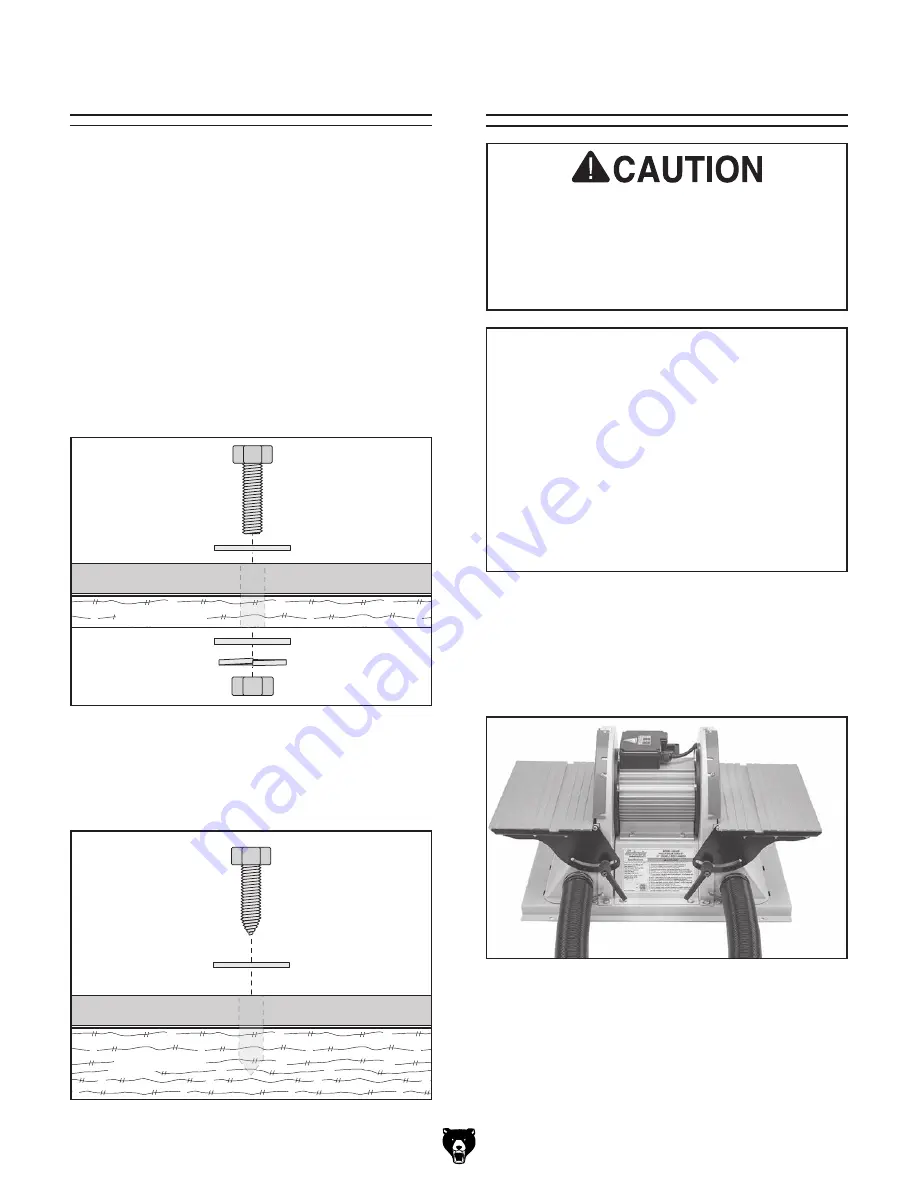
Figure 7. Dust hoses attached to dust ports.
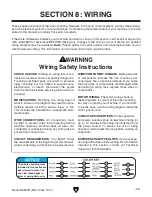
Dust Collection
To connect dust-collection system to machine:
1. Fit (2) 2
1
⁄
2
" dust hoses over dust ports,
and secure in place with 2
1
⁄
2
" hose clamps
(see
Figure 7).
Minimum CFM at Dust Port: 150 CFM
Do not confuse this CFM recommendation with
the rating of the dust collector. To determine the
CFM at the dust port, you must consider these
variables: (1) CFM rating of the dust collector,
(2) hose type and length between the dust col-
lector and the machine, (3) number of branches
or wyes, and (4) amount of other open lines
throughout the system. Explaining how to cal-
culate these variables is beyond the scope of
this manual. Consult an expert or purchase a
good dust collection "how-to" book.
This machine creates a lot of wood chips/
dust during operation. Breathing airborne
dust on a regular basis can result in perma-
nent respiratory illness. Reduce your risk
by wearing a respirator and capturing the
dust with a dust collection system.
2. Tug hoses to make sure they do not come
off.
Note: A tight fit is necessary for proper
performance.


