Model G0899 (Mfd. Since 10/20)
-25-
21. Slide fence up against right-hand edge of
miter slot, and lock it in place. Examine how
fence lines up with miter slot.
Note: It is permissible for back of fence to
pivot outward not more than
1
⁄
64
" from being
parallel with miter slot. This creates a slightly
larger opening between fence and blade, at
rear of blade, to reduce risk of workpiece
binding or burning as it is fed through cut.
Many woodworkers intentionally set up their
fence in this manner. Keep this in mind
before adjusting your fence. For more details,
see
Figure 129 on Page 73.
Figure 29. Checking fence parallelism with
blade.
Fence is
Parallel to
Miter Slot,
which is
Parallel to
Blade
Miter Slot
Blade
Fence
— If fence is still parallel with miter slot, pro-
ceed to
Step 22.
— If fence is not parallel with miter slot, then
you MUST adjust fence, as described in
Fence Adjustments on Page 71, so that
it is parallel.
—If miter slot is not parallel with blade, you
must follow procedures described in
Miter
Slot to Blade Parallelism on Page 67.
22. Carefully slide fence so it barely touches saw
blade and lock it in place.
23. Lightly mark "0" location on fence tube (under
indicator line on pointer window) with a pen-
cil, then remove fence.
20. Adjust foot at rear of fence so that gap
between fence and table top is even from
front to back.
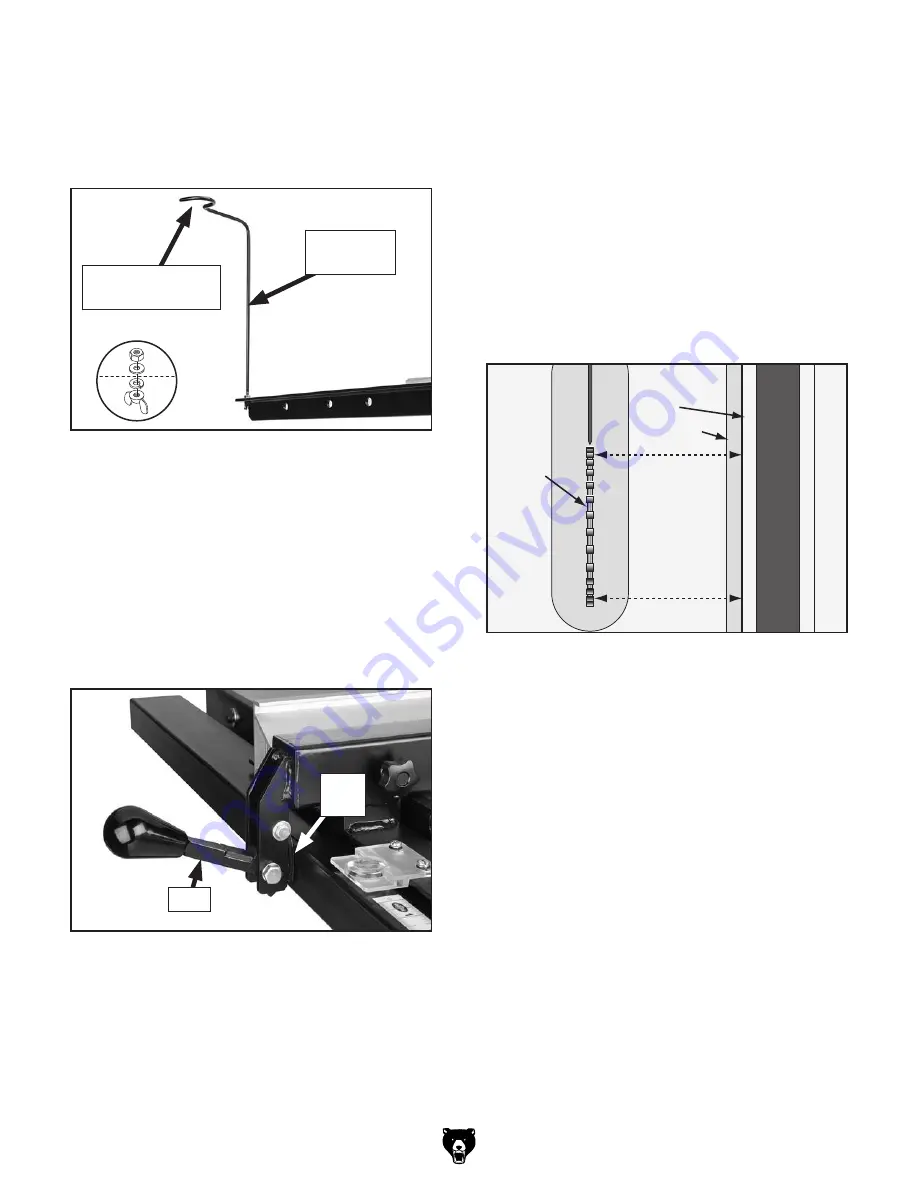
Figure 28. Fence installed on rails.
Cam
Cam
Foot
17. Attach dust hose support arm to rear rail with
M6-1 hex nut, 6mm flat washer, 6mm lock
washer, and M6-1 wing nut. Orient arm so
open end of hook faces outward, as shown in
Figure 27.
Figure 27. Dust hose support installed.
Dust Hose
Support
Open End Faces
Outward
18. Install saw blade as outlined in Blade
Installation on Page 33.
19. Place fence on rails on right hand side of
blade.
Note:
Make sure cam foot contacts cam on
fence lock handle before you place fence on
rail; otherwise, fence will not lock onto rail
tube (see
Figure 28).
Summary of Contents for G0899
Page 92: ......


