DO NOT use chemical additives such as
concentrated automotive coolant or bleach
to prevent freezing and algae growth.
Additives can degrade cooling efficiency,
damage components, and cause excess
electrical conductivity within the laser tube.
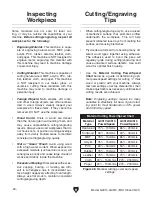
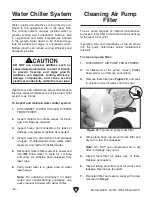
Figure 72. Typical air pump foam filter.
-54-
Model G0911–G0914 (Mfd. Since 05/21)
Water Chiller System
Water quality and effective cooling directly con-
tribute to the operational life of the laser tube.
The cooling system requires distilled water to
prevent scaling and contaminant build-up. Due
to oxygenation and warm temperatures inherent
in the system, water needs to be checked regu-
larly for evidence of algae or unpleasant odors.
Mildew growth can reduce cooling efficiency and
decrease tube life.
Operational load determines actual maintenance
intervals. General maintenance of the water chiller
system is as follows.
To inspect and maintain water chiller system:
1. DISCONNECT WATER CHILLER SYSTEM
FROM POWER!
2. Inspect radiator fan intake screen for block-
age, and clean as required.
3. Inspect hoses and connections for leaks or
damage, and repair or replace as required.
4. Inspect water for discoloration and evidence
of algae. If contaminated, drain water, clean
reservoir, and refill with distilled water.
5. Reconnect water chiller system to power and
turn
ON. Allow water to cycle for 1 minute
and verify air bubbles have released from
laser tube.
6. Verify water level is in green area on water
level gauge.
Note: For additional information on alarm
codes and troubleshooting guidelines, see
user's manual included with water chiller.
Cleaning Air Pump
Filter
The air pump requires no internal maintenance,
but uses a foam filter to maintain clean air delivery
to the laser focal point.
Operating time and cleanliness of the air drawn
into the pump determines actual maintenance
intervals.
To clean air pump filter:
1. DISCONNECT AIR PUMP FROM POWER!
2. At intake-end of air pump, loosen Phillips
head screw, and remove cover plate.
3. Remove foam filter (see Figure 72), and soak
in solution of warm water and dish soap.
4. Wrap clean shop rag around foam filter and
dry with a few firm squeezes.
Note: DO NOT use compressed air to dry
filter or damage may occur.
5. Inspect foam filter for holes, rips, or tears.
Replace as required.
6. Inspect tubing and filter cover for cracks and
leakage. Replace as required.
7. Re-install filter and secure cover with screw
removed in
Step 2.
Summary of Contents for G0911
Page 100: ......

