Model G0948 (Mfd. Since 08/21)
-33-
Using Positive Stop
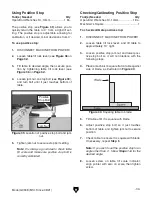
The positive stop (see
Figure 39) allows you to
quickly return the table to 0° from a right-tilt set-
ting. The positive stop is adjustable, allowing for
calibration, or if desired, minor deviations from 0°.
To use positive stop:
1. DISCONNECT MACHINE FROM POWER!
2. Loosen table tilt lock lever (see Figure 38 on
Page 32).
3. Tilt table to desired angle, then secure posi-
tion by tightening table tilt lock lever (see
Figure 38 on Page 32).
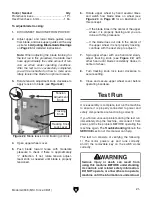
4. Loosen jam nut on stop bolt (see Figure 39),
and turn bolt until it just touches bottom of
table.
5. Tighten jam nut to secure stop bolt setting.
Note: It is always a good idea to check table
tilt scale and make sure positive stop bolt is
correctly calibrated.
To check/calibrate positive stop:
1. DISCONNECT MACHINE FROM POWER!
2. Loosen table tilt lock lever, and tilt table to
approximately 10° right.
3. Loosen positive stop jam nut, and lower posi-
tive stop bolt so it will not interfere with the
following steps.
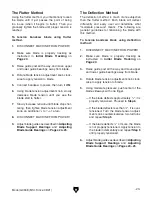
4. Place a machinist's square flat on table against
side of blade, as illustrated in
Figure 40.
Checking/Calibrating Positive Stop
Tool(s) Needed
Qty
Open-End Wrenches 10, 14mm ..................1 Ea.
Machinist's Square ............................................ 1
Tool(s) Needed
Qty
Open-End Wrenches 10, 14mm ..................1 Ea.
Figure 40. Squaring table to blade.
5. Tilt table until it is square with blade.
6. Adjust positive stop bolt so it just touches
bottom of table, and tighten jam nut to secure
position.
7. Check table to ensure it is square with blade.
If necessary, repeat
Step 5.
Note: If you wish to set the positive stop to an
angle other than 0°, follow
Steps 1–5 for the
desired angle.
8. Loosen screw on table tilt scale indicator,
align pointer with zero on scale, then tighten
screw.
calibrating positive stop
Figure 39. Location of positive stop bolt and jam
nut.
Jam Nut
Positive
Stop Bolt
Summary of Contents for G0948
Page 68: ......


