G1022 Series Contractor Saws
-19-
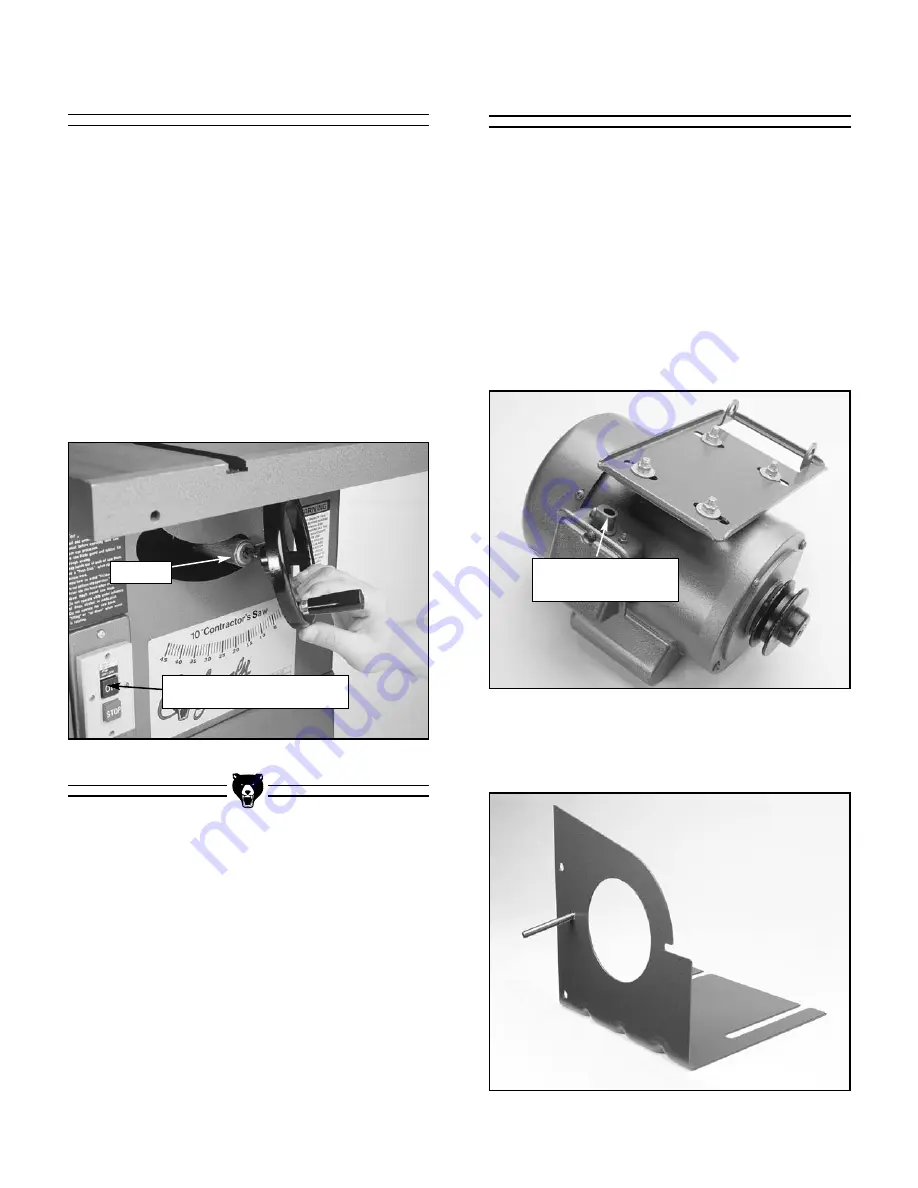
Figure 13.
Attaching the motor plate.
The following pictures show the motor and V-belt
included with the Model G1022SM and Z. The
motor and belt included with the Model G1022ZF,
ZFX and PRO will look slightly different but will
assemble in the same manner as shown.
To mount the motor:
1.
Turn the motor upside down and attach the
motor plate using M8-1.25 x 25 hex bolts,
8MM flat washers and M8-1.25 hex nuts as
shown in
Figure 13
. Finger-tighten only.
Motor
Figure 12.
Mounting the handwheels.
To mount the handwheels:
1.
Position a handwheel over the arbor raising
shaft on the front of the saw. Be sure it fits
completely over the shaft. The slots in the
handwheel hole will engage with the roll pin
on the shaft as shown in
Figure 12
.
2.
Position the other handwheel similarly on the
blade tilting shaft located at the side of the
saw.
3.
Screw the black plastic lock knobs onto the
ends of the shafts to lock the handwheels in
place.
Handwheels
Roll Pin
Figure 14.
Attaching pulley guard bracket.
2.
Insert the
1
⁄
4
''-20 x 2'' hex bolt through the
hole in the pulley guard bracket as shown in
Figure 14
.
Body mounted switch on
G1022SM and Z only
Note: Motor comes
pre-wired.
Summary of Contents for G1022PRO
Page 45: ...G1022 Series Contractor Saws 43 G1022SM AND Z WIRING DIAGRAM...
Page 46: ...44 G1022 Series Contractor Saws G1022ZF ZFX AND PRO WIRING DIAGRAM...
Page 49: ...G1022SM...
Page 50: ...G1022SM...
Page 51: ...G1022SM...
Page 55: ...G1022Z...
Page 56: ...G1022Z...
Page 57: ...G1022Z...
Page 61: ...G1022ZF ZFX PRO...
Page 62: ...G1022ZF ZFX PRO...
Page 63: ...G1022ZF ZFX PRO...
Page 71: ......
Page 72: ......


