Model G4003 (Mfd. Since 6/20)
-17-
To remove a chuck:
1. Place a piece of plywood across the lathe
bed and position it just under the chuck. The
board should be at least 8" wide and 10"
long.
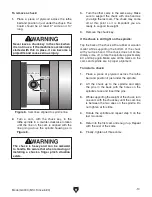
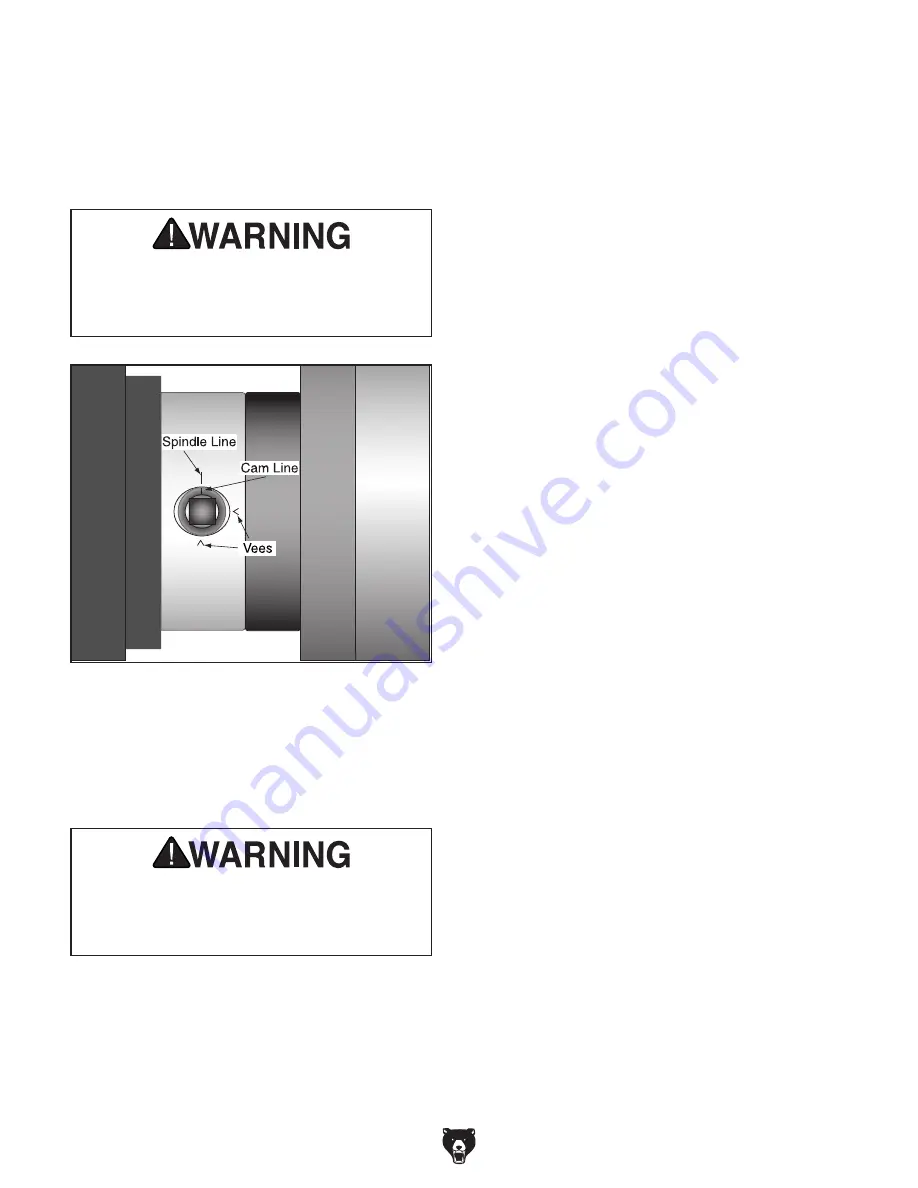
Figure 8. Cam lines aligned to spindle line.
3. Turn the other cams in the same way. Make
sure to support the chuck with one hand as
you align the last cam. The chuck may come
off at this point so it is important you are
ready to support its weight.
4. Remove the chuck key.
If the chuck is still tight on the spindle:
Tap the back of the chuck with a rubber or wooden
mallet while supporting the bottom of the chuck
with your free hand. If the chuck does not imme-
diately come off, rotate the spindle approximately
60˚ and tap again. Make sure all the marks on the
cams and spindle are in proper alignment.
To install a chuck:
1. Place a piece of plywood across the lathe
bed and position it just under the spindle.
2. Lift the chuck up to the spindle and align
the pins in the back with the holes on the
spindle’s face and insert the pins.
3. While supporting the weight of the chuck, turn
one cam with the chuck key until the cam line
is between the two vees on the spindle. Do
not tighten at this time.
4. Rotate the spindle and repeat step 3 on the
last two cams.
5. Return to the first cam and snug it up. Repeat
with the rest of the cams.
6. Finally, tighten all three cams.
Never leave a chuck key in the chuck when
it is not in use. If the machine is accidentally
started with this in place, it can become a
projectile and cause serious injury.
2. Turn a cam, with the chuck key, in the
lathe spindle in a counter-clockwise rotation
until the line on the cam is aligned with the
line going across the spindle housing as in
Figure 8.
The chuck is heavy and can be awkward
to handle. Be aware that when removing or
installing a chuck a finger pinch situation
exists.
Summary of Contents for G4003
Page 60: ......

