


-2-
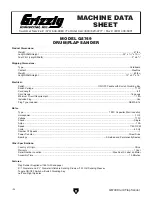
g8749 drum/Flap sander
iNtRODUctiON
We stand behind our machines. if you have any
service questions, parts requests or general ques-
tions about the machine, please call or write us at
the location listed below.
grizzly industrial, inc.
1203 lycoming Mall Circle
Muncy, pa 17756
phone: (570) 546-9663
Fax: (800) 438-5901
E-Mail: techsupport@grizzly.com
if you have any comments regarding this manual,
please write to us at the address below:
grizzly industrial, inc.
C
/
o
technical documentation Manager
p.o. Box 2069
Bellingham, Wa 98227-2069
Email: manuals@grizzly.com
contact info
Functional Overview
Manual Accuracy
We are proud to offer this manual with your new
machine! We've made every effort to be exact
with the instructions, specifications, drawings, and
photographs of the machine we used when writ-
ing this manual. however, sometimes errors do
happen and we apologize for them.
also, owing to our policy of continuous improve-
ment,
your machine may not exactly match
the manual. if you find this to be the case, and
the difference between the manual and machine
leaves you in doubt, immediately call our techni-
cal support for updates or clarification.
For your convenience, we always keep current
grizzly manuals and most updates available on
our website at
www.grizzly.com. any updates to
your machine will be reflected in these documents
as soon as they are complete. Visit our site often
to check for the latest updates!
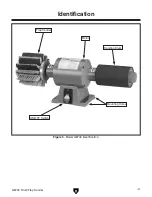
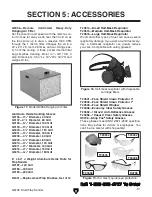
the Model g8749 drum/Flap sander is generally
used for edge contour sanding using the sand-
ing drums, as shown in
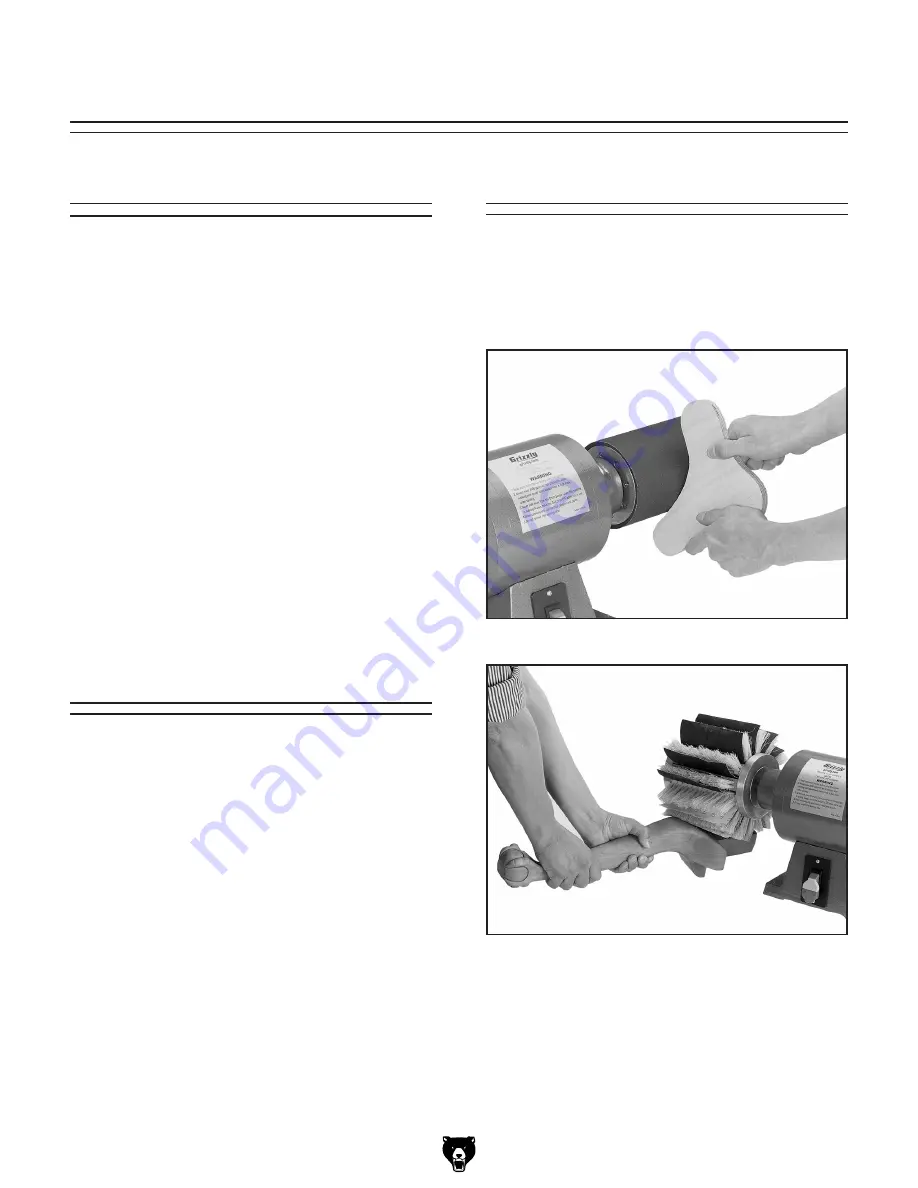
Figure 1, or for round or
spherical sanding using the flap sander, as shown
in
Figure 2.
Figure 1. typical drum sanding operation.
Figure 2. typical flap sanding operation.


