background image

-22-

Model h2935/h2936 (Mfg. since 2/12)

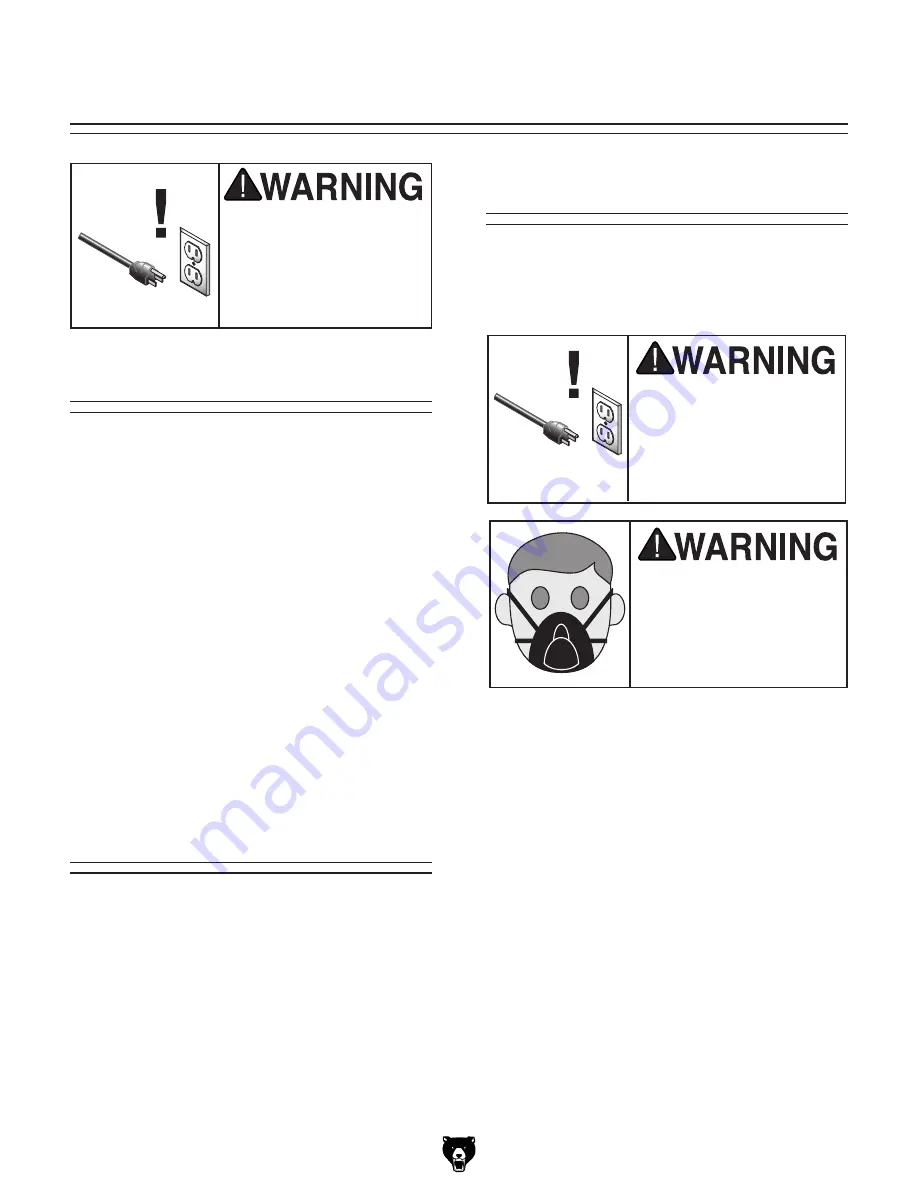
Always disconnect power 

to  the  machine  before 

performing maintenance. 

Failure  to  do  this  may 

result in serious person-

al injury.

Cleaning  the  Model  h2935/h2936  is  relatively 
easy. Vacuum excess sawdust, and wipe off the 
remaining dust with a dry cloth. if any resin has 
built up, use a resin dissolving cleaner to remove 
it. 

cleaning

SEcTION 6: MAINTENANcE

For  optimum  performance  from  your  machine, 
follow this maintenance schedule and refer to any 
specific instructions given in this section.

Daily check:


Check filters.

• 

dust drawer.

• 

loose mounting bolts.


Worn or damaged wires.


Any other unsafe condition.

Weekly Maintenance:


Check filters.


dust drawer.

Monthly check:

• 

Clean/vacuum dust buildup from inside cabi-
net and off motor.

Schedule

Keep  the  sanding  table   

unplugged  during  all 

maintenance procedures. 

Ignoring this warning may 

result in serious personal 

injury to you or others!

Always wear a dust mask 

and safety glasses when 

servicing  and  changing 

filters.  Sawdust  may 

cause  allergic  reactions 

or respiratory problems.

To service the filters:

1. 

disConnECt 

poWEr 

to 

thE 

doWndrAFt tABlE!

2

.  remove a downdraft plate, remove the filters, 

and gently knock them out inside a garbage 
can


Note: 

Generally this technique will work two 

or three times, then you will have to replace 
the filter. 

3.

  reinstall the filters and the downdraft plate.


To change the filter:

1.

  disConnECt 

poWEr 

to 

thE 

doWndrAFt tABlE!

2.

  remove  a  plate,  remove  the  filter,  install  a 

new filter, and reinstall the plate. 

Filters

the filters may need to be serviced or replaced if 
suction is noticeably reduced. the amount of use 
has a direct bearing on how often you must ser-
vice or change the 1" prefilter and 2" filter.

Summary of Contents for H2935

Page 1: ...s printed Motor has changed Aside from this information all other content in the owner s manual applies and MUST be read and under stood for your own safety IMPORTANT Keep this update with the owner s manual for future reference For questions or help contact our Tech Support at 570 546 9663 or techsupport grizzly com READ THIS FIRST For questions or help with this product contact Tech Support at 5...

Page 2: ...odels Manufactured Since 2 12 Copyright MAY 2006 By Grizzly Industrial Inc REVISED JANUARY 2012 TS Warning No portion of this manual may be reproduced in any shape Or form without the written approval of Grizzly Industrial inc BL8221 printed in TAIWAN H2936 H2935 ...

Page 3: ...ng grinding tool integrity and the usage of personal protective equipment The manufacturer will not be held liable for injury or property damage from negligence improper training machine modifications or misuse Some dust created by power sanding sawing grinding drilling and other construction activities contains chemicals known to the State of California to cause cancer birth defects or other repr...

Page 4: ...r Set Up 13 Unpacking 13 Inventory 14 Hardware Recognition Chart 15 Site Considerations 16 Floor Load 16 Working Clearances 16 Assembly 16 Test Run 18 SECTION 4 OPERATIONS 19 Disabling Switch 19 Dust Drawer 19 Operation 20 SECTION 5 ACCESSORIES 21 SECTION 6 MAINTENANCE 22 Schedule 22 Cleaning 22 Filters 22 SECTION 7 SERVICE 23 Troubleshooting 23 Motor Electrical 23 Operations 23 H2935 H2936 Electr...

Page 5: ...mine if the manual version you received matches the manufacture date of your machine For your convenience we post all available man uals and manual updates for free on our website at www grizzly com Any updates to your model of machine will be reflected in these documents as soon as they are complete Manufacture Date of Your Machine Manual Accuracy We stand behind our machines If you have any ques...

Page 6: ...h x Width 23 1 2 x 33 3 4 in Shipping Dimensions Type Cardboard Wood Runner Content Machine Weight 208 lbs Length x Width x Height 26 x 36 x 36 in Electrical Power Requirement 120V Single Phase 60 Hz Full Load Current Rating 7 5A Minimum Circuit Size 15A Switch Grizzly Toggle with Lockout Key Switch Voltage 120V Cord Length 12 ft Plug Included Yes Included Plug Type NEMA 5 15 Motors Main Type Open...

Page 7: ... Second Stage Filter Width 16 in Second Stage Filter Thickness 2 in Table Info Table Size Length 31 1 2 in Table Size Width 23 1 2 in Floor To Table Height 32 in No Of Table Inserts 88 Table Insert Diameter 1 3 8 in Construction Info Frame Pre Formed Steel Base Pre Formed Steel on Casters Impeller Heavy Duty Plastic Table Sheet Metal Side Wall Steel Filter Woven Fabric Table Inserts Rubber Paint P...

Page 8: ...x 39 3 8 in Shipping Dimensions Type Cardboard Wood Runner Content Machine Weight 252 lbs Length x Width x Height 30 x 41 x 36 in Electrical Power Requirement 120V Single Phase 60 Hz Full Load Current Rating 8 5A Minimum Circuit Size 15A Switch Grizzly Toggle with Lockout Key Switch Voltage 120V Cord Length 12 ft Plug Included Yes Included Plug Type NEMA 5 15 Motors Main Type Open Horsepower 1 2 H...

Page 9: ...5 in Second Stage Filter Width 16 in Second Stage Filter Thickness 2 in Table Info Table Size Length 37 in Table Size Width 28 in Floor To Table Height 32 in No Of Table Inserts 110 Table Insert Diameter 1 3 8 in Construction Info Frame Pre Formed Steel Base Pre Formed Steel on Casters Impeller Heavy Duty Plastic Table Sheet Metal Side Wall Steel Filter Woven Fabric Table Inserts Rubber Paint Powd...

Page 10: ...rawer C Steel Panel D Downdraft Plates E Hanger F 120V Outlet Receptacle G Outlet Plate H ON OFF Switch I Circuit Breaker Identification C E I H D G F B A F To reduce the risk of serious injury when using this machine read and understand this entire manual before beginning any operations ...

Page 11: ...ery Never operate under the influence of drugs or alcohol when tired or when distracted OWNER S MANUAL Read and understand this owner s manual BEFORE using machine Untrained users can be seriously hurt EYE PROTECTION Always wear ANSI approved safety glasses or a face shield when operating or observing machinery to reduce the risk of eye injury or blindness from flying particles Everyday eyeglasses...

Page 12: ...Do not force machine It will do the job safer and better at the rate for which it was designed GUARDS COVERS Guards and covers can protect you from accidental contact with moving parts or flying debris Make sure they are prop erly installed undamaged and working correctly before using machine NEVER STAND ON MACHINE Serious injury or accidental contact with cutting tool may occur if machine is tipp...

Page 13: ...perate the machine with the filter in place Unplug the machine before removing the filter MAINTENANCE SERVICE Problems concerned with any moving parts or accessories must be investigated and corrected with the power discon nected and after everything has come to a com plete stop LEAD AND ASBESTOS This machine will not protect against lead paint dust or asbestos fibers These materials must be colle...

Page 14: ...o an undersized circuit To reduce the risk of these hazards avoid over loading the machine during operation and make sure it is connected to a power supply circuit that meets the requirements in the following section For your own safety and protection of property consult a qualified electrician if you are unsure about wiring practices or electrical codes in your area Note The circuit requirements ...

Page 15: ...the extension cord size gets longer and the gauge size gets smaller higher gauge numbers indicate smaller sizes Any extension cord used with this machine must contain a ground wire match the required plug and receptacle and meet the following require ments Minimum Gauge Size 14 AWG Maximum Length Shorter is Better 50 ft Grounding Plug Requirements Figure 2 Typical 5 15 plug and receptacle Groundin...

Page 16: ... should inventory the contents Wear safety glasses dur ing the entire set up pro cess This machine presents serious injury hazards to untrained users Read through this entire manu al to become familiar with the controls and opera tions before starting the machine Unpacking Set Up Safety SECTION 3 SET UP The Model H2935 H2936 is a heavy machine DO NOT over exert yourself while unpacking or mov ing ...

Page 17: ... 3 8 16 Cabinet Base 4 Pins Panels 7 Handle Outlet Plate 1 Hex Nut 5 16 18 Power Cord Hanger 1 Phillips Head Screws 1 4 20 x 5 8 2 Figure 3 Model H2935 out of box In the event that any nonproprietary parts are missing e g a nut or a washer we would be glad to replace them or for the sake of expedi ency replacements can be obtained at your local hardware store Figure 4 Model H2935 inventory A B F E...

Page 18: ...Model H2935 H2936 Mfg Since 2 12 15 Hardware Recognition Chart ...

Page 19: ...tions Assembly Components and Hardware Needed Qty Foot Pad Screws 4 Hex Nuts 3 8 16 4 Filter 16 x 20 x 1 1 Filter 16 x 20 x 2 H2935 1 Filter 16 x 25 x 2 H2936 1 Downdraft Plates H2935 4 Downdraft Plates H2936 5 Pins 7 Center Panel 1 Left Panel 1 Right Panel 1 Handle 1 Hex Nut 5 16 18 1 Phillips Head Screws 1 4 20 x 5 8 2 To assemble the downdraft sanding table 1 With an assistant s help lay the ba...

Page 20: ...nt the filters so the metal webbing points toward the impeller Figure 7 Filters installed in filter bay 1 Filter 2 Filter Airflow 6 Install the downdraft plates as shown in Figure 8 Figure 8 Installing downdraft plates 7 Align the center panel and rear sanding table hinges and secure with three pins as shown in Figure 9 Figure 9 Center panel installed 8 Secure the right and left panels with the re...

Page 21: ... The machine should run smoothly with little or no vibration or rubbing noises 7 Turn the sanding table OFF Note Strange or unusual noises should be investigated and corrected before operating the machine further Always disconnect the machine from power when investigating or correcting potential problems 8 Remove the safety switch key on Page 19 from the main switch 9 To test the safety switch mov...

Page 22: ...this type of machine or equipment before We strongly rec ommend that you read books trade maga zines or get formal training before begin ning any projects Regardless of the con tent in this section Grizzly Industrial will not be held liable for accidents caused by lack of training Frequently monitor and empty the dust drawer of accumulated sawdust Figure 15 Figure 15 Dust drawer Disabling Switch T...

Page 23: ...e as shown in Figure 16 Note Use the power cord hanger Figure 16 to move long cords out of the way so they do not interfere with the workpiece Two portable electric sanders can be plugged in and operated simultaneously However each sander must draw 3 5 amps or less If the 7 amp maximum draw is exceeded the circuit breaker Figure 1 will trip and need to be reset by press ing the circuit breaker but...

Page 24: ...ludes sander dust bag vacuum adapter 3 pcs 60 grit 3 pcs 120 grit 4 pcs 240 grit steel wool pad foam pad and scuff pad Comes in a handy carry case Figure 18 Model H3120 G5970 Electric Palm Sander This quarter sheet palm sander features a built in dust collection bag and sealed On Off switch for long dependable life Swirl free 10 000 orbits per minute make this double insulated sander an indispensa...

Page 25: ...motor Schedule Keep the sanding table unplugged during all maintenance procedures Ignoring this warning may result in serious personal injury to you or others Always wear a dust mask and safety glasses when servicing and changing filters Sawdust may cause allergic reactions or respiratory problems To service the filters 1 DISCONNECT POWER TO THE DOWNDRAFT TABLE 2 Remove a downdraft plate remove th...

Page 26: ...t short replace fuse replace breaker 2 Use sanding tools with less amperage draw 3 Install replace lockout key replace switch 4 Correct motor wiring connections Machine has vibration or noisy operation 1 Feet at fault 2 Motor or component is loose 1 Adjust feet for stability 2 Inspect replace stripped or damaged bolts nuts and re tighten with thread locking fluid Hand tools stall or are underpower...

Page 27: ... 24 Model H2935 H2936 Mfg Since 2 12 H2935 H2936 Electrical Components Figure 23 Capacitor Figure 22 Motor wiring Figure 21 Switch wiring ...

Page 28: ...R Ground WARNING SHOCK HAZARD Disconnect power before working on wiring 120 VAC 5 15 Plug Capacitor 45MFD 250VAC Gn BLACK WHITE GREEN RED COLOR KEY Wt Gn Rd Bk Wt Wt Wt Gn Gn Gn Rd Rd Rd Rd Rd Bk Bk Bk Bk Bk Bk Bk Gn Gn Gn Gn Gn Bk Bk Wt Wt Bk Bk Hot Neutral Ground Bk Bk Wt Wt H2935 H2936 Wiring Diagram See Figures 22 23 See Figure 21 ...

Page 29: ... 26 Model H2935 H2936 Mfg Since 2 12 H2935 Parts Breakdown 1 2 3 4 5 6 7 8V2 9 10 11V2 12V2 13V2 14 15 17 18 19 20 21 22 23 24 25 26 27 28 32 33 34 35 36 37 38 39 40 41 42 43 44 53 56 57 26 15 26 58 ...

Page 30: ... RELAY 12A 125V JOEMEX 10 PCAP04 CAP SCREW 1 4 20 X 1 2 36 PH2936031 GROUNDING CONNECTOR 11V2 PH2936011V2 FAN HOUSING V2 04 09 37 PH2936029 POWER CORD CONNECTOR W 12V2 PH2936012V2 IMPELLER V2 04 09 38 PH2936030 POWER CORD CONNECTOR B 13V2 PH2935013V2 MOTOR 1 3HP 110V 1PH V2 04 09 39 PTLW01 EXT TOOTH WASHER 10 14 PH2936014 ANTI SHAKING RUBBER 40 PH2936038 CAPACITOR COVER 15 PW06 FLAT WASHER 1 4 41 ...

Page 31: ... 28 Model H2935 H2936 Mfg Since 2 12 H2936 Parts Breakdown 1 2 3 4 5 6 7 8V2 9 10 11V2 12V2 13V2 14 17 18 19 20 21 22 23 24 25 26 27 28 29 30 31 32 33 34 35 36 37 38 39 40 43 53 56 57 58 26 15 15 26 59 ...

Page 32: ...4 CAP SCREW 1 4 20 X 1 2 34 PH2936034 SHORT CONNECTOR 11V2 PH2936011V2 FAN HOUSING V2 04 09 35 PH2936035 THERMAL RELAY 12A 125V JOEMEX 12V2 PH2936012V2 PLASTIC IMPELLER 7 T X 9 5 W V2 12 07 36 PS12 PHLP HD SCR 1 4 20 x 5 8 13V2 PH2936013V2 MOTOR 1 2HP 110V 1PH V2 04 09 37 PH2936037 HANDLE 14 PH2936014 ANTI SHAKING RUBBER 38 PH2936038 CAPACITOR COVER 15 PW06 FLAT WASHER 1 4 39 PTLW01 EXT TOOTH WASH...

Page 33: ...t 800 523 4777 or www grizzly com to order new labels REF PART DESCRIPTION REF PART DESCRIPTION 45V2 PH2935045V2 MACHINE ID LABEL CSA H2935 50 PH2936050 NO HANDS IN OUTLET 45V2 PH2936045V2 MACHINE ID LABEL CSA H2936 51V2 PH2935051V2 MAX AMPS LABEL 4 5A H2935 46 G8588 GRIZZLY NAMEPLATE SMALL 51V2 PH2936051V2 MAX AMPS LABEL 3 5A H2936 47 PLABEL 11 SAFETY GLASSES LABEL 52 PLABEL 14 ELECTRICITY LABEL ...

Page 34: ...shall be tried in the State of Washington County of Whatcom We shall in no event be liable for death injuries to persons or property or for incidental contingent special or consequential damages arising from the use of our products To take advantage of this warranty contact us by mail or phone and give us all the details We will then issue you a Return Number which must be clearly posted on the ou...

Page 35: ...r metalworker ____ 0 2 Years ____ 2 8 Years ____ 8 20 Years ____20 Years 6 How many of your machines or tools are Grizzly ____ 0 2 ____ 3 5 ____ 6 9 ____10 7 Do you think your machine represents a good value _____Yes _____No 8 Would you recommend Grizzly Industrial to a friend _____Yes _____No 9 Would you allow us to use your name as a reference for Grizzly customers in your area Note We never use...

Page 36: ...D LINE FOLD ALONG DOTTED LINE GRIZZLY INDUSTRIAL INC P O BOX 2069 BELLINGHAM WA 98227 2069 Place Stamp Here Name_______________________________ Street_______________________________ City______________State______Zip______ Send a Grizzly Catalog to a friend ...

Page 37: ...Buy Direct and Save with Grizzly Trusted Proven and a Great Value Since 1983 ORDER 24 HOURS A DAY 1 800 523 4777 Visit Our Website Today For Current Specials ...

Reviews: