-32-
Model T32335 (Mfd. Since 11/20)
— Turn screw half turn clockwise to increase
both settings.
— Turn screw half turn counterclockwise to
decrease both settings.
6. Install pressure switch cover.
7. Connect machine to power, start compres-
sor, and cycle compressor through cut-in/
cut-out pressures. If compressor does not
automatically turn
OFF at 115 PSI, turn
machine
OFF before pressure reaches 120
PSI. Adjust pressure switch settings until cut-
out pressure is 115 PSI or lower.
Adjusting Only Cut-Out Setting
If only the maximum tank pressure setting needs
to be adjusted, then follow these steps. Keep
in mind that the allowable pressure differential
between cut-in pressure and cut-out pressure
must be kept between 30–40 PSI. Exceeding this
range can cause the compressor to overheat.
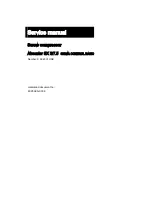
5. Adjust screw shown in Figure 36 to change
maximum tank pressure setting.
— Turn screw half turn clockwise to increase
tank pressure.
— Turn screw half turn counterclockwise to
decrease tank pressure.
6. Install pressure switch cover.
7. Connect machine to power, start compres-
sor, and cycle compressor through cut-in/
cut-out pressures. If compressor does not
automatically turn
OFF at 115 PSI, turn
machine
OFF before pressure reaches 120
PSI. Adjust pressure switch settings until cut-
out pressure is 115 PSI or lower.
Figure 36. Location of cut-out only adjustment
screw.
Cut-Out
Adjustment
Screw
To adjust only cut-out setting:
1. Operate compressor and record cut-in and
cut-out pressures.
2. DISCONNECT MACHINE FROM POWER!
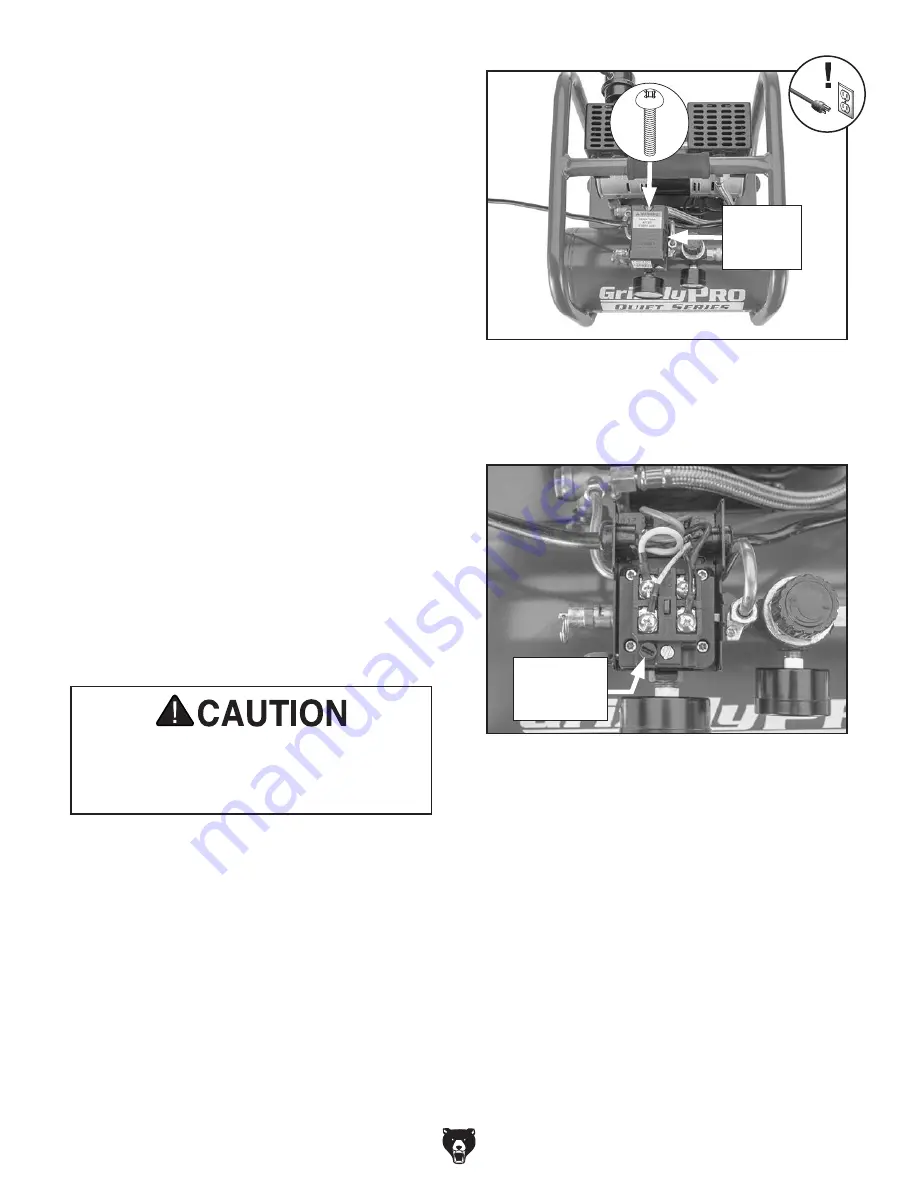
Figure 35. Location of pressure switch cover
Phillips head screw.
Pressure
Switch
Cover
Releasing air through drain valve can
be extremely loud. Protect hearing with
ANSI-approved hearing protection while
performing following step.
3. Use safety relief valve to reduce tank pres-
sure to less than 10 PSI.
4. Remove Phillips head screw shown in
Figure 35 to remove pressure switch.
Summary of Contents for QUIET Series
Page 40: ......


