-30-
Model T32335 (Mfd. Since 11/20)
4. Inspect seal ring and diaphragm (see Figure
32) for damage and dirt.
Figure 32. Check valve components.
Seal Ring
Diaphragm
5. Replace any damaged parts and clean any
dirt from diaphragm and seal ring.
6. Re-install check valve/cap.
IMPORTANT: Make sure diaphragm presses
squarely against discharge line and exhaust
tube opening.
Note: Do not add thread sealant or Teflon
tape to cap threads. Seal ring provides suf-
ficient sealing.
Examining
Check Valve
The check valve pushes compressed air into the
tank and prevents it from flowing back toward
the pump. The diaphragm in the check valve can
become damaged, twisted, or dirty and cause
the valve to leak or prevent the compressor from
pressurizing.
Eye injury hazard! Always
wear safety glasses when
handling pressurized air
system.
Tool Needed
Qty
Wrench or Socket 19mm ................................... 1
To examine check valve:
1. DISCONNECT MACHINE FROM POWER!
Releasing air through drain valve can
be extremely loud. Protect hearing with
ANSI-approved hearing protection while
performing following step.
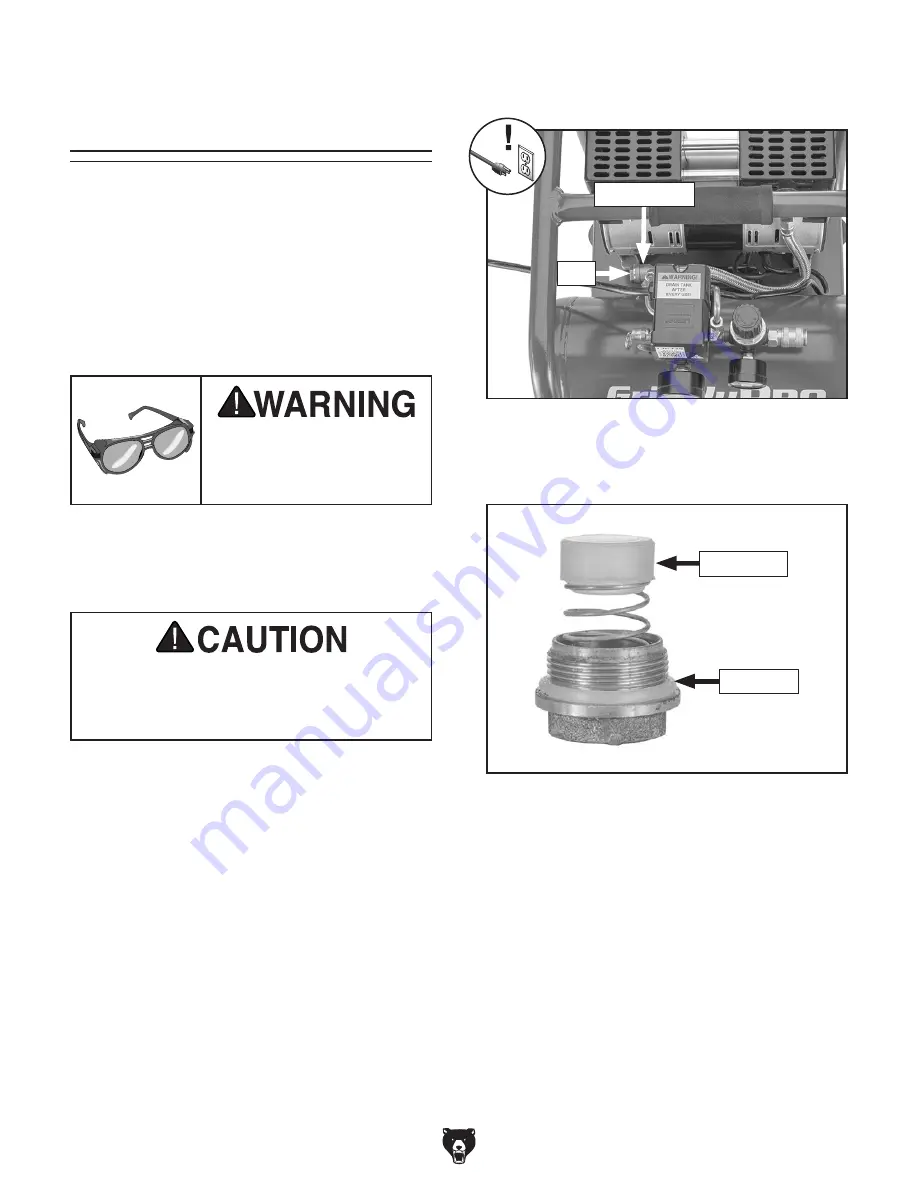
Figure 31. Location of check valve cap.
Check Valve
Cap
3. Remove cap shown in Figure 31 from check
valve.
2. Use safety relief valve to reduce tank pres-
sure to less than 10 PSI.
Summary of Contents for QUIET Series
Page 40: ......


