-2-
T1234 125W Glue Gun Kit (Mfd. 08/17)
To use glue gun:
1. Make sure working surface is clear of any
combustible materials.
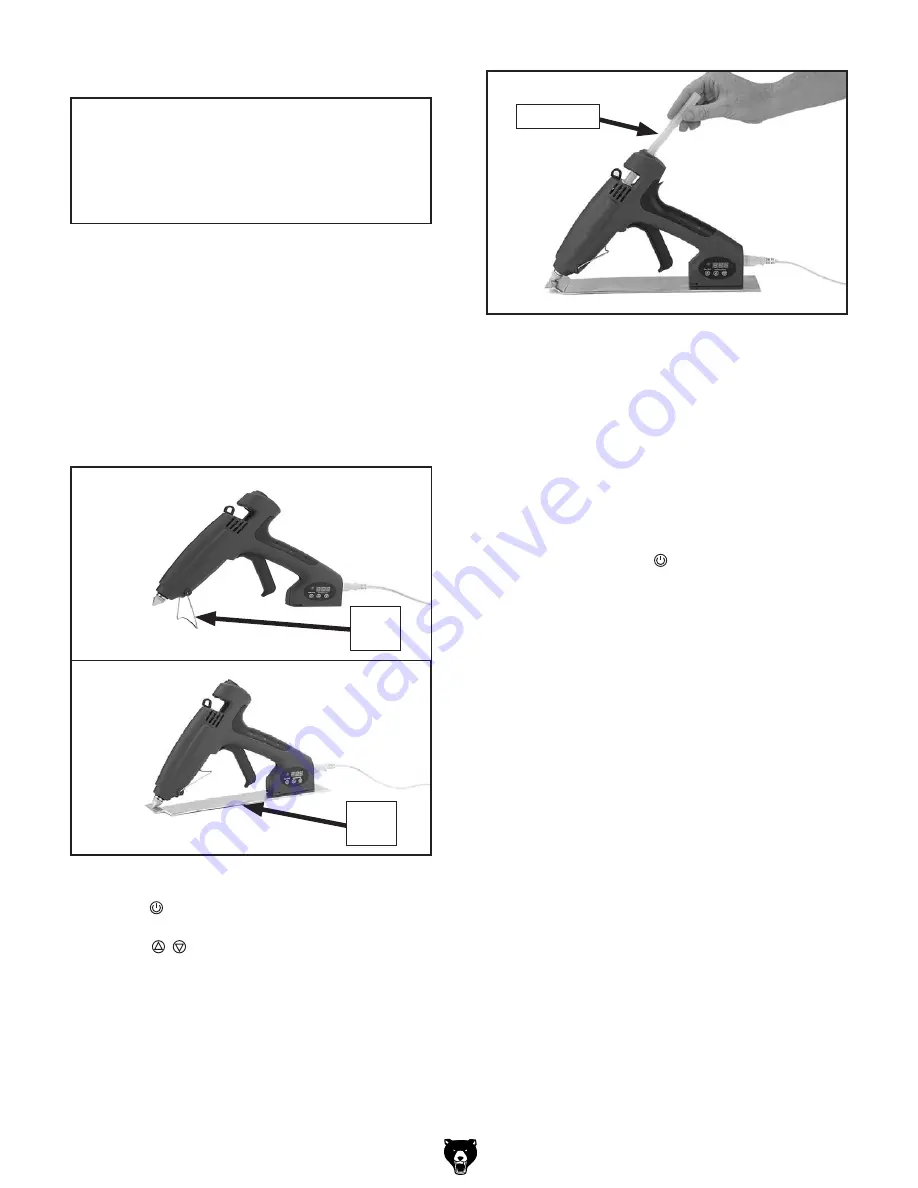
2. Insert cord into glue gun, and insert plug into
matching 120V power receptacle. Rest glue
gun upright using wire stand or flat stand (see
Figure 2). Magnets in glue gun base hold it in
place on flat stand.
Operation
Some materials are heat sensitive and may
become damaged either by heated nozzle
or hot glue. Test temperature on a scrap
piece of material first.
3. Press button to turn glue gun ON.
4. Press buttons to set temperature, and
then allow glue gun to heat up for approxi-
mately 1–2 minutes.
5. Insert glue stick into back of glue gun (see
Figure 3).
6. Once glue gun has fully heated, slowly
squeeze trigger until melted material begins
to flow from nozzle.
Important: When hot, rest glue gun upright
with nozzle facing down to prevent melted
glue from escaping chamber and increasing
risk of fire or personal injury.
7. After gluing operation is complete, release
trigger and press button to turn glue gun
OFF. Allow it to fully cool before storing. Glue
sticks may remain in glue gun when not in
use and be re-melted when used again.
Tip: Never pull glue stick out through back
of glue gun. Doing so may damage feed
mechanism. Cut off extra portion of glue stick
and feed remainder through glue gun.
Note: Never pour water over glue gun, put
glue gun into water, or expose to rain. Only
use a damp cloth to clean glue gun.
To change glue gun nozzle:
1. DISCONNECT GLUE GUN FROM POWER!
2. Allow nozzle to completely cool.
3. Turn nozzle counterclockwise to remove.
4. Insert new nozzle and turn clockwise to
tighten. DO NOT over-tighten.
Figure 3. Inserting glue stick into glue gun.
Glue Stick
Figure 2. Glue gun resting upright.
Flat
Stand
Wire
Stand
NOTICE
Summary of Contents for T1234
Page 4: ......


