-4-
Model T25448/T25449 (Mfg. Since 1/13)
Symptom
Possible Cause
Possible Solution
Switch box will not
turn
ON.
1. Switch box not connected to power.
2. Remote controller not properly programmed
to operate switch.
3. Remote controller battery weak/dead.
4. Switch box circuit breaker has tripped.
5. Remote controller is out of range with
switch.
6. wall circuit breaker has tripped.
7. Remote controller/switch at fault.
1. Connect switch box to correct power source (
Page 2).
2. Properly program remote controller to operate switch
(
Page 2).
3. Replace remote controller battery (this page).
4. Press the circuit breaker reset button on rear of
switch.
5. Operate the remote controller within 75 ft. of the
switch.
6. Reset wall circuit breaker. Make sure breaker is in
good condition and circuit is properly sized for dust
collector in use.
7. Test/replace.
Dust collector will
not turn
ON.
1. Dust collector ON/OFF switch not turned
ON.
2. Dust collector not connected to switch box.
3. Switch box not connected to power.
4. wall circuit breaker has tripped.
5. Dust collector at fault.
1. Turn dust collector ON/OFF switch
ON.
2. Properly connect dust collector to switch box
(
Page 2).
3. Connect switch box to correct power source (
Page 2).
4. Reset wall circuit breaker. Make sure breaker is in
good condition and circuit is properly sized for dust
collector in use.
5. Refer to dust collector manual for troubleshooting;
contact dust collector manufacturer for technical
help.
Troubleshooting
Review the troubleshooting and procedures in this subsection if a problem develops. If you need additional
help with a procedure, call our Technical Support at (570) 546-9663.
Note: Please gather the serial number and manufacture date of your switch before calling.
Replacing Remote Controller Battery
The remote controller is independently powered
by a Type 23ae, 12V internal battery. If the switch
box stops responding to the remote controller,
replace the battery as the first course of resolu-
tion.
To replace the remote controller battery:
1. Place the remote controller upside down on a
stable, protective surface.
2. use a #00 Phillips screwdriver to remove the
three screws that secure the components
together.
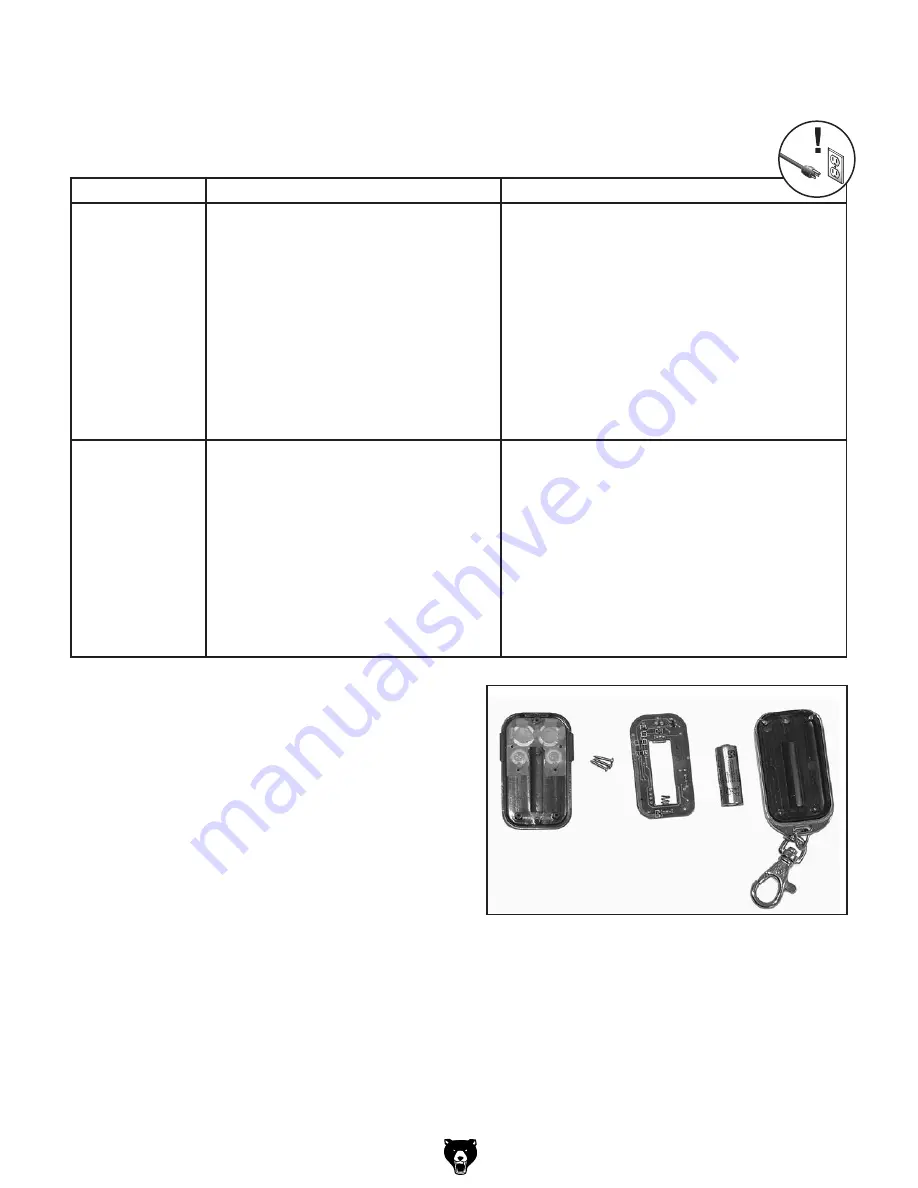
3. Carefully separate the covers, circuit board,
and battery, as shown in
Figure 8.
Figure 8. Remote controller components.
4. Replace the battery, then re-assemble the
remote controller.


