background image

COPYRIGHT © MARCH, 2020 BY GRIZZLY INDUSTRIAL, INC.


WARNING: NO PORTION OF THIS MANUAL MAY BE REPRODUCED IN ANY SHAPE

 OR FORM WITHOUT THE WRITTEN APPROVAL OF GRIZZLY INDUSTRIAL, INC.

#CS20915  PRINTED IN TAIWAN

V1.03.20

MODEL T31636

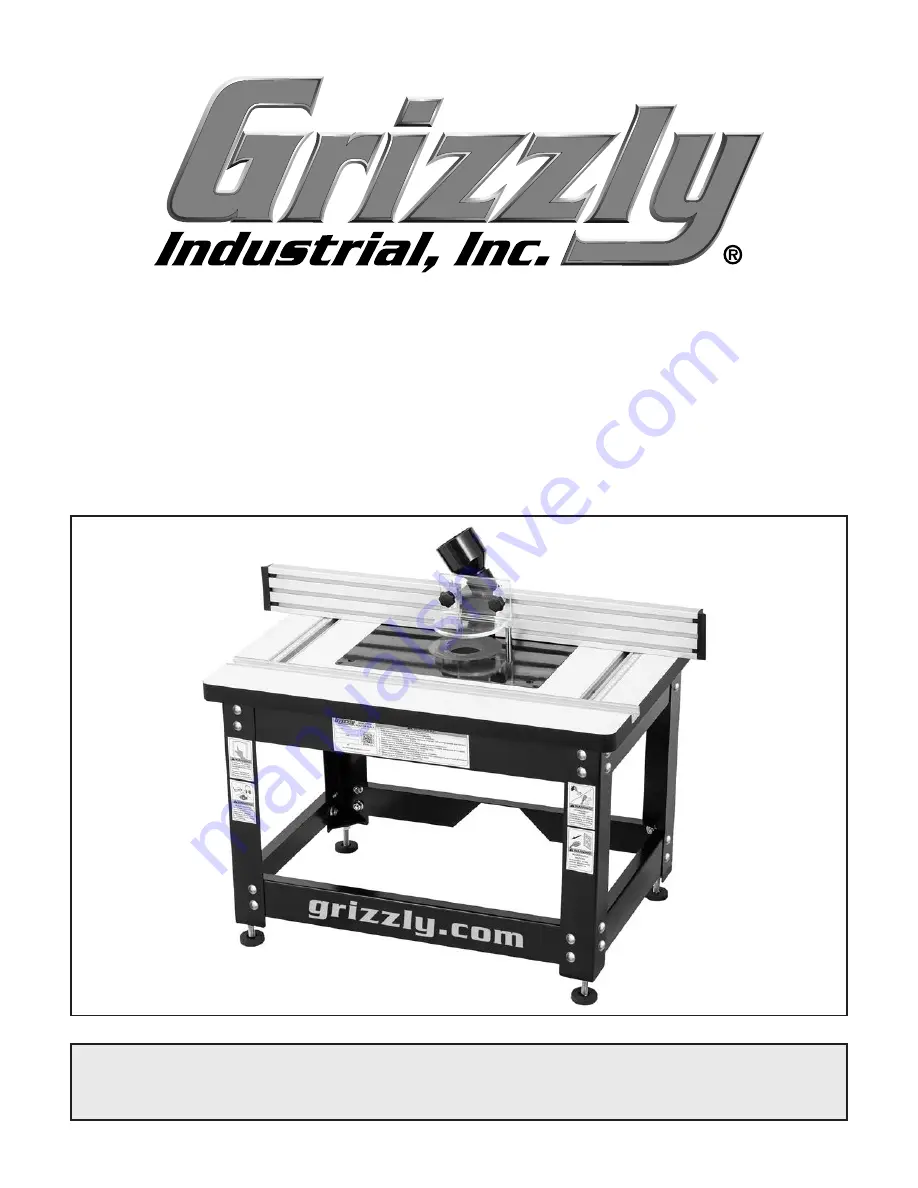
BENCHTOP ROUTER TABLE

OWNER'S MANUAL

(For models manufactured since 02/20)

Summary of Contents for T31636

Page 1: ...WARNING NO PORTION OF THIS MANUAL MAY BE REPRODUCED IN ANY SHAPE OR FORM WITHOUT THE WRITTEN APPROVAL OF GRIZZLY INDUSTRIAL INC CS20915 PRINTED IN TAIWAN V1 03 20 MODEL T31636 BENCHTOP ROUTER TABLE OWNER S MANUAL For models manufactured since 02 20 ...

Page 2: ...ng grinding tool integrity and the usage of personal protective equipment The manufacturer will not be held liable for injury or property damage from negligence improper training machine modifications or misuse Some dust created by power sanding sawing grinding drilling and other construction activities contains chemicals known to the State of California to cause cancer birth defects or other repr...

Page 3: ...ERVICE 28 Troubleshooting 28 Adjusting Mounting Plate 29 SECTION 7 PARTS 30 Main 30 Labels Cosmetics 32 WARRANTY RETURNS 33 IMPORTANT NOTICE Modification Required for Mounting Your Router The universal mounting plate that is included with the Model T31636 does not have pre drilled mounting holes to hold your router This is because different brands of routers have different base mounting hole confi...

Page 4: ...made every effort to be exact with the instruc tions specifications drawings and photographs in this manual Sometimes we make mistakes but our policy of continuous improvement also means that sometimes the machine you receive is slightly different than shown in the manual If you find this to be the case and the difference between the manual and machine leaves you confused or unsure about something...

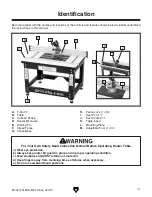
Page 5: ...protection b Always keep router bit guard in place and in proper operating condition c Feed workpiece AGAINST rotation of router bit d Keep fingers away from revolving bit use fixtures when necessary e Do not use awkward hand positions A T Slot 3 4 B Table C Outfeed Fence D Router Bit Guard E Starting Pin F Infeed Fence G Fence Base H Fence Lock 1 of 6 I Dust Port 11 2 J Dust Chute 21 2 K Table In...

Page 6: ...Provides workpiece support during router operations T slots allow attachment of hold downs featherboards etc C Router Bit Guard Provides workpiece vis ibility while shielding user during operations Figure 2 Router table controls rear D Fence Locks 2 of 4 Tighten and loos en infeed outfeed fences for side to side adjustment E Dust Port 11 2 dust port connects to user s dust collection system Dust c...

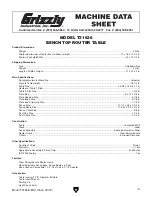
Page 7: ...ze 9 x 12 x 3 8 in Plate Opening Size 3 7 8 in Plate Insert Size 3 7 8 in Plate Insert Opening Size 1 1 4 in Fence Size 27 1 2 x 3 4 x 2 3 4 in Fence Board Size 11 3 4 x 2 3 4 x 3 4 in Fence T Slot Size 3 8 in Dust Port Size 1 1 2 in Dust Chute Size 2 1 2 in Construction Table Laminated MDF Stand Steel Fence Assembly Extruded Aluminum Steel Router Guard Clear Polycarbonate T Slots Extruded Aluminu...

Page 8: ...id proof DANGEROUS ENVIRONMENTS Do not use machinery in areas that are wet cluttered or have poor lighting Operating machinery in these areas greatly increases the risk of accidents and injury MENTAL ALERTNESS REQUIRED Full mental alertness is required for safe operation of machin ery Never operate under the influence of drugs or alcohol when tired or when distracted For Your Own Safety Read Instr...

Page 9: ... moving parts or flying debris Make sure they are properly installed undamaged and working correctly BEFORE operating machine FORCING MACHINERY Do not force machine It will do the job safer and better at the rate for which it was designed NEVER STAND ON MACHINE Serious injury may occur if machine is tipped or if the cutting tool is unintentionally contacted STABLE MACHINE Unexpected movement dur i...

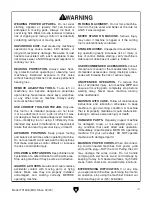
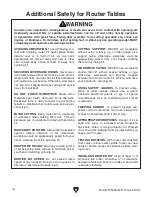
Page 10: ...uter TESTING ROTATION With router disconnected from power rotate router spindle to test any new setup to ensure proper bit clearance before start ing router INSTALLING ROUTER BIT Insert at least 3 4 of bit shank into collet and allow 1 8 of clearance between shank and bottom of collet to ensure bit is securely installed AVOIDING AMPUTATION To avoid making con tact with spinning router bit never pl...

Page 11: ...ct them for shipping damage If items are damaged please call us immediately at 570 546 9663 IMPORTANT Save all packaging materials until you are completely satisfied with the machine and have resolved any issues between Grizzly or the shipping agent You MUST have the original pack aging to file a freight claim It is also extremely helpful if you need to return your machine later Unpacking Wear saf...

Page 12: ... 4 Fence Locks 4 N T Bolts 1 4 20 x 3 4 Fence Locks 2 O Router Bit Guard 1 P Knobs 7 Lobe 1 4 20 Bit Guard 2 Q Flat Washers 1 4 Bit Guard 2 R Carriage Bolts 1 4 20 x 3 4 Bit Guard 2 S Legs 4 T Upper Long Braces Stand 2 U Upper Short Braces Stand 2 V Rear Long Brace Stand 1 W Lower Short Braces Stand 2 X Front Long Brace Stand 1 Y Carriage Bolts 5 16 18 x 1 2 Stand 32 Z Flange Nuts 5 16 18 Stand 32...

Page 13: ...Model T31636 Mfd Since 02 20 11 Hardware Recognition Chart USE THIS CHART TO MATCH UP HARDWARE DURING THE INVENTORY AND ASSEMBLY PROCESS 5mm 5mm Flat Head Cap Screw ...

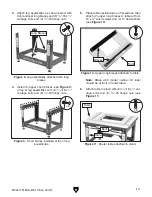
Page 14: ...ng a location for this machine in the shop Below is the minimum amount of space needed for the machine Placement Location Assembly To assemble router table 1 Attach two legs together with 1 lower short brace at bottom using 4 5 16 18 x 1 2 carriage bolts and 4 5 16 18 flange nuts see Figure 6 Repeat with second pair of legs and 1 lower short brace The machine must be fully assembled before it can ...

Page 15: ...aces attached to table x 4 Figure 11 Router table attached to stand 6 Attach table to stand with 8 5 16 18 x 1 2 car riage bolts and 8 5 16 18 flange nuts see Figure 11 Table Stand Bolts x 8 Note Brace with model number ID label should be at front of router table Front Braces Figure 8 Leg assemblies attached with long braces Long Braces 4 Install 2 upper short braces see Figure 9 at top of leg ass...

Page 16: ...e installed in table Straightedge Mounting Plate Table Surface Figure 13 Pattern for aligning mounting plate 8 Lay straightedge across mounting plate table insert and table surfaces in pattern shown in Figure 13 Adjust set screws see Figure 12 so that ends of straightedge lay flat on table surface at all positions of pattern IMPORTANT Mounting plate and table surface must be aligned evenly to ensu...

Page 17: ... and install infeed fence Figure 17 Infeed fence installed on fence base Infeed Fence Fence Base Carriage Bolts 14 Repeat Steps 11 13 to install outfeed fence on opposite side of base 16 Press 2 fence end caps into position as shown in Figure 20 with flat side forward Figure 20 End caps pressed into fences End Cap 1 of 2 13 Secure infeed fence to base with 2 1 4 flat washers and 2 8 lobe knobs see...

Page 18: ... router table is designed to attach to the bottom of your router in the same manner as the router base IMPORTANT When deciding how to orient the router in relation to the router table take into account access to the router controls such as depth adjustment knobs lock levers knobs and the power switch Items Needed Qty Marking Pen 1 Drill 1 Drill Bits 2 Fasteners As Needed Carriage Bolts To reduce r...

Page 19: ... base as a template 9 Remove router base from mounting plate drill matching hole sizes in mounting plate for fasteners 6 Remove router base from router see Figure 27 To install router 1 DISCONNECT ROUTER FROM POWER 2 Insert mounting plate into the router table so that the starting pin holes are to the right of the opening as shown in Figure 25 Note Starting pin must be installed to feed into cutte...

Page 20: ...operation Breathing airborne dust on a regular basis can result in perma nent respiratory illness Reduce your risk by wearing a respirator and capturing the dust with a dust collection system 2 Tug the hose to make sure it does not come off Note A tight fit is necessary for proper performance If router unexpectedly moves or router bit contacts plate insert or fence during opera tion serious person...

Page 21: ...ed operation always disable switch before leaving machine unattended Make sure to place key in a well hidden or secure location To complete a typical operation the operator does the following 1 Examines workpiece to make sure it is suit able for cutting 2 Adjusts fences close to bit for maximum workpiece support then secures fences in place 3 Adjusts bit height for desired cutting profile 4 Adjust...

Page 22: ...s sufficiently dried before routing Wood with a moisture con tent over 20 will cause unnecessary wear on the router bits produce poor cutting results and increase the risk of kickback Excess moisture can also hasten rust and corrosion Figure 32 Location of router table T slot T Slot Table T Slot The Model T31636 includes one 3 4 T slot see Figure 32 This can be used for attach ing router table acc...

Page 23: ...ditional safety and control near the router bit during router operations Adjusting Fence The fence assembly on the Model T31636 has an infeed fence and outfeed fence These can be moved side to side to increase or decrease the space around the router bit The less space there is around the bit the less opportunity there is of kickback and of the operator contacting the bit Fences should always be ad...

Page 24: ...g router bit a spacer needs to be installed between the outfeed fence and fence base A piece of wood that has been planed to be of equal thickness with holes for mounting works well The thickness of the spacer will depend on and be equal to the amount of material being removed from the face of the workpiece To joint edge of a workpiece 1 DISCONNECT MACHINE FROM POWER 2 Secure straight cutting bit ...

Page 25: ...d tighten all knobs 8 Connect router to power then perform cut see Figure 38 Profile Routing To cut a profile into a workpiece 1 DISCONNECT MACHINE FROM POWER 2 Secure bit in router according to router manu facturer s instructions 3 Raise router bit to desired height then adjust fence so it sits behind the bit the same dis tance as desired depth of cut see Figure 40 Depth of Cut Top View Bit Infee...

Page 26: ... Wood stock Mount with flat head screws Countersunk holes cut out profile of cutter spindle 6 Secure zero clearance fence board and router bit guard to fence base then make sure fence is parallel with table T slot see Aligning Fence Table on Page 21 7 Check for proper clearance connect router table to power then make test cut to verify results ALWAYS use hold downs or featherboards and push sticks...

Page 27: ...accidental contact with spinning router bit causing serious personal injury 3 Remove fence from table 4 If possible fabricate and mount a custom guard over the bit that safely protects your hands from spinning router bit 5 Insert starting pin in hole on mounting plate see Figure 44 or clamp a starting block to table see Figure 43 Workpiece Template Bearing Guide Figure 45 Using a template and bear...

Page 28: ...cs include basic operation techniques router safety hold ing a workpiece and a handful of projects for the home Figure 47 Assortment of basic eye protection Basic Eye Protection T20501 Face Shield Crown Protector 4 T20502 Face Shield Crown Protector 7 T20503 Face Shield Window T20451 Kirova Clear Safety Glasses T20452 Kirova Anti Reflective S Glasses T20456 DAKURA Safety Glasses Black Clear T20451...

Page 29: ...damaged cords plugs Any other unsafe condition Weekly Check Clean vacuum dust buildup off of router Schedule To reduce risk of shock or accidental startup always disconnect machine from power before adjustments maintenance or service Cleaning the Model T31636 is relatively easy Vacuum excess sawdust and wipe off the remain ing dust with a dry cloth If any resin has built up use a resin dissolving ...

Page 30: ...ith table T slot Page 21 Workpiece is burned when cut 1 Router bit dull 2 Feeding workpiece too slow 3 Depth of cut too deep 1 Replace router bit 2 Increase feed rate 3 Take a smaller depth of cut Always reduce cutting depth when working with hard woods Fuzzy grain 1 Wood may have high moisture content or surface wetness 2 Router bit dull 1 Inspect workpiece moisture content allow to dry if moistu...

Page 31: ...e surface 5 Re install fence assembly to table Figure 50 Example of using a straightedge to align mounting plate with table surface Set Screws 1 of 4 Straightedge Mounting Plate Table Surface Figure 49 Pattern for adjusting mounting plate 3 Lay straightedge across mounting plate table insert and table surfaces in pattern shown in Figure 49 Adjust set screws see Figure 50 in mounting plate as neces...

Page 32: ... 30 21 4 38 36 37 1 8 8 8 8 8 8 35 2 3 5 6 7 9 11 12 13 14 15 2 1 9 9 3 13 14 3 3 12 15 15 9 9 6 9 9 13 14 13 14 8 9 25 18 28 21 22 4 Main SECTION 7 PARTS We do our best to stock replacement parts when possible but we cannot guarantee that all parts shown are available for purchase Call 800 523 4777 or visit www grizzly com parts to check for availability ...

Page 33: ...RACE LOWER FRONT 27 PT31636027 T SLOT TRACK 3 4 8 PT31636008 FLANGE NUT 5 16 18 28 PT31636028 T SLOT TRACK W SCALE 5 16 9 PT31636009 CARRIAGE BOLT 5 16 18 X 1 2 29 PT31636029 WOOD SCREW 10 X 1 2 11 PT31636011 ADJUSTABLE FOOT 3 8 16 X 2 30 PT31636030 SCALE INCH 12 PT31636012 HEX NUT 3 8 16 31 PT31636031 DUST BOX 13 PT31636013 WOOD SCREW 10 X 5 8 32 PT31636032 DUST CHUTE 14 PT31636014 FLAT WASHER 10...

Page 34: ... jewelry 4 Disconnect power before changing cutters or adjusting servicing router 5 Before starting ensure machine is stable router is firmly mounted and guards are in place 6 Always keep fingers at least 6 away from spinning cutter 7 Always feed workpiece against rotation of cutter 8 Do not use awkward hand positions while feeding workpiece 9 Reduce risk of kickback by taking multiple passes when...

Page 35: ...r for incidental contingent special or consequential damages arising from the use of our products The manufacturers reserve the right to change specifications at any time because they constantly strive to achieve better quality equipment We make every effort to ensure that our products meet high quality and durability standards and we hope you never need to use this warranty In the event you need ...

Page 36: ......

Reviews: