background image

Review the troubleshooting procedures in this section if a problem develops with your machine. If you need 
replacement parts or additional help with a procedure, call our Technical Support. 

Note: Please gather the 

serial number and manufacture date of your machine before calling.

Model T31681 (Mfd. Since 12/19)

-25-

SECTION 8: SERVICE

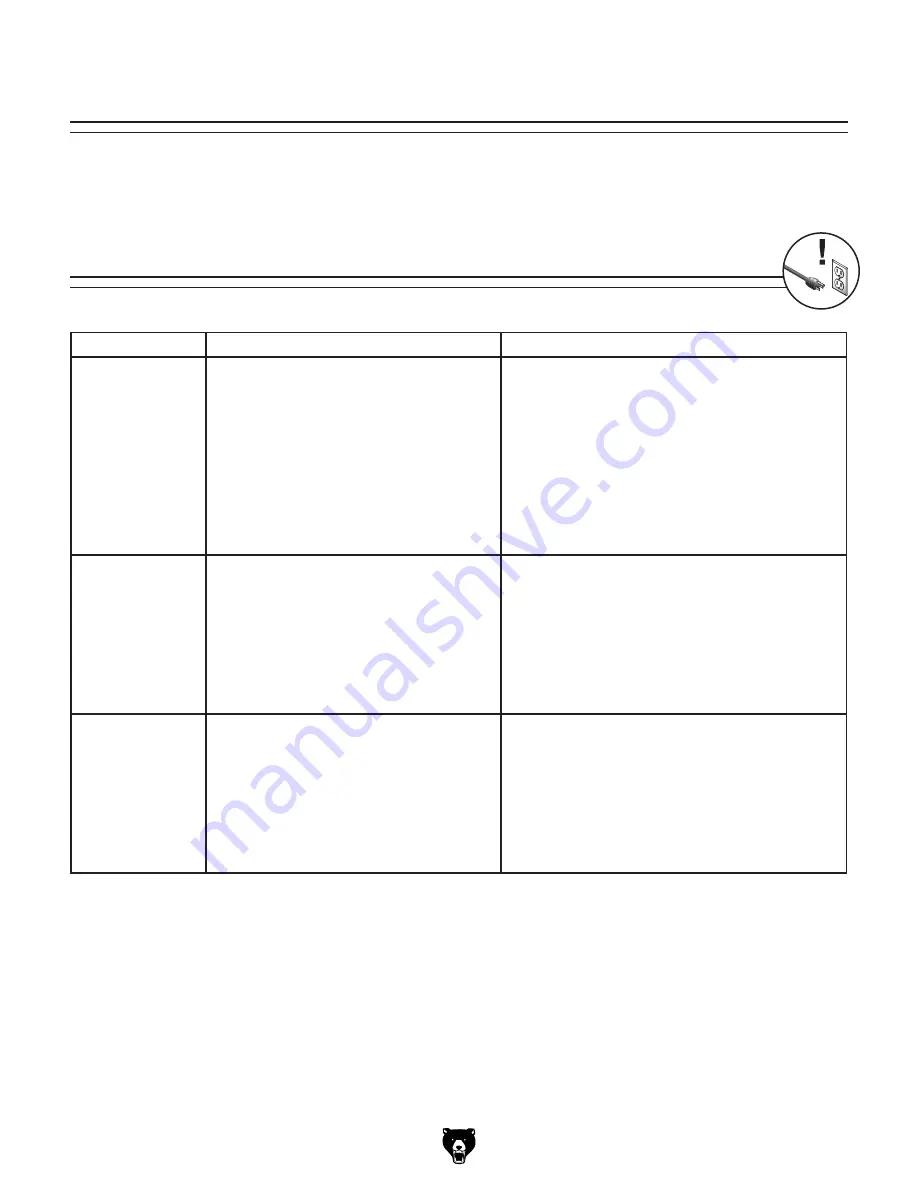
Troubleshooting

Symptom

Possible Cause

Possible Solution

Machine does 
not start or power 
supply breaker trips 
immediately after 
startup.

1.  Wheel cover limit switch engaged/at fault.
2.  Incorrect power supply voltage or circuit 

size.

3.  Power supply circuit breaker tripped or fuse 

blown.

4.  Contactor not energized/at fault.
5.  Wiring broken, disconnected, or corroded.

6.  ON/OFF switch at fault.
7.  Motor at fault.

1.  Close wheel cover/replace switch.
2.  Ensure correct power supply voltage and circuit 

size.

3.  Ensure circuit is sized correctly and free of shorts.

4.  Test all legs for power; replace as necessary.
5.  Fix broken wires or disconnected/corroded 

connections (

Page 28).

6.  Replace switch.
7.  Test/repair/replace.

Machine stalls or is 
underpowered.

1.  Meat/bone crooked during feed.
2.  Fence loose or misadjusted.
3.  Machine undersized for task.
4.  Blade undersized for task.
5.  Blade slipping on wheels.
6.  Run capacitor at fault.
7.  Contactor not energized/at fault.
8.  Motor at fault.

1.  Straighten or replace meat/bone.
2.  Adjust fence.
3.  Reduce feed rate or depth of cut.
4.  Use correct blade.
5.  Adjust blade tracking and tension (

Page 18).

6.  Test/repair/replace.
7.  Test all legs for power; replace as necessary.
8.  Test/repair/replace.

Machine has 
vibration or noisy 
operation.

1.  Motor or component loose.

2.  Motor fan rubbing on fan cover.
3.  Motor mount loose/broken.
4.  Feet not adjusted properly.
5.  Blade weld at fault/teeth broken.
6.  Motor bearings at fault.

1.  Replace damaged or missing bolts/nuts or tighten if 

loose.

2.  Fix/replace fan cover; replace loose/damaged fan.
3.  Tighten/replace.
4.  Adjust feet to stabilize machine (

Page 13).

5.  Replace blade (

Page 16).

6.  Test by rotating shaft; rotational grinding/loose shaft 

requires bearing replacement.

Motor & Electrical

Summary of Contents for T31681

Page 1: ...ANUAL For models manufactured since 12 19 COPYRIGHT FEBRUARY 2020 BY GRIZZLY INDUSTRIAL INC WARNING NO PORTION OF THIS MANUAL MAY BE REPRODUCED IN ANY SHAPE OR FORM WITHOUT THE WRITTEN APPROVAL OF GRI...

Page 2: ...g grinding tool integrity and the usage of personal protective equipment The manufacturer will not be held liable for injury or property damage from negligence improper training machine modifications...

Page 3: ...oor work results Table of Contents INTRODUCTION 2 Machine Description 2 Contact Info 2 Manual Accuracy 2 Identification 3 Controls Components 4 Machine Data Sheet 5 SECTION 1 SAFETY 7 Safety Instructi...

Page 4: ...d the difference between the manual and machine leaves you confused or unsure about something check our website for an updated version We post current manuals and manual updates for free on our web si...

Page 5: ...on Become familiar with the names and locations of the controls and features shown below to better understand the instructions in this manual Wheel Cover Knob Adjustable Foot Adjustable Fence Support...

Page 6: ...wheels Disconnects power to motor when opened F Support Rod Knob Locks and unlocks fence support rod Turn clockwise to lock support rod Turn counterclockwise to unlock support rod G Meat Pusher Pushes...

Page 7: ...ine Weight 117 lbs Length x Width x Height 23 x 22 x 41 in Must Ship Upright Yes Electrical Power Requirement 110V Single Phase 60 Hz Full Load Current Rating 8 5A Minimum Circuit Size 15A Connection...

Page 8: ...Height 14 in Construction Table Stainless Steel Fence Stainless Steel Base Aluminum Magnesium Alloy Body Aluminum Magnesium Alloy Wheels Cast Stainless Steel Wheel Cover Aluminum Magnesium Alloy Other...

Page 9: ...Do not use machinery in areas that are wet cluttered or have poor lighting Operating machinery in these areas greatly increases the risk of accidents and injury MENTAL ALERTNESS REQUIRED Full mental a...

Page 10: ...ake sure they are properly installed undamaged and working correctly BEFORE operating machine FORCING MACHINERY Do not force machine It will do the job safer and better at the rate for which it was de...

Page 11: ...could result in blade damage or breakage WORKPIECE MATERIAL This machine is designed to cut fresh and frozen meat and bones This machine is NOT designed to cut wood metal glass stone tile etc HAND PL...

Page 12: ...ower supply circuit that meets the specified circuit requirements This machine is prewired to operate on a power supply circuit that has a verified ground and meets the following requirements Serious...

Page 13: ...nd This machine MUST be grounded In the event of certain malfunctions or breakdowns grounding reduces the risk of electric shock by providing a path of least resistance for electric current This machi...

Page 14: ...lifting help or use power lifting equip ment such as a forklift to move heavy items The following items are needed but not included for the setup assembly of this machine Figure 4 Location of U brack...

Page 15: ...ances to the shop or disable start switch or power connection to prevent unsupervised use Figure 6 Minimum working clearances Cutting Path 221 2 31 18 18 Figure 5 Leveling machine with metal shim Foot...

Page 16: ...ower and fix the problem BEFORE operating the machine again The Troubleshooting table in the SERVICE section of this manual can help Figure 7 Top wheel blade guide and wiper Figure 8 Bottom wheel back...

Page 17: ...afety fea ture must work properly before proceed ing with regular operations Contact Tech Support for help 13 Press the red O button to reset machine then close wheel cover and secure Congratulations...

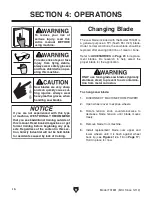
Page 18: ...Saw blades are very sharp and can quickly cause cut ting injuries Always wear heavy leather gloves when handling saw blades 16 Model T31681 Mfd Since 12 19 SECTION 4 OPERATIONS Changing Blade The saw...

Page 19: ...heel Model T31681 Mfd Since 12 19 17 6 Rotate blade tension knob until blade no lon ger moves freely 7 Verify blade teeth are facing down through table as shown in Figure 14 8 Verify blade is flush ag...

Page 20: ...xcessive feed rate hardness variations between workpieces and improper blade selection Over tensioning the blade increases the chance of the blade breaking or wheel misalignment Under tensioned blades...

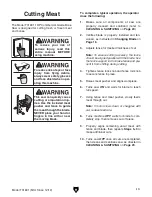
Page 21: ...ge 16 3 Adjusts fence for desired thickness of cut Note To ensure cutting accuracy the fence should be aligned parallel with the blade Use the fence support rod to brace fence and pre vent it from shi...

Page 22: ...s steel food processing equipment and always fol low the manufacturer s recommendations To prevent illness or death never use a product that will make the meat unsafe for human consumption Figure 17 U...

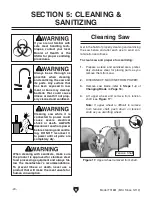
Page 23: ...nitizing at the same time because they use heat Place the parts that can fit inside the dishwasher and use the highest possible heat settings If it is an option use the dishwasher to dry parts with ho...

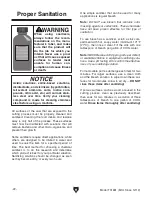
Page 24: ...best method for choosing a chemical sanitizer is to do the research and determine which product is best for your particular situation Sanitizing solutions should be changed as soon as they become dirt...

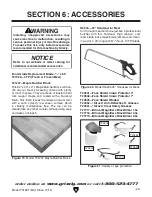
Page 25: ...tive S Glasses T20451 Kirova Clear Safety Glasses T27717 Bifocal Magnifiers Black Clear 1 5x T27718 Bifocal Magnifiers Black Clear 2 0x T27719 Bifocal Magnifiers Black Clear 2 5x Food Grade Replacemen...

Page 26: ...or optimum performance from this machine this maintenance schedule must be strictly followed Ongoing To minimize your risk of injury and maintain proper machine operation shut down the machine imme di...

Page 27: ...y 5 Fix broken wires or disconnected corroded connections Page 28 6 Replace switch 7 Test repair replace Machine stalls or is underpowered 1 Meat bone crooked during feed 2 Fence loose or misadjusted...

Page 28: ...loose 3 Feeding meat bone too fast 4 Incorrect blade for saw 1 Adjust blade tracking Page 17 2 Increase blade tension 3 Feed workpiece slower 4 Install correct blade Cuts are not straight and clean 1...

Page 29: ...y not match your machine If you find this to be the case use the wiring diagram inside the motor junction box CAPACITORS INVERTERS Some capacitors and power inverters store an electrical charge for up...

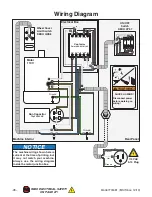
Page 30: ...acitor 75 F 300VAC Rear Panel Electrical Box Machine Interior To Plug 3 1 4 2 Ground Ground WARNING SHOCK HAZARD Disconnect power before working on wiring NOTICE The machine wiring shown here is curre...

Page 31: ...h wiring Figure 24 Wheel cover limit switch wiring Figure 22 Main electrical wiring Contactor Model T31681 Mfd Since 12 19 29 READ ELECTRICAL SAFETY ON PAGE 27 Electrical Components Contactor Capacito...

Page 32: ...77 or visit our online parts store at www grizzly com to check for availability 35 1 2 3 4 5 6 7 8 9 72 10 11 12 13 14 15 16 17 17 18 19 20 22 23 24 25 26 27 28 29 30 31 32 33 39 40 41 42 43 43 1 43 2...

Page 33: ...PH W CAPACITOR 43 1 PT31681043 1 MOTOR FAN COVER REF PART DESCRIPTION 43 2 PT31681043 2 MOTOR FAN 43 3 PT31681043 3 BALL BEARING 6203 2RZ 43 4 PT31681043 4 BALL BEARING 6203 2RZ 43 5 PT31681043 5 R C...

Page 34: ...sing this machine 1 Read and understand owner s manual before operating 2 Never touch moving blade keep hands out of blade path and never force the cut 3 Always wear approved eye protection 4 Clean an...

Page 35: ...ontingent special or consequential damages arising from the use of our products The manufacturers reserve the right to change specifications at any time because they constantly strive to achieve bette...

Page 36: ......

Reviews: