background image

OM-TDH/TDHC       7

The kettle should be installed in a ventilated room for efficient performance. Items which 

might obstruct or restrict the flow of air for combustion and ventilation must be removed. 

The area directly around the appliance must be cleared of any combustible material.

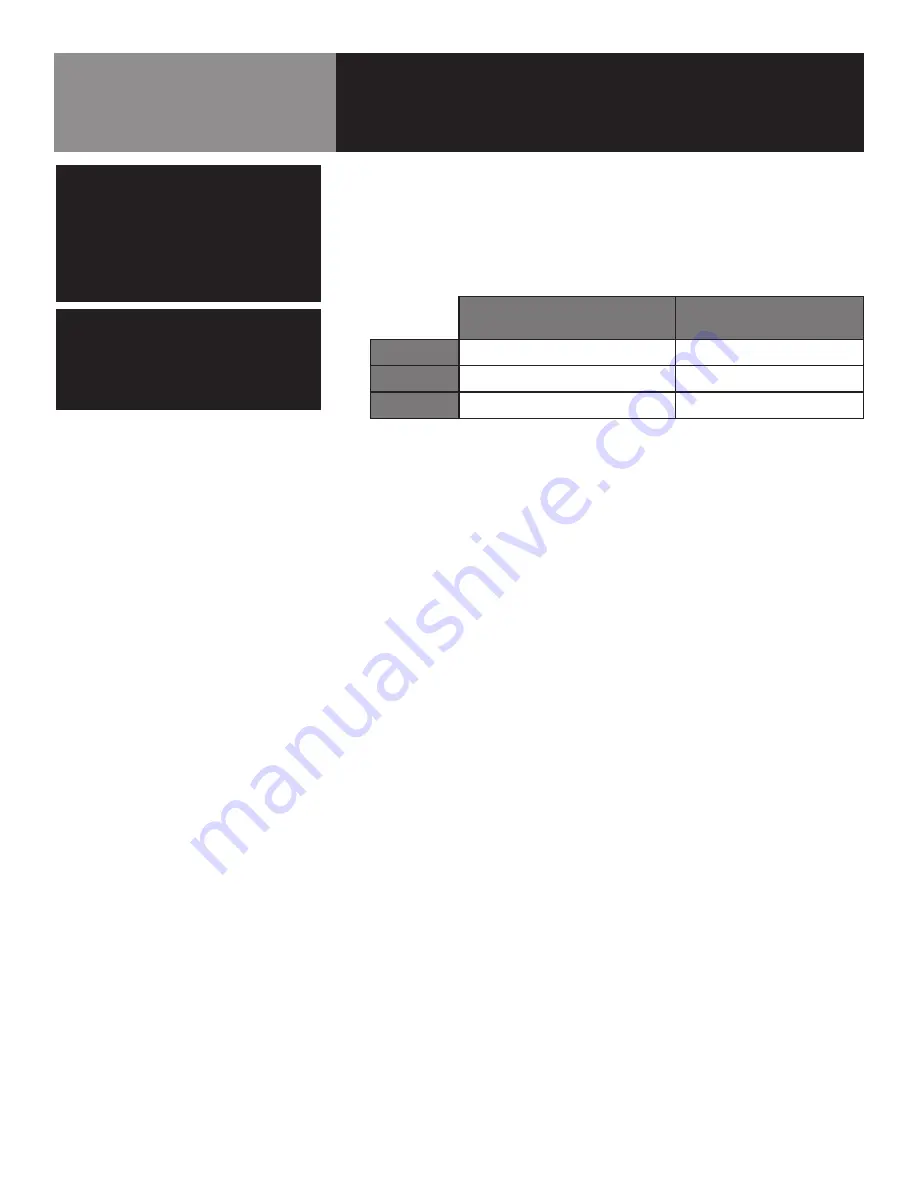
1.  Installation on combustible floors is allowed. Minimum clearances between the 

unit and combustible surfaces is as follows:

2.   We recommends installation of the unit under a vent hood. The base must be 

fastened to a working surface or stand.

3.   Complete the piping to the gas service main using ½ inch IPS pipe or an 

approved equivalent.

4.   Provide 115 VAC, 60 cycle, 1 phase, 1 AMP electric service. Local codes and/

or The National Electrical Code should be observed in accordance with ANSI/

NFPA-70 latest edition. AN ELECTRICAL GROUND IS REQUIRED. The electrical 

schematic is located on the inside of the service panel and in this manual.

5.   Electrical connection to the unit must be water resistant sealtite conduit type or 

equal and utilize the water resistant conduit fitting provided on the unit.

6.   The installation must conform with local codes or the American National 

Standards Z223.1 - latest edition National Fuel Gas Code. The kettle should be 

installed in an adequately ventilated room with provision for adequate air supply. 

The best ventilation will employ a vent hood and exhaust fan with no direct 

connection between the vent duct and the kettle flue. DO NOT obstruct the flue 

or vent duct after installation.

7.   PRESSURE TEST WARNING

a)   Test pressure exceeding ½ PSIG (3.45 kPa). During pressure testing of the 

gas supply piping system at pressures exceeding ½ PSIG, the appliance 

and its individual shutoff valve must be disconnected from the gas supply 

piping system.

b)   Test pressure equal to or less than ½ PSIG (3.45 kPa). During pressure 

testing of the gas supply piping system at pressures equal to or less than 

½ PSIG, the kettle must be isolated from the gas supply piping system by 

closing its individual manual shutoff valve.

Installation

WARNING

THE KETTLE MUST BE INSTALLED BY 

PERSONNEL QUALIFIED TO WORK WITH 

GAS, ELECTRICITY AND PLUMBING. 

IMPROPER INSTALLATION CAN CAUSE 

INJURY TO PERSONNEL AND/OR DAMAGE 

TO THE EQUIPMENT.

WARNING

THIS UNIT IS FOR COMMERCIAL USE. DO NOT

USE HOME OR RESIDENTIAL GRADE GAS

CONNECTIONS. THEY DO NOT MEET GAS 

CODES AND COULD BE HAZARDOUS.

Model

Minimum Clearance from

Combustible walls

Recommended

Clearances

Left Side

1 in.

1 in.

Right Side

0 in.

12-16 in. for servicing

Rear

1 in.

3 in. for faucet bracket

Summary of Contents for TDB 48A

Page 1: ...aintenance instructions thoroughly before installing or servicing this equipment NOTIFY CARRIER OF DAMAGE AT ONCE It is the responsibility of the consignee to inspect the container upon receipt of same and to determine the possibility of any damage including concealed damage Unified Brands suggests that if you are suspicious of damage to make a notation on the delivery receipt It will be the re sp...

Page 2: ...LOW CLEARANCE FOR STIRRING BOILING AND SAFE TRANSFER OF PRODUCT CAUTION KEEP FLOORS IN FRONT OF KETTLE WORK AREA CLEAN AND DRY IF SPILLS OCCUR CLEAN IMMEDIATELY TO AVOID SLIPS OR FALLS WARNING KEEP WATER AND SOLUTIONS OUT OF CONTROLS AND BURNERS NEVER USE A HIGH PRESSURE HOSE TO CLEAN KETTLE SURFACES CAUTION MOST CLEANERS ARE HARMFUL TO THE SKIN EYES MUCOUS MEMBRANES AND CLOTHING TAKE PRECAUTIONS ...

Page 3: ...T AND WILL VOID ALL WARRANTIES WARNING KEEP AREA AROUND KETTLE FREE AND CLEAR OF ALL COMBUSTIBLE MATERIALS FAILURE TO DO SO COULD RESULT IN FIRE OR PROPERTY DAMAGE CAUTION HEATING AN EMPTY KETTLE MAY CAUSE THE RELEASE OF STEAM FROM THE PRESSURE RELIEF VALVE IMPORTANT SERVICE PERFORMED BY OTHER THAN FACTORY AUTHORIZED PERSONNEL WILL VOID ALL WARRANTIES IMPORTANT READ FIRST IMPORTANT ...

Page 4: ... INTERNATIONAL 8501 East Pleasant Valley Road Cleveland Ohio 44131 NSF INTERNATIONAL 798 N Dixboro Rd P O Box 130140 Ann Arbor Michigan 48113 0140 UNDERWRITERS LABORATORIES INC 333 Pfingsten Road Northbrook Illinois 60062 KLENZADE SALES CENTER ECOLAB Inc 370 Wabasha St Paul Minnesota 55102 NATIONAL FIRE PROTECTION ASSOCIATION 60 Battery March Park Quincy Massachusetts 02269 NFPA 54 Installation Ga...

Page 5: ...the above with the exception of the crank tilt hand wheel The gas supply shuts off automatically when the kettle is tilted The unit must be specified for use with natural gas or propane For other gas types consult factory Service connections are required for gas and 115V electricity Options available include 1 One piece Lift off cover 2 Holder for Lift off Cover 3 Basket insert 4 Rice Strainer 5 S...

Page 6: ...ate for your unit at the top of the Service Log at the end of this manual Keep this manual with the unit To remove the kettle from the box cut any straps from around the box Detach the box sides from the skid Pull the box up off the unit taking care to avoid damage or injury from any staples left in the box walls When installation is to begin cut the straps holding the kettle on the skid and lift ...

Page 7: ...s Z223 1 latest edition National Fuel Gas Code The kettle should be installed in an adequately ventilated room with provision for adequate air supply The best ventilation will employ a vent hood and exhaust fan with no direct connection between the vent duct and the kettle flue DO NOT obstruct the flue or vent duct after installation 7 PRESSURE TEST WARNING a Test pressure exceeding PSIG 3 45 kPa ...

Page 8: ...nit is anchored to a mounting surface apply a small bead of silicone caulk around the perimeter of the kettle base and seal the joint 11 Make sure the water level is correct in the jacket by confirming that the level is near the middle of the sight glass If the water level is low follow the instructions in Jacket Filling and Water Treatment in the Maintenance section of this manual 12 Check to be ...

Page 9: ...as been installed the installer should test to ensure that it is operating correctly 1 Remove literature and packing materials from inside and outside of the unit 2 Add water to the kettle to a depth of at least one inch 3 Make sure the supplies of gas and electric power are on 4 Follow the To Start Kettle Heating instructions in the Operation section of this manual Begin heating the water at the ...

Page 10: ...ain gas valve and will cycle on and off once the unit reaches set temperature If the unit is tilted the main gas valve will be disabled and the light will turn off until the unit is returned to the cooking position e A LOW WATER indicator light located on the control console illuminates when the jacket water falls below acceptable levels When lit the main gas valve is disabled and will not functio...

Page 11: ...ill automatically change to the LOW TEMP setting and will continue at this setting until the user changes the tem perature via MANUAL or HIGH TEMP buttons b An audible alarm will notify the user that at tention is required the alarm will continue to sound until the user presses the TIMER button 3 An active timer can be cancelled by pressing and holding the TIMER button for 5 secs 4 Set temp can be...

Page 12: ...uct cook times and help maintain the temperature color and texture of products being held or simmered for extended periods b Make sure the plastic ball handle is secure on the lift off cover be fore using ALWAYS use the plastic handle to place or remove cover from the kettle Wear protective oven mitts and a protective apron c When putting the cover on the kettle position it on top of kettle rim wi...

Page 13: ...tle at the desired temperature This action is indicated by the Heat indicator light The kettle has the following safety features in addition to the 90 second ignition timer 1 Low water cutoff relay that will shut off gas supplies to all burners until the jacket water level is corrected 2 High limit pressure switch set to open at about 43 PSI and to shut down the burners until jacket pressure is de...

Page 14: ...o grow Do not use steel wool which will leave particles in the surface and cause eventual corro sion and pitting 7 The outside of the unit may be cleaned with a warm water 100 F or less spray Do not use a high pressure spray 8 The outside of the unit may be polished with a recognized stainless steel cleaner like Zepper from Zep Manufacturing Company CAUTION MOST CLEANERS ARE HARMFUL TO THE SKIN EY...

Page 15: ...it be sanitized just before use 11 Clean the kettle thoroughly If there is difficulty removing mineral de posits or a film left by hard water or food residues then use a de liming agent following manufacturer directions 12 Rinse and drain the unit thoroughly before further use 13 If especially difficult cleaning problems persist contact your cleaning product supplier for assistance The supplier ha...

Page 16: ...n release the ring and permit the valve to snap shut If the ring does not activate if there is no discharge or if the valve leaks stop using the kettle immediately and contact a authorized service representative C Grease Lubrication by Service Hand Tilt Models At least twice a year grease the two trunnion bearings The bearings are located within the kettle support housing Remove the access panels ...

Page 17: ...only distilled water 2 Hang a strip of pH test paper on the rim of the container with about 1 inch of the strip below the surface of the water 3 Stir the water continuously while you slowly add water treatment compound until a color between indicating a pH of 10 5 and 11 5 is reached Shown on the pH test kit chart Judge the pH by frequently comparing the test strip with the color chart provided in...

Page 18: ...hes the desired temperature User a Temperature controller dial setting Auth Service Rep Only b Temperature controller calibration and offsets X c Controller operation The Controller relay should click when the dial is rotated to settings above and below the temperature of the kettle X Safety Valve pops open User a For air in the jacket See Jacket Vacuum in the Maintenance section b Thermostat dial...

Page 19: ...d PV MV If 24V is not present replace the ignition control module X b That gas pressure is at least 3 5 W C 8 7818 b X c Electrical connections of the main valve to terminals to a sure that they are securely attached Check magnetic operator for pilot valve on gas valve Repair or replace as necessary X Pilot lights but main burner will not come on the spark stays on Auth Service Rep Only a Check fo...

Page 20: ...UAL SHUT OFF 098445 5 1 2 ALUMINUM KNOB 175095 6 1 VALVE 1 4 SWING CHECK 096915 7 1 GAUGE 084208 8 1 POWER SWITCH 174871 9 1 CONTROL CLASSIC 174843 10 1 VALVE PRESSURE RELIEF 097005 11 2 LIGHT AMBER 116384 12 1 ROTARY SHAFT SEAL 101145 13 1 SWITCH PRESSURE NOT SHOWN 096963 14 1 SHAFT HANDLE 018963 15 1 RING 1 2 012692 16 1 BALL RED 012691 17 1 ELECTRODE WATER LEVEL NOT SHOWN 074623 ...

Page 21: ... 175095 6 1 VALVE 1 4 SWING CHECK 096915 7 1 GAUGE 084208 8 1 POWER SWITCH 174871 9 1 CONTROL ADVANCED 174837 10 1 VALVE PRESSURE RELIEF 097005 11 2 LIGHT AMBER 116384 12 1 ROTARY SHAFT SEAL 101145 13 1 SWITCH PRESSURE NOT SHOWN 096963 14 1 SHAFT HANDLE 018963 15 1 RING 1 2 012692 16 1 BALL RED 012691 17 1 ELECTRODE WATER LEVEL NOT SHOWN 074623 Parts List For Advanced Control Models ...

Page 22: ...5 TUBE PILOT 135487 6 PILOT ORIFICE SPUD NATU RAL GAS 098648 6 PILOT ORIFICE SPUD PRO PANE GAS 098647 7 FITTING COMPRESSION 90 NOT SHOWN 004584 8 ORIFICE SEE TABLE BELOW Model of Orifices Natural Gas Propane Gas Altitude THD 20 TDHC 20 8 137758 137756 0 2000 ft TDH 24 TDHC 24 8 137758 137756 0 2000 ft TDH 40 TDHC 40 12 135543 137756 0 2000 ft TDH 48 TDHC 48 12 135543 137756 0 2000 ft ...

Page 23: ...05764 14 SCREW HED HD 1 4 20 X 1 2 005608 15 WASHER LOCK 1 4 005655 16 SCREWHEXHDCAP1 4 20X 1 1 2 005469 17 NUT HEXAGON KEPS 1 4 20 012940 18 PLATE SHROUD WELD ASM 137680 19 SEAL TRUNNION 137005 20 PLATE SHROUD WELD ASM 5 6 QT 137700 20 PLATE SHROUD WELD ASM 10 12 QT 137380 21 GASKET 3 8 THK X 1 2 WIDE 6 CENTER 137588 22 E RING 1 875 DIA 138357 23 FAUCET BRACKET 137738 24 GROMMET 7 8 ID X 1 5 8 OD...

Page 24: ...R LOCK 1 4 005655 16 SCREWHEXHDCAP1 4 20X 1 1 2 005649 17 NUT HEXAGON KEPS 1 4 20 012940 18 PLATE SHROUD WELD ASM 137680 19 SEAL TRUNNION 137005 20 PLATE SHROUD WELD ASM 5 6 QT 137700 20 PLATE SHROUD WELD ASM 10 12 QT 137380 21 GASKET 3 8 THK X 1 2 WIDE 6 CENTER 137588 22 E RING 1 875 DIA 138357 23 FAUCET BRACKET 137738 24 GROMMET 7 8 ID X 1 5 8 OD 007400 25 COVER CABINET 175309 26 SCREW 10 32 X 1...

Page 25: ...002989 3 STOP MANUAL TILT 137697 4 KEY 1 4 SQ X 5 LG 137746 5 COLLAR SET 1 1 2 ID X 2 1 4 OD X 3 4 THK 003118 6 SCREW HEX HD CAP 3 8 16 X 1 1 2 005615 7 WASHER FLAT 3 8 005830 8 NUT HEX 3 8 16 005619 9 NUT HEX 5 16 18 005602 10 SCREW SET SOCKET 086617 11 SCREW SET SOCKET 003400 12 SCREW HEX HD CAP 5 16 18 X 1 005613 ...

Page 26: ...8001 4 ASSEMBLY GEAR SECTOR 128028 5 ASSEMBLY BEARING BLOCK 128021 6 KEY 1 4 SQ X 1 LG 122371 7 RETAINING RING 1 500 124764 8 ASSEMBLY HANDWHEEL 124719 9 PIN ROLL 1 4 X 1 63 LG 128036 10 WASHER FLAT 3 8 005830 11 WASHER LOCK 3 8 005618 12 SCREW 3 8 16 X 1 HEX HD 005612 13 PIN ROLL 1 4 X 1 25 LG 012614 For Classic Advanced Control Models ...

Page 27: ...H 096963 2 1 RTD PROBE 175429 3 1 WATER LEVEL ELECTRODE 015589 4 1 BRACKET 137736 5 1 COVER NOT SHOWN 003141 6 1 GASKET BOTTOM COVER NOT SHOWN 137969 7 1 SCREW 1 4 20 X 1 1 2 NOT SHOWN 012597 8 1 GASKET BOTTOM COVER SCREW NOT SHOWN 137968 For Classic Advanced Control Models ...

Page 28: ...28 OM TDH TDHC Parts List Key Description Part No 1 GAUGE COMPOUND PRES SURE W DUAL 084208 2 VALVE PRESSURE RELIEF 50 PSI 097005 3 ASSY WATER FILL SUB 137438 4 ELBOW NPT 90 DEG STREET BLK 096905 ...

Page 29: ... 077854 7 1 FUSE THREE AMP TYPE 3 AG 077853 8 1 SCREW 6 32 X 3 8 LG FOR 6 009697 9 3 P C BOARD MOUNTING POST 099901 10 5 SCREW 8 X 3 8 LG HEX SLOT FOR 5 AND 17 069789 11 1 SCREW 8 32 X 1 1 4 RND HEAD FOR 4 005056 12 2 SCREW ROUND HEAD 4 40 X 3 4 LG FOR 3 003122 13 1 BARRIER INSULATION FOR 3 003490 14 2 WASHER SHAKEPROOF LOCK 6 FOR 3 005715 15 2 NUT HEX 4 40 FOR 3 003121 16 1 TRANSFORMER 20 VA 120V...

Page 30: ...54 6 1 FUSE THREE AMP TYPE 3 AG 077853 7 1 SCREW 6 32 X 3 8 LG FOR 6 009697 8 3 P C BOARD MOUNTING POST 099901 9 5 SCREW 8 X 3 8 LG HEX SLOT FOR 5 AND 17 069789 10 1 SCREW 8 32 X 1 1 4 RND HEAD FOR 4 005056 12 1 TRANSFORMER 20 VA 120V 137487 1 SCREW ROUND HEAD 4 40 X 3 4 LG FOR 3 003122 1 BARRIER INSULATION FOR 3 003490 1 WASHER SHAKEPROOF LOCK 6 FOR 3 005715 1 NUT HEX 4 40 FOR 3 003121 For Classi...

Page 31: ...OM TDH TDHC 31 Wiring Diagram For Classic Control Models ...

Page 32: ...32 OM TDH TDHC Wiring Diagram For Advanced Control Models ...

Page 33: ...OM TDH TDHC 33 Service Log Model No Purchased From Serial No Location Date Purchased Date Installed Purchase Order No For Service Call Date Maintenance Performed Performed By ...

Page 34: ...34 OM TDH TDHC ...

Page 35: ...OM TDH TDHC 35 ...

Page 36: ...36 OM TDH TDHC ...

Page 37: ... REV C 07 17 1055 Mendell Davis Drive Jackson MS 39272 888 994 7636 601 372 3903 Fax 888 864 7636 unifiedbrands net 2017 Unified Brands All Rights Reserved Unified Brands is a wholly owned subsidiary of Dover Corporation ...

Reviews: