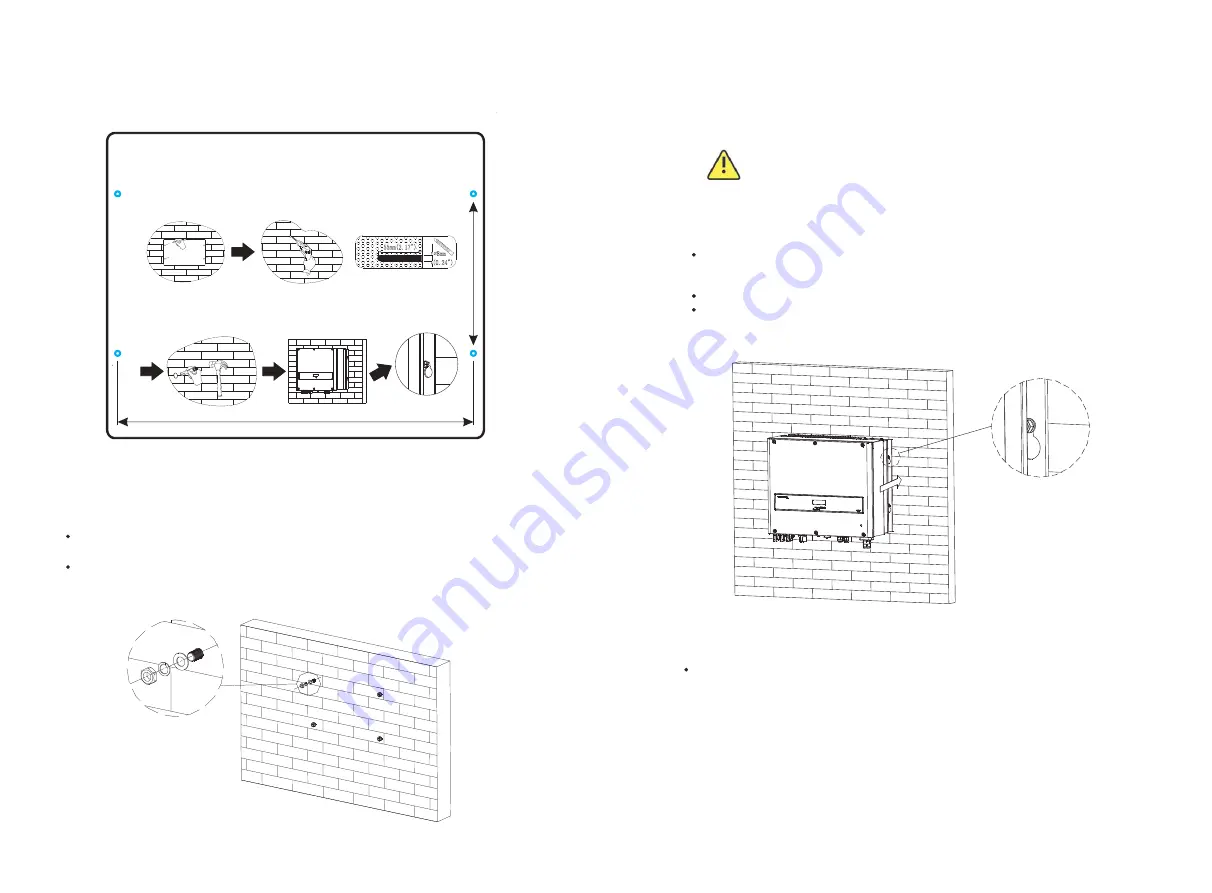
Hint: Data units in mm
Steps:
Drill four holes for expansion bolt use the Fix Hole Paper as template.
Fix the mounting expansion bolt on the wall as the figures shown below, combine
four expansion bolt with four M6 nuts. Refer to Fig 5.4.
Fig5.3
15
16
Fig5.4
5.3.2 Mounting Inverter
WARNING
Falling equipment can cause serious or even fatal injury, never
mount the inverter on the bracket unless you are sure that the
mounting frame is really firmly mounted on the wall after carefully
checking.
After expansion bolt is firmly mounted on the wall, then mount the inverter on
expansion bolt.
Rise up the inverter a little higher than expansion bolt. Considering the weight of
inverter, you need to hang on the inverter. During the process please maintain
the balance of the TL3-S.
Hang the inverter on the expansion bolt.
After confirming the inverter is stuck on expansion bolt, fasten four M6 screws.
Refer to Fig 5.5.
Fig5.5
Connection of a second protective conductor
In some installation countries, a second protective conductor is required to
prevent a touch current in
the event of a malfunction in the original protective conductor.
For installation countries falling within the scope of validity of the IEC standard
62109, you must install
the protective conductor on the AC terminal with a conductor cross-section of at
least 10 mm²Cu.
Or Install a second protective conductor on the earth terminal with the same cross-
section as the original
protective conductor on the AC terminal. This prevents touch current if the
original protective conductor fails.
Installation Guide
1.
Please make sure that the thickness of the wall for inverter installation
is more than 60mm
;
2.
3
.
4
.
Please place the bitmap horizontally on the wall and confirm the level
by level;
Please mark the holes in the 4 mounting holes of hole pattern;
Drill a hole with a depth of 55mm at the mark with a drill of
φ
8mm;
5.
6
.
Please
hang
the
inverter on the expansion bolt and tighten the nut
with a wrench.
Please expand the bolt with a hammer into the hole in the wall and
install the nut(including elastic flat pad), do not tighten the nut.
2
0
0
m
m
(
7
.
8
7
in
c
h
)
446mm
(
17.56inch
)


