K. Do not install inverter close to strong electromagnetic signal.
L. Install the inverter out of children's reach.
5.2
Installation Environment Requirements
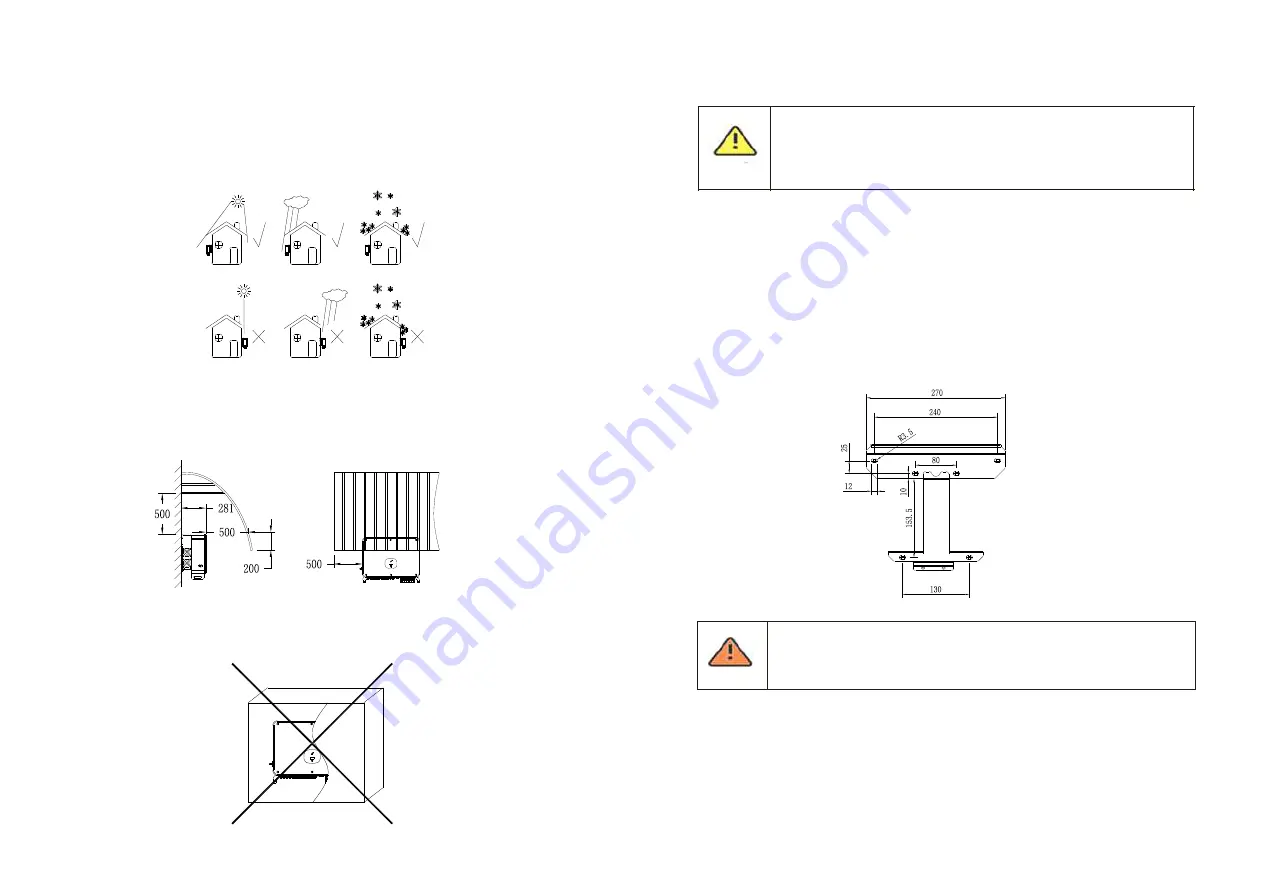
A.Although the inverter's protection level is IP 65, to extent inverter lifespan you still
need to avoid rain and snow, please refer to following drawings.
Figure
5
.
3
B.To reduce the de-rate performance of the inverter and extend inverter's life span, we
strongly recommend you install an awning, for the distance between an awning and
inverter, please refer to following drawing.
Figure
5
.
4
Figure
5
.
5
Figure
5
.
6
D.Do not install inverter into an enclosed space like following drawing
:
12
11
5.3
Moving Requirements
●
The inverter is heavy, please move it with care and keep balance to avoid
personnel injury.
●
Do not place the inverter with its wiring and signal terminals at the
bottom contacting with floor or any other object because the terminals
are not designed to support the weight of inverter.
1>2-3 people put their hands into the package, lift the inverter out of the package, and
move to the designated installation location.
2>When you are moving the inverter, please keep the balance.
Notice:
There is front and bottom mark on the package.
5
.
4
Wall Mount Bracket Installation
Before install the inverter you need install the wall mount bracket so that the inverter can
be firmly installed on the wall.
Wall mount plane drawing
:
Steps:
1>Use the wall mount plate as a template drill holes on the wall and put in expansion
bolts.
2>Follow the following drawing put the bolt to install the wall mount plate on the wall.
To avoid electric shock or other damage, be sure to check the wall for
power lines or other piping before opening the wall.
WARNING
DANGER


