GROWSPAN
™
ROUND COLD FRAMES
13
Revision date: 01.01.16
COVER INSTALLATION (CONTINUED)
Install the Cover Film
After all of the poly latch U-channel is attached to the
shelter, the cover film is unpacked and pulled into place.
Assistants positioned inside the frame along the length of
the film edge can help when pulling the film into place. In
some instances, ropes or straps are used to pull the cover
film onto the frame depending on the length of the cover
and the width of the frame.
WARNING:
To prevent damage to the cover and to
prevent serious personal injury, DO NOT attempt to
install the main cover on windy or stormy days.
Continue with the steps that follow.
1. Unpack the cover film and position it at the base along
one side of the frame.
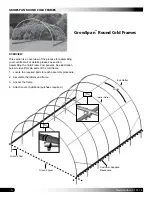
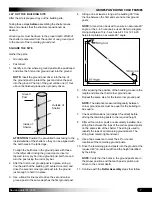
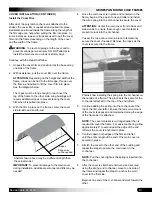
2. With assistance, pull the cover film over the frame.
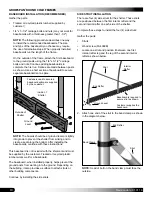
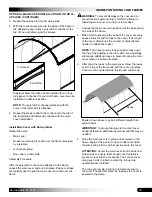
ATTENTION:
Depending on the height and width of the
frame, ropes can be tied to the film edge, thrown over
the frame, and pulled to lift the cover film into place.
See the diagram below.
The ropes must be long enough to reach over the
top of the frame to the other side. Long buildings will
require additional ropes to prevent tearing the cover
film when it is pulled into place.
3. With the film in place on the frame, center the cover
side-to-side and end-to-end.
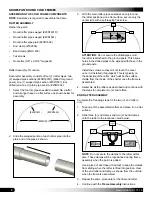
4. Once the main cover is in place and centered on the
frame, begin at the peak of one end rafter and install
the wire spring into the U-channel to secure the cover.
ATTENTION:
Center the main cover front to back and
side-to-side to ensure that enough cover material is
present to lock into the U-channel.
If used, the rope can remain in place to temporarily
secure the cover if needed. Remove the ropes as the
cover is secured to the frame.
IMPORTANT:
To prevent damage to the main cover
during installation, additional personnel and lifts may be
needed.
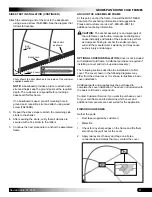
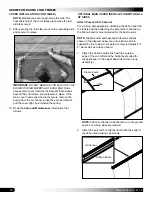
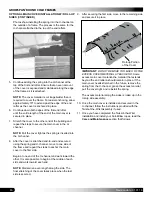
Photos show installing the spring into the U-channel on
the outside of a frame. The process is the same for the
U-channel attached to the top of the end rafters.
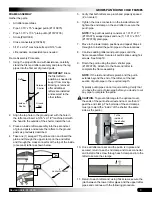
5. Continue adding the spring into the U-channel at the
top of the first end rafter. Ensure that an even amount
of the cover is exposed and maintained along the edge
of the frame as it is attached.
NOTE:
The cover material is cut longer/wider than is
required to cover the frame. For easier anchoring, allow
approximately 8" to extend past the edge of the end
rafter as the cover is anchored in place.
6. Continue down both edges of the first end rafter
until the entire length of the end of the main cover is
secured in place.
7. Stretch the cover to the other end of the building and
repeat the steps to secure the main cover in the
U-channel.
NOTE:
Pull the cover tight as the spring is inserted into
the U-channel.
8. After the cover is stretched end-to-end and secured
using the spring and U-channel, move to one side of
the frame and repeat the steps to anchor the main
cover to the first side.
Begin at one end of the U-channel and work toward the
other.
Ropes
Shelter shown above may be a different length than
the actual model.
Ropes may
not be needed.


