GROWSPAN
™
GOTHIC COLD FRAMES
14
Revision date: 01.01.16
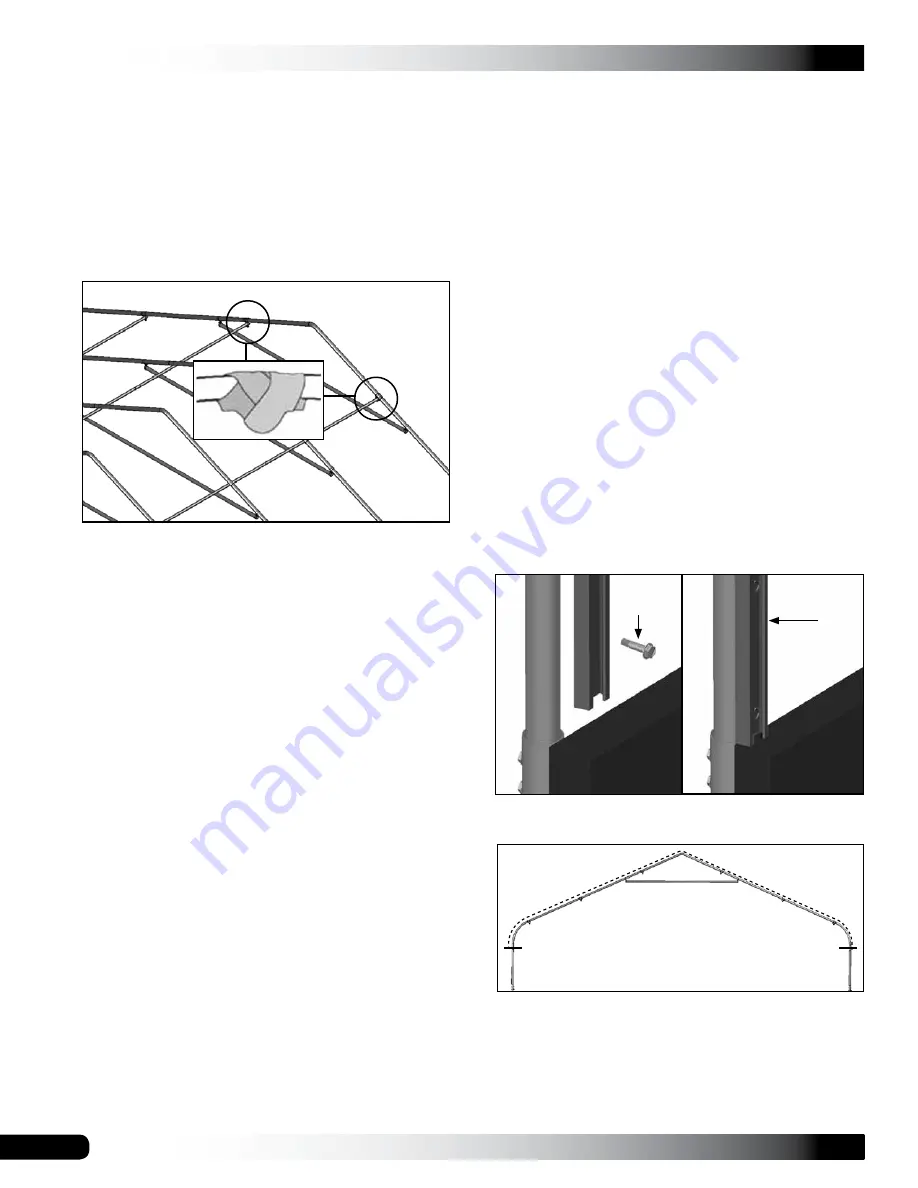
FINISH ROUGH EDGES
Gather the parts:
• Duct tape (supplied by customer)
• Metal file
1. Check for any sharp edges on the frame and file them
smooth so they will not cut the cover.
2. Apply two layers of heavy duct tape on all pipe
connections and clamps that may contact the cover.
OPTIONAL COVER INSTALLATION
(Cover is not included
with standard cold frame. Additional purchase is required if
installing a cover and/or roll-up side accessory.)
The following sections describe the installation of a film
cover. The cover shown in the following diagrams may
differ from the actual cover. It is shown to illustrate a basic
cover installation.
Additional parts and supplies must be purchased to
complete the cover installation.
These are not included with
the basic cold frame components.
Contact Customer Service if you want to purchase a cover
for your cold frame and to determine which cover and
additional components are best suited for the application.
OPTIONAL MAIN COVER INSTALLATION
After the frame is assembled and the baseboards are
attached to the frame, the optional cover can be installed.
The steps to install the main cover include:
1. Install poly latch U-channel on the tops of the end
rafters and to the baseboard.
2. Pull cover over the shelter.
3. Attach the main cover to one peak, stretch to the other
peak and secure with poly latch spring.
4. Stretch the cover along one side and attach.
5. Stretch to other side and attach.
Install Poly Latch U-Channel for Main Cover (No Roll-
Up Sides)
NOTE:
If you are installing a film cover and intend to
have the optional roll-up sides for that film cover, skip this
procedure and continue with the
OPTIONAL MAIN COVER
INSTALLATION WITH ROLL-UP SIDES
procedure.
1. Using Tek screws, attach a section of the poly latch
U-channel (#102179) to the top of the first end rafter.
Begin at the
top of the baseboard
as shown below.
2. Continue to attach the U-channel sections working up
and over the first end rafter.
Tek screw
U-Channel
ATTENTION:
The U-channel is attached to the top of
the rafter and will bend with the curve of the rafter as it
is attached. See diagram that follows.
Frame shown may differ slightly from actual frame.
End Rafters Only
Dashed line represents the U-channel.


