7
Revision date: 08.27.19 113466_67_68HBC
on-center
on-center
on-center
on-center
Set Ground Posts
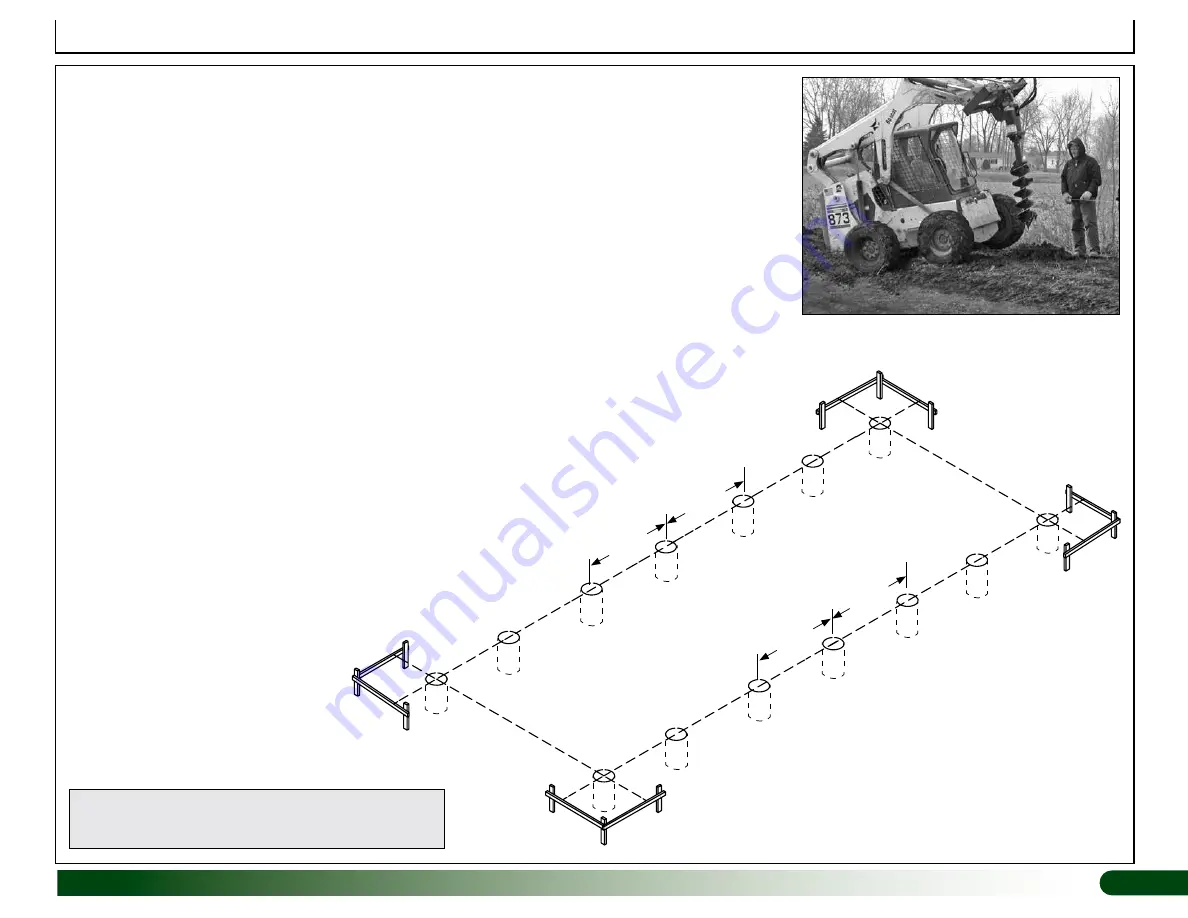
Drawing may show layout of a different length. Refer to
Quick Start section located at back of these instructions for
on-center measurements and post layout for your frame.
MARK SITE AND DIG POST HOLES FOR CONCRETE
These steps describe marking all ground post locations and digging holes. For some sites, it may not be
possible to complete the procedure in this manner. An alternative procedure such as working from one end
of the building toward the other may be necessary. Determine the best procedure based on site and other
factors and proceed as needed.
NOTE:
Refer to Quick Start Section located near the back of these instructions for Side Profile and
related diagrams
.
If you are not setting ground posts in concrete and are anchoring frame as described in the MUST
READ document, do not auger holes for ground posts. Instead, follow the steps to mark ground
post locations and drive posts into the ground at those locations. See information below and on
next page.
Complete these steps:
1. Stake building outline using string line and batter boards. Set batter boards 3' back from the
building corners. Check to ensure that building layout is square. Cover or panels (if equipped)
will not install properly if frame is not square once assembled.
2. Consult diagrams in Quick Start section to verify frame length and width dimensions and to
accurately position ground posts.
3. Guided by string line, use a flag or stake to mark each ground post hole location.
4. Move string line and dig a post hole a minimum of two
feet (2') deep
or to a depth that is
below geographic frost
line.
Consult local building codes. A power auger works
best.
Minimum hole diameter is 12"
.
5. After digging all holes, reattach string line to batter
boards and use it as a guide to set and align ground
posts.


