21
Revision date: 12.30.16
Diagonal Cable Installation
In addition to the end bay sidewall diagonal cables, this frame includes mid bay roof diagonal cable assemblies.
Consult the frame connection diagrams in the Quick Start section near the back of this guide for all connection details.
See Cable Assembly table on Page 19 (and in Quick Start section) for cable part number.
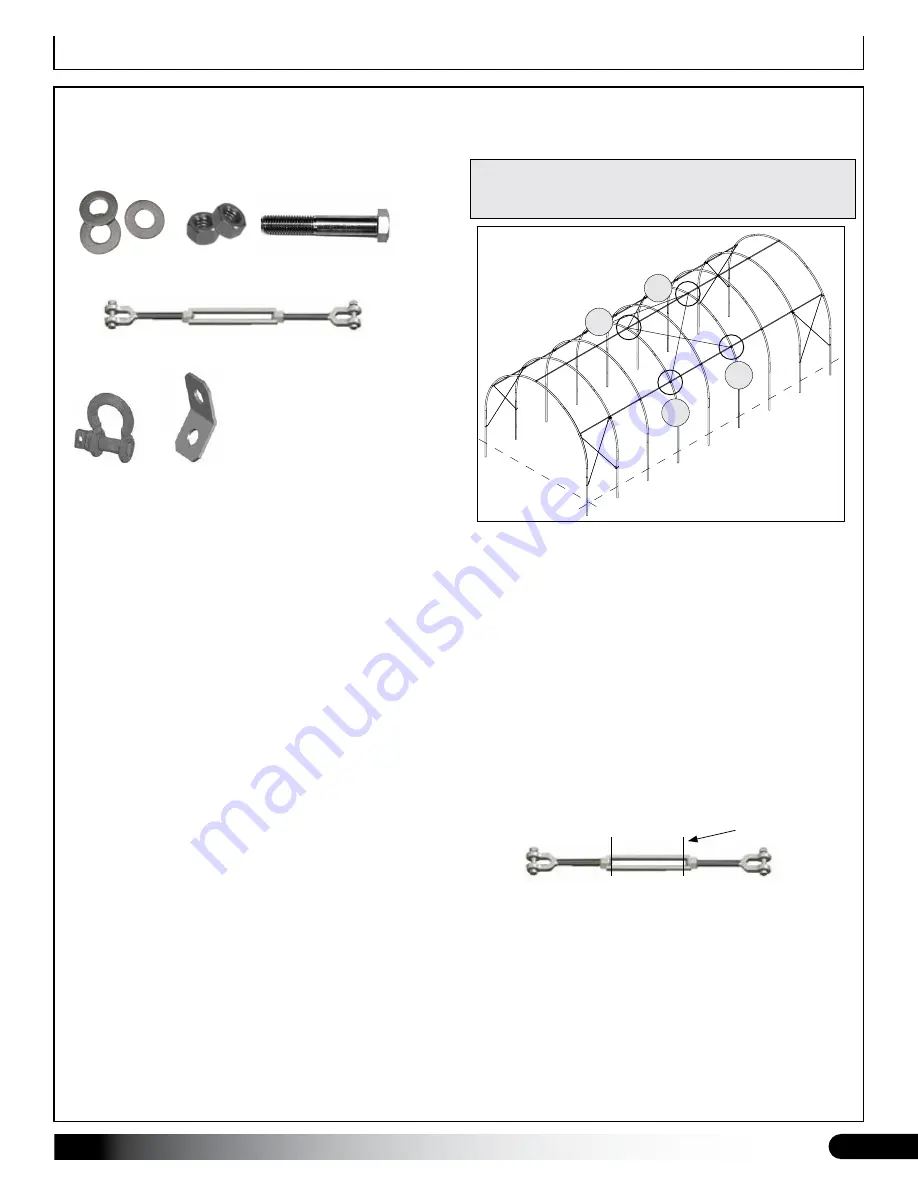
PROCEDURE 1: INSTALL 108503 CABLE BRACKETS
Unlike end bay sidewall diagonal cables, mid bay roof
cables attach to a 108503 angled bracket secured to
the rafter using a bolt and nut.
Read and understand
the following conditions before installing the 108503
brackets.
Review connection details and Side Profile
diagram for your building length in Quick Start section.
Install all 108503 cable brackets once positions are
determined.
•
No Optional Ridge Vent:
If no ridge vent is present,
secure two (2) 108503 brackets — there will be
two per through-bolt connection (A) — using the
fasteners noted above. Use the pre-drilled hole at the
rafter peak.
•
Optional Ridge Vent present:
If a ridge vent is
present, attach the 108503 cable brackets using the
threaded rod for the ridge vent arms in the two (2)
mid bay (A) locations.
•
No Rafter Support Kit (See Page 11):
If no rafter
support components are installed at the rafter
where cable bracket is attached (B), secure 108503
brackets to the rafter using the fasteners noted
above. Use the predrilled hole in rafter. Each (B)
location will have one (1) 108503 bracket attached.
•
Rafter Support Kit Installed (See Page 11):
If rafter
support kit components are installed, loosen nut and
bolt at each (B) location, add the 108503 bracket,
and reinstall and tighten nut.
A
A
B
B
ATTENTION:
The B locations are identical on opposite
side of frame (not shown) on same two rafters.
AS2167
Anchor
Shackle
104189 Turnbuckle
108503
Cable
Bracket
FAME18B
3/8" Washers
FALB04B
3/8" Nuts
FAG365B
3/8" x 3-1/2" Bolt
PROCEDURE 2: ATTACH MID BAY CABLES
Complete these steps to attach mid bay diagonal cables
to the installed 108503 angled cable brackets:
1. Consult table on Page 19 for cable part number.
Verify on-center rafter spacing to ensure correct
cable is selected.
2. Attach an AS2167 shackle to one end of the cable.
3. Fully open a turnbuckle and attach it to the free
end of the cable opposite the shackle.
Threads of
threaded jaw should remain fully in turnbuckle body
when properly opened. See below.
4. Move to the frame and attach cable end with shackle
to upper 108503 bracket secured to rafter (A) above.
5. Take cable end with turnbuckle and attach turnbuckle
to lower 108503 bracket (B).
6. Repeat Steps 2-5 to construct and install the three
(3) remaining mid bay roof cable assemblies.
7. Return to all turnbuckles and hand-tighten until snug
to remove all slack.
8. Continue with the next procedure.
IMPORTANT:
Review all connection detail diagrams
in the Quick Start section to better understand how to
install these cable assemblies and 108503 brackets.
PARTS TO ASSEMBLE AND INSTALL MID BAY CABLES
Body
End of Rod


