GROWSPAN
™
GOTHIC PREMIUM HIGH TUNNELS
18
108179_80_81_82_83_84H Revision date: 01.08.21
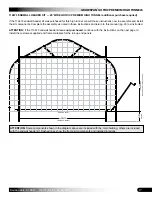
ROLL-UP PANEL INSTALLATION (QED108181)
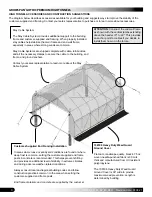
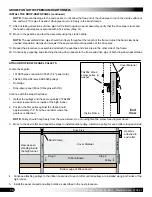
Before attaching the guide posts, attach each roll-up
panel to the customer-supplied end framing (4" x 4") using
FA4652 wood screws and neo-bonded washers. Complete
these steps to install the roll-up door panel conduit and
hardware.
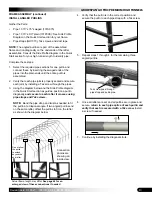
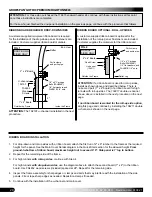
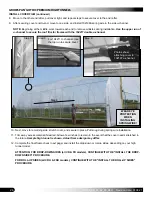
1. Take one roll-up door panel, move to one end of the
frame, and unfold the panel.
2. With assistance, lift and center the panel into position
against the 4" x 4" end frame and attach the top to the
header using wood screws and neo-bonded washers.
NOTE:
Verify that the lower edge of the panel is on the
ground before securing the upper edge to the header.
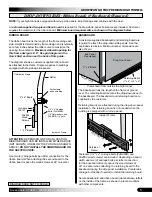
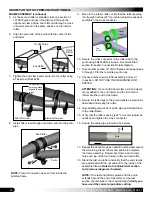
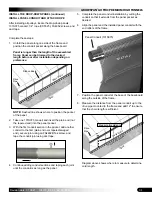
3. Refer to the End Framing diagram located in the Quick
Start section to assemble the guide posts. Secure each
pipe joint using a Tek screw.
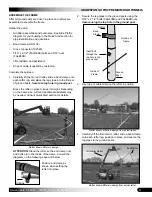
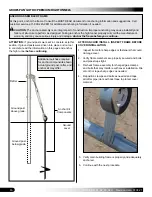
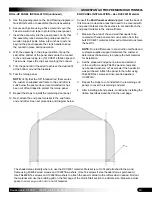
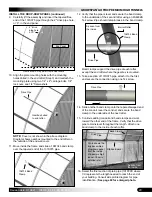
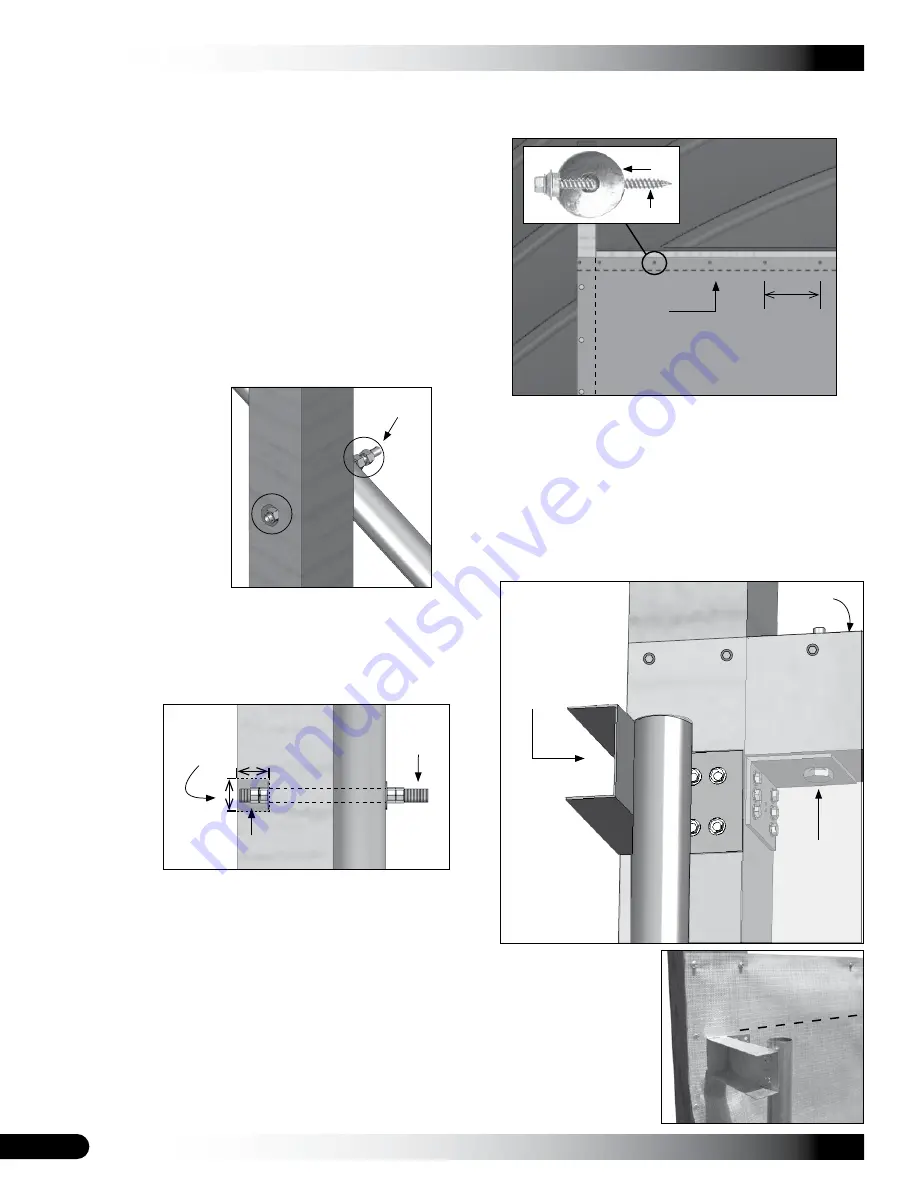
4. Install the guide posts and brackets over the
roll-
up door panel.
Use FA4652 wood screws to secure
brackets to the customer-supplied wood posts.
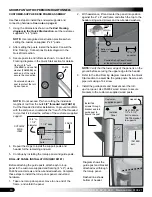
CUSTOMER-SUPPLIED END FRAME ASSEMBLY
Use these steps to install the end wall supports and
connecting hardware.
See note on page 8.
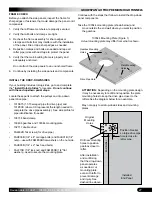
1. Using the dimensions shown on the
End Framing
diagram in the Quick Start section
, set the customer-
supplied 4" x 4" posts.
NOTE:
Use recognized construction practices when
setting the customer-supplied 4" x 4" posts.
2. After setting the posts, install the header. Consult the
End Framing - Connections Details diagram in the
Quick Start section.
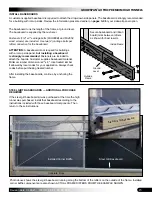
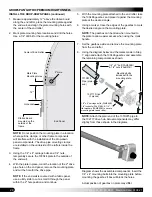
3. Secure posts to end rafters as shown. Consult End
Framing diagrams in the Quick Start section for details.
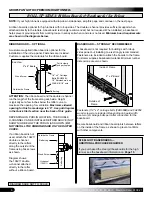
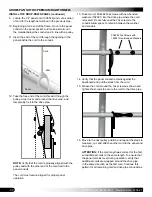
NOTE:
Do not exceed 8" when cutting the individual
lengths of rod from the bulk
3/8" threaded rod (FAK16)
.
Cut the threaded rod after installation.
To prevent conflicts
with the end panel, countersink the "head" of the threaded
rod so that it is below the surface of the customer-supplied
support.
4. Repeat the steps to install the support posts and
header for the remaining end wall.
5. Continue by installing the roll-up panel and guide posts.
Use two 3/8" nuts
(FALB04B) and one flat
washer (FAME08B) on
each end of the rod to
secure the connection.
Countersink holes in
post to protect the roll-
up door panel.
FAK16
1 1/4" deep
1 3/8" to
1 1/2"
diameter
CUTAWAY
SIDE
VIEW
Countersunk
hole
FAK16
Install Tek
screws through
bracket and into
guide post to
secure the post.
Customer-
supplied support
Use 104188B
1/2" x 5 1/2"
bolt to secure
106755 bracket
to supports.
104188B
bolt
Header
Diagram shows the
guide post and bracket
attached over/through
the roll-up panel.
Dashed line shows
bottom of header.
Position Roll-up Panel Pocket
at the bottom of the end panel.
Bottom of the
header.
102921
FA4652
10" to 12"
on-center
Installed
Panel

