10
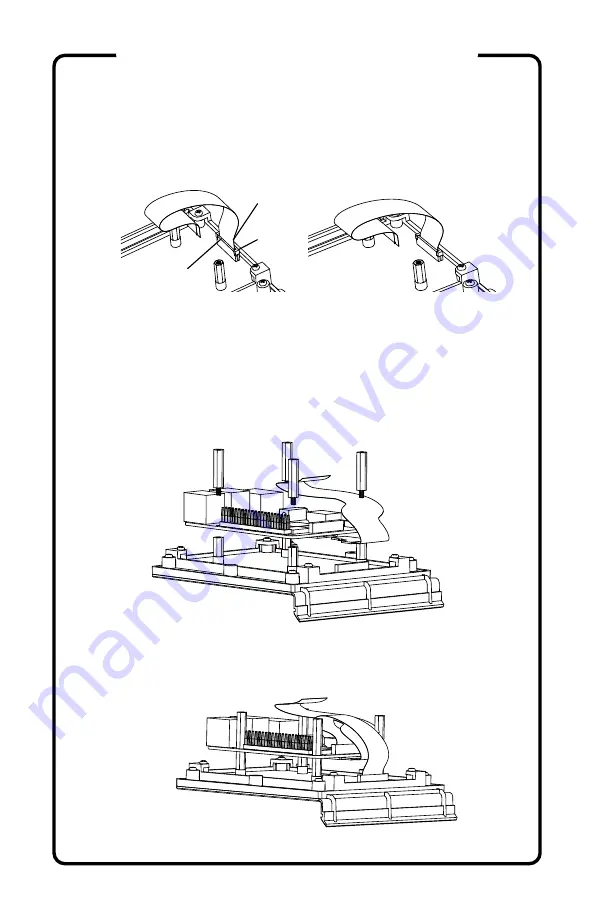
8) Gently lift up the latch on the SCREEN DSI connector,
insert the DSI RIBBON CABLE (W6) with the blue side
facing towards the top, then press down on the latch to
secure it in place.
9) Insert the MicroSD card extension cable (L2) into the
Raspberry Pi™ and secure the Pi to the screen using 4 -
20mm stand-offs (S2). If using the optional cooling fan,
install it now using the included mounting screws instead.
Using stand-offs as mounting screws makes it easy to
remove and reinstall the Raspberry Pi™ when needed.
blue side
latch
metal contacts
(continued)
ASSEMBLY INSTRUCTIONS
10) Connect the DSI RIBBON CABLE (W6) from the
SCREEN to the DSI connector on the Raspberry Pi™
following the directions above in step 8.
Summary of Contents for BUILD-A-CADE
Page 1: ...grs Instruction Manual grs grs build A cAde build A cAde tsticks...
Page 2: ......
Page 34: ...32 NOTES...
Page 35: ......
Page 36: ...Designed by...


