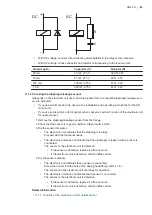
AC
DC
+
-
R
C
•
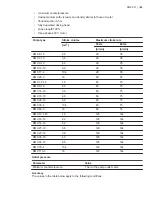
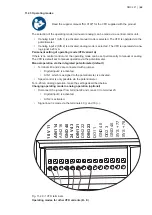
With DC voltage, connect a free-wheeling diode parallel to the relay or the contactor.
•
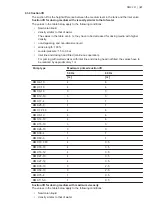
With AC voltage, choose capacitor and resistor corresponding to the input current:
Current up to ...
Capacitor (C)
Resistor (R)
60 mA
10 mF, 275 V
390 Ω, 2 W
70 mA
47 mF, 275 V
22 Ω, 2 W
150 mA
100 mF, 275 V
47 Ω, 2 W
1.0 A
220 mF, 275 V
47 Ω, 2 W
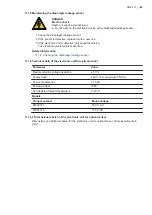
11.1.4 Checking the diaphragm leakage sensor
It depends on the electronic unit used, how the signals from a connected diaphragm leakage sen-
sor are indicated.
•
If you use an AR control unit, observe the installation and operating instructions for the AR
control unit.
•
If you use an electronic unit for optical sensor, observe section Function of the electronic unit
for optical sensor.
1. Remove the diaphragm leakage sensor from the flange.
2. Check that the sensor is in good condition. Clean it with a cloth.
3. Dip the sensor into water.
•
The electronic unit indicates that the diaphragm is leaky:
Proceed with the functional check.
•
The electronic unit does not indicate that the diaphragm is leaky or that a sensor is
connected:
The sensor or the electronic unit is defective:
•
If the sensor is defective, replace it with a new one.
•
If the electronic unit is defective, call Grundfos service.
4. Dry the sensor carefully.
•
The electronic unit indicates that a sensor is connected:
Screw the sensor into the hole of the dosing head flange (M14 x 1.5).
The sensor and the electronic unit are ready for operation.
•
The electronic unit does not indicate that a sensor is connected:
The sensor or the electronic unit is defective:
•
If the sensor is defective, replace it with a new one.
•
If the electronic unit is defective, call Grundfos service.
Related information
• 11.1.1 Function of the electronic unit for optical sensor
DMX 221 | |
59

