Allgemeiner T
eil / Gener
al Section
CD 21 /
CD 22
1 - 8
GR
UNDIG
Ser
vice
Operating Hints
This chapter contains excerpts from the operating instructions. For further particulars please refer to the appropriate user instructions the part number of which is indicated in the relevant
spare parts list.
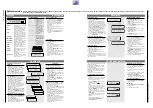
Display
PAUSE
– Lights up when play is interrupted.
{
– Lights up when the player receives a
command from the remote control.
TRACK
– Indicates what track is being
played; the number of tracks on the
CD or in a programme.
PEAK
– Flashes when the loudest passage
(peak) on a CD or in a programme
is being searched.
Lights up when the loudest passage
(peak) has been found.
TRACK TIME
– Indicates the elapsed playing time
of the track being played.
REM TRACK TIME
– Indicates the remaining playing
time of the track being played.
TOTAL REM TIME
– Indicates the remaining playing
time of the CD or a programme.
TOTAL TIME
– Indicates the total playing time of
the CD or a programme.
REPEAT
– Lights up when you repeat a CD or
a programme.
REPEAT 1
– Lights up when you repeat a track.
SHUFFLE
– Lights up when the tracks are
played in random order.
PROGRAM
– Flashes when a programme is
being compiled.
Lights up when a programme has
been stored in the player memory.
1-15
– Shows the number of tracks on the CD
+
– Lights up when there are more than
15 tracks on the CD.
1
2
3
4
5
6
7
8
9
10
11
12
13
14
15
+
PEAK TOTAL
REM
TRACK
TIME
REPEAT 1
PAUSE
SHUFFLE
TRACK
PROGRAM
DISPLAY
OPERATION
Switching on and off
• When you want to switch your CD player on,
press the
POWER
button. The yellow light in
the middle of the button indicates that the unit
is on.
button depressed: POWER ON
button not depressed: POWER OFF
– If you have not inserted a CD, the display
shows
no
DISC
.
– After the unit has been switched on, it is
always in the STOP mode.
• When you want to switch the unit off, simply
press the
POWER
button again.
Inserting a CD
• Open the CD compartment by pressing
/
OPEN/CLOSE
.
–
OPEN
lights up.
• Insert the CD so that the printed side of the
disc is facing up.
• Place CD singles (8 cm) in the depression in
the compartment.
• Press
/
OPEN/CLOSE
again. The
compartment closes.
–
CLOSE
lights up, followed by
READ
.
The number of tracks and the playing time of
the CD are shown on the display.
You can also close the CD compartment by
pressing its front; playback will then start
automatically.
Display messages
READ
– Lights up when the CD's
contents list is being
scanned.
no
DISC
– Lights up when there is
no CD in the CD
compartment.
NO AUDIO DISC
– Scrolls on the display
when insert a non audio
CD (CD-ROM, CD-I or
CDV).
WRONG TRACK
– Scrolls on the display if
you select a non-existent
track number.
GO TO PLAY
– Scrolls on the display if
you try to activate a
function for which you
must first start play.
GO TO STOP
– Scrolls on the display if
you try to activate a
function for which you
must first stop play.
1
2
3
4
5
6
7
8
9
10
11
TOTAL
TIME
TRACK
12 cm
8 cm
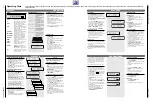
CD playback
• Press
2
PLAY/REPLAY
to start playback.
– The display shows the number of the track
being played as well as the elapsed playing
time (relative playing time).
– The number indicator shows how many tracks
are on the CD; when a track has been played
its number disappears.
• If you press
2
PLAY/REPLAY
again, the
running track will be restarted (REPLAY function).
• If you want to interrupt playback without
changing the unit settings, press
PAUSE
.
• If you want to continue with playback, press
PAUSE
or
2
PLAY/REPLAY
once more.
• To stop playback, press
9
STOP/CLEAR
.
Next/previous track
• By briefly pressing
T
you can skip to the
beginning of the next track in the track
sequence, and by pressing
S
you can skip
to the beginning of the preceding track.
• While in STOP mode you can select a certain
track.
– Playback begins immediately.
Fast search
• By keeping
S
or
T
pressed, you activate
the fast search in the corresponding direction.
The searching speed is determined by how long
a key is pressed:
– the first 2 seconds fairly slowly, with sound;
– then at the maximum speed, with no sound.
If you reach the end of the last track and release
T
, play will resume a few seconds before the
end of the CD.
PLAYBACK
1
2
4
5
7
8
9
11
12
TRACK
TIME
SHUFFLE
TRACK
6
7
8
9
10
11
12
TRACK
TIME
TRACK
6
7
8
9
10
11
12
TRACK
TIME
REPEAT
TRACK
6
7
8
9
10
11
12
TRACK
TIME
REPEAT 1
TRACK
3
4
5
6
7
8
9
10
11
12
3
4
5
6
7
8
9
10
11
12
TRACK
TIME
TRACK
REPEAT function
Repeating a track:
• Press
REPEAT
before or during play.
– REPEAT 1 lights up; the track will now be
repeated continuously.
• Press
REPEAT
twice to stop the track being
repeated.
Repeating the CD:
• Press
REPEAT
twice before or during play.
– REPEAT lights up;
the CD will now be
repeated
continuously.
• Press
REPEAT
again to stop the CD being
repeated.
SHUFFLE function
• By pressing
SHUFFLE
you activate the shuffle
function which mixes up the order of the CD
tracks. A random number generator selects the
order of the tracks to be played.
– All operating functions continue to function as
during normal playback.
– With the
S T
buttons you can select
next or previous random tracks.
– The track grid shows which tracks on the CD
are still to be played.
• The function is deactivated by pressing
9
STOP/CLEAR
,
/
OPEN/CLOSE
or
SHUFFLE
; in this last case the remaining tracks
are played in their normal order.
• The shuffle function can also be used together
with the repeat function.
PLAYBACK
Calling up other information (INFO)
• Press
INFO
whenever you want to know the
remaining playing time of the track being
played (REM TRACK TIME).
• Press
INFO
again if you wish to know the
remaining playing time of the entire CD
(TOTAL REM TIME).
• Press
INFO
again if you wish to return to the
elapsed playing time indication of the current
track (TRACK TIME).
Searching the loudest passage
(PEAK SEARCH)
•
In STOP mode, press
PEAK SEARCH
.
– PEAK starts flashing and the CD or the
programme will now be scanned for the
loudest passage (the peak).
– The display shows the track being scanned
and its elapsed playing time.
– When the loudest passage has been found it
will be repeated continuously (from 2 seconds
before the peak until 2 seconds after the peak)
• You can now adjust your recording device.
• You can stop the search by pressing
9
STOP/CLEAR
or
/
OPEN/CLOSE
; if you
press
2
PLAY/REPLAY
, the CD or the
programme will be played from the beginning.
Fade-in and fade-out (FADER)
•
During play press
FADER
.
– The sound level will now gradually decrease
(FADE OUT), after which the player will go into
the PAUSE mode.
• Press
FADER
again.
– Play continues and the sound level will increase
again to the originally set level (FADE IN).
➥
➥
➥
➥
➥
➥
➥
10
11
12
PEAK
TRACK
TIME
TRACK
8
9
10
11
12
PEAK
TRACK
TIME
TRACK
3
4
5
6
7
8
9
10
11
12
REM
TRACK
TIME
TRACK
➥
2
3
4
5
6
7
8
9
10
11
12
REM
TRACK
TIME
TRACK
2
3
4
5
6
7
8
9
10
11
12
TOTAL
REM
TIME
TRACK
2
3
4
5
6
7
8
9
10
11
12
TRACK
TIME
TRACK
➥
➥
NOTE!
The following functions can only be operated
using the remote control (CD22 only).
Scanning a CD (SCAN)
• Press
SCAN
before or during play.
– If the CD compartment was open, it will now
close.
–
SCAN
lights up for
2 seconds and the
first 10
seconds of each track are played in turn; 10
seconds are counted down each time under
REM TRACK TIME
.
• When the player reaches a track which you
wish to hear in full, press
SCAN
again or
2
PLAY/REPLAY
.
Adjusting the sound level (– )
NOTE!
– Use the
–
keys only if the player is
connected to an amplifier or HiFi system
without its own remote control.
– The setting chosen with
–
will be
cancelled when the player is switched off.
• Hold
– VOLUME
pressed down.
–
VOL
lights up; the output signal from the player
will now decrease gradually.
– The successive steps are shown on the display.
• Release the key as soon as the required sound
level is obtained.
• Hold
pressed down.
–
VOL
lights up; the output signal will now in-
crease again gradually to the maximum level.
– The successive steps are shown on the display.
• Release the key as soon as the required sound
level is obtained.
You can programme your own track sequence for
each CD. The order of the programmed tracks
determines the order in which they are played.
Each track can be stored as often as you like.
You can enter a programme in the STOP mode
or in the PLAY mode.
You can store a sequence of up to 30 tracks.
Programming
• Insert a CD and close the compartment.
– The CD player reads the contents of the CD.
The display shows the total playing time and
the number of tracks.
• Press
PROGRAM
to select the PROGRAM mode.
–
PROGR
lights up and
starts flashing.
• Select the first track you want to programme
with
S
and
T
.
– the track number appears under TRACK.
• Press
PROGRAM
to store the track in your
programme.
• Choose the next track you wish to include in
your programme and press
PROGRAM
to save
it.
– The number of tracks and the playing time of
your programme will be shown under TRACK
and TOTAL TIME.
– The track number indicator always shows
which numbers have been stored.
• You can leave the programme mode by
pressing the
9
STOP/CLEAR
,
PAUSE
or
2
PLAY/REPLAY
button.
PROGRAM
PROGRAMMING
1
3
4
6
9
TOTAL
TIME
TRACK
PROGRAM
TOTAL
TIME
TRACK
PROGRAM
6
7
8
9
10
11
12
PROGRAM
6
1
2
5
3
4
Programme playback
• To play the programme you have created,
press
2
PLAY/REPLAY
.
– All functions of the playback mode continue to
function.
– Playback starts with the first number of the
programme.
• All keys (except
PROGRAM
and
PEAK
SEARCH
) can be used during programmed
play.
• Search for a particular passage is only
possible within the track being played.
Deleting the programme
During play:
• Press
/
OPEN/CLOSE
or press
9
STOP/CLEAR
(twice).
In STOP mode:
• Press
/
OPEN/CLOSE
or press
9
STOP/CLEAR
(once).
– The programme has now been deleted.


