CDP-S 150
Allgemeiner T
eil / General Section
GRUNDIG
Service
1 - 5
GB
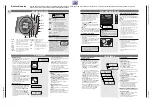
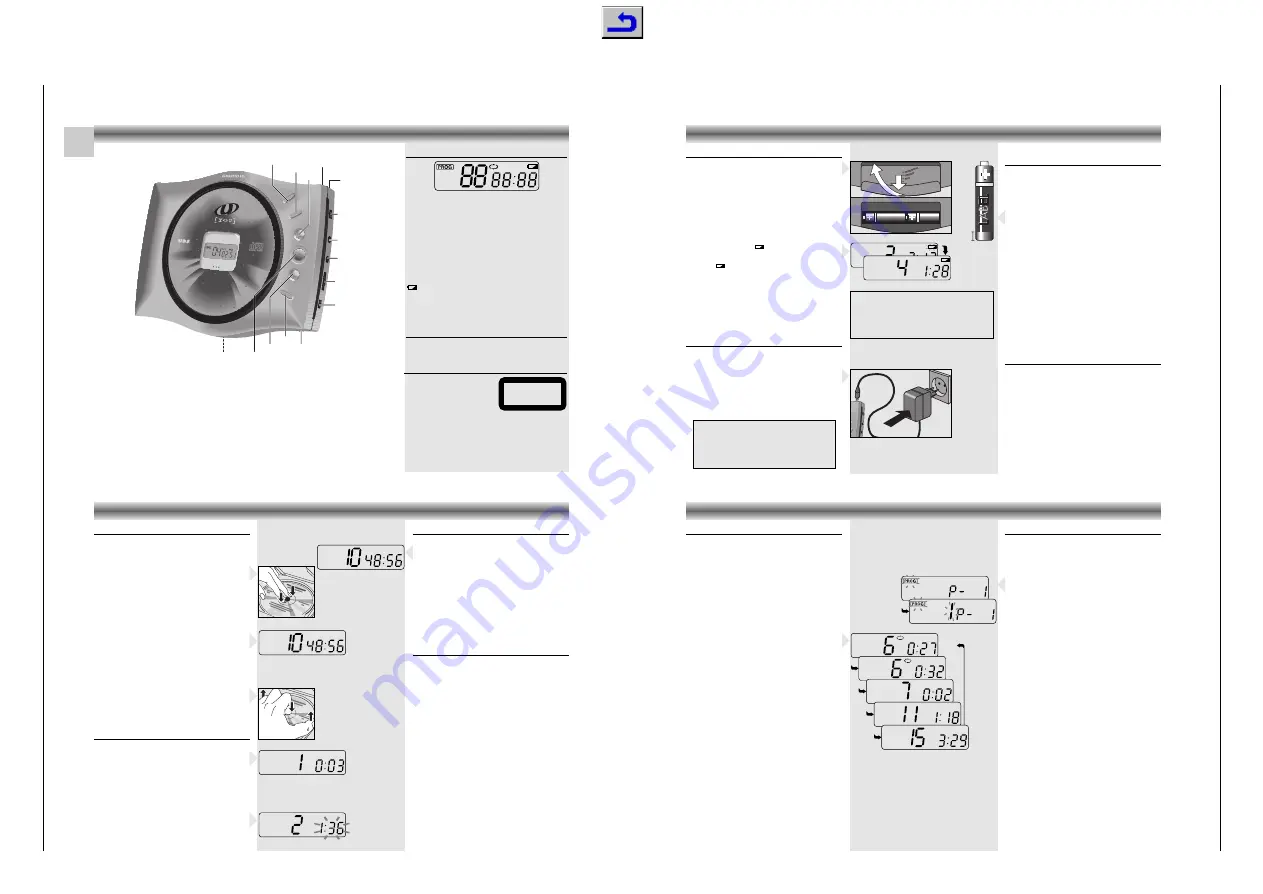
MODE
– to select a different playback mode
(REPEAT, INTRO or RANDOM)
PROG.
– to programme track numbers
NEXT
– to skip and search forward
PUSH
OPEN
– to open the lid of the CD player
DC-3 V
+>-
– jack for external power supply
HOLD
– to lock all button functions
LINE OUT
– jack for connection to a HiFi
installation
PHONES
– earphone jack (3.5 mm)
VOLUME
– to adjust the volume at the
earphone output
UBS
– (
U
ltra
B
ass
S
ystem) to boost the
bass response
STOP
– to stop playback
PREV.
– to skip and search backward
PLAY
– to start and interrupt playback
Display
The display indicates:
PROG:
during programming or programme
playback
RANDOM:
during the RANDOM function
INTRO:
during the INTRO function
b
:
during the REPEAT function:
b
1
– repeat one
b
ALL
– repeat all
HOLD:
when HOLD is activated
:
flashing:
the batteries are weak;
continuously: the battery voltage is too low
88
:
track number
88
:
88
:
playing time
Bottom of the set:
Batteries
– for inserting 2 LR 6 (AA) alkaline
batteries or rechargeable batteries.
Warning
CLASS 1 LASER PRODUCT
means that the laser´s construc-
tion makes it inherently safe so
that the legally prescribed
maximum permissible radiation
values can never be exceeded.
CAUTION:
Using any equipment or devices other than
those described and specified in these operating
instructions, or tampering with the unit in any way, can
result in dangerous exposure to radiation.
CLASS 1
LASER PRODUCT
RANDOM
INTRO
1 ALL HOLD
TRACK MIN. SEC.
P O R T A B L E
C D P L A Y E R
M
O
D
E
P
R
O
G.
N
E
X
T.
P
R
E
V.
S
T
O
P
P
L
A
Y
U
L
T
R
A
B
A
S
S
S
Y
S
T
E
M
P
E
R
S
O
N
A
L
C
O
M
P
A
C
T
D
I
S
C
P
L
A
Y
E
R
MODE
PROG.
NEXT
PLAY
PREV.
STOP
HOLD
LINE OUT
PHONES
VOLUME
UBS
DC-3V
+>-
PUSH
OPEN
PUSH
OPEN
Batteries
Batteries
• Open the battery compartment and insert as
indicated two alkaline batteries type LR6,UM3,
AA or insert two rechargeable Nickel-Cadmium
batteries .
• Remove the batteries if they are empty or if the
CD player is not to be used for a long time.
The display indicates when the battery voltage is
too low:
• When the indicator
flashes, the batteries are
getting too weak.
• When
appears continuously, the battery
voltage is too low and the CD player will soon
shut down.
Note:
The battery supply is switched off when the
DC IN 3V
socket is in use.
When changing over to battery supply, pull out the
plug from the
DC IN 3V
socket.
Mains adapter (supplied)
1
Make sure that the local voltage corresponds to
the voltage of the adapter.
2
Connect the supplied mains adapter (3 V/800 mA
Direct Current plus-pole to the centre pin) to the
player's
DC IN 3V
jack and to the wall outlet.
• Always disconnect the adapter if you are not
using it.
Note:
The CD-player remains connected to the mains
even when it is switched off.
The unit is only fully isolated from the mains if the
mains adapter is removed from the wall socket.
Recharging Nickel-Cadmium batteries
(only AA IEC KR 15/51)
Your mains adapter also works as a charger.
This is only possible with
Ni-Cd
batteries with the
reference
AA IEC (KR 15/51) 1.2 V/600mA
.
Note:
As a quick reference when buying the Ni-Cd batte-
ries, be sure that the metal cap on the negative pole
is exposed more than 3 mm as illustrated.
• Charge the batteries prior to first use and also if
the batteries have not been used for a long
period.
• Install the rechargeable batteries in the battery
compartment as described before.
• Connect the adapter to the CD-player and then
to the wall outlet.
• The batteries should be allowed to recharge for 8
hours for full capacity.
• The ambient temperature for recharging should
be between 0˚C and 40˚C.
• The player can be operated while the batteries
are being recharged.
Automatic Power-Off
This CD-player is equipped with an automatic
power-off function.
• In STOP mode, the player automatically shuts
down approximately one minute after the last
operation.
• If you press
STOP
while the set is in STOP mode,
the player also shuts down.
• To reactivate the player, press
PLAY
.
DC-3V
+>-
Note on Environmental Protection
Do not throw exhausted batteries in the
household refuse.
Hand over the old batteries to your dealer or
public collecting points when buying new ones.
3 mm
min
•
•
•
•
•
•
•
•
•
•
•
•
•
•
•
•
•
•
•
•
•
•
•
•
•
POWER SUPPLY
• Open the lid by pressing both
PUSH OPEN
buttons and lifting the lid gently.
• Insert an audio CD, printed side up.
• Push gently on the CD center so that it fits onto
the hub.
• In addition to standard 12 cm CD's, you can
also play 8 cm CD singles without an adapter.
• Close the lid by pushing it gently on its right-hand
side.
– The CD-player scans the contents list of the CD.
The total playing time and the total number of
tracks appear on the display.
• After that, the CD starts playing automatically.
Removing the CD:
• To take out the CD, open the CD lid by pressing
both
PUSH OPEN
buttons and lifting the lid gently.
• Hold the CD by its edge and press the hub
gently.
• Open the CD door only if the CD player is in
position STOP.
Playing a CD
• Press
PLAY
to start playback.
– The display shows the current track number and
its elapsed playing time.
• Adjust the sound using the
VOLUME
and
UBS
controls.
– The position of these controls does not affect the
output signal of the
LINE OUT
socket.
• For brief interruptions, press
PLAY
.
– The playing time indication starts flashing.
• To resume playback, press
PLAY
again.
• To stop playback, press
STOP
.
– The total playing time and number of tracks will
then appear on the display.
• If you press the
STOP
button again, you will
switch off the set.
– If no button is pressed for 1 minute, the set will
switch off automatically.
– The CD player also goes to position STOP:
– by opening the CD lid;
– when the end of the CD is reached;
– if the batteries run down or if the power supply
is interrupted.
Prev. / Next
Selecting another track during play
• Press
PREV.
or
NEXT
until the required track
number appears in the display.
– The selected track begins to play.
Starting with a particular track
• Press
PREV.
or
NEXT
until the required track
number appears in the display.
• Press
PLAY
.
– Play starts from the selected track.
Searching for a passage during play
• Hold
PREV.
down to search backwards to the
beginning.
• Hold
NEXT
down to search forwards to the end.
Note:
This function can be described as 'audibly'
searching for a title.
During the search, volume is reduced and returns to
its adjusted level as soon as the button is released.
CD PLAYER
Inserting a CD
Selecting a different playback mode
The
MODE
button allows you to select five different
playback modes.
• Press the
MODE
button until the display shows the
desired function.
– The playback mode changes in the following
sequence:
b
1
–>
b
ALL
–>
INTRO
–>
–>
RANDOM
–> normal playback –>
b
1
, etc.
–
b
1:
one track is repeated;
–
b
ALL:
all tracks on the CD are repeated;
–
INTRO:
to play only the first 10 seconds of
each title; after the last title, the CD player
stops.
–
RANDOM:
the tracks are played in random
order until all of them have been played once.
• The
RANDOM
function is not possible during
playback of a programme.
• If you select
INTRO
or
RANDOM
during
playback, the function starts from the end of the
current track.
• To go back to normal playback, press
MODE
repeatedly until all the mode indications
disappear.
• You can also press
STOP
twice to switch the set
off.
Programming
By programming the player you can play up to 24
tracks in any desired order.
Storing a programme
• Insert a CD and close the compartment.
• Press
PROG.
.
'PROG' starts flashing on the display.
• Select the first desired track using
PREV.
or
NEXT
.
– The selected track number flashes.
• Store this track by pressing
PROG.
again.
• Select and store in this way all desired titles.
• You can leave the storing mode by pressing
PLAY
or
STOP
.
Checking the programme
• In STOP mode, press
PREV.
or
NEXT
repeatedly.
– The display shows in sequence all programmed
track numbers.
Playing the programme
• Press
PLAY
.
– Play starts with the first track of the programme.
– The display shows 'PROG'.
– After the last track playback stops. The total
playing time and total number of tracks will then
appear on the display.
Note:
While playing a programme, it is possible
to use
PREV.
or
NEXT
to select the desired
programmed tracks.
Erasing a programme
• To erase the programme, hold the
PROG.
button
down for 2 seconds.
– The 'PROG' indication goes out.
• The programme is also erased when the unit is
switched off.
1
ALL
INTRO
RANDOM
CD PLAYER
CONTROLS
Operating Hints
This chapter contains excerpts from the operating instructions. For further particulars please refer to the appropriate user instructions the part number of which is indicated in
the relevant spare parts list.

