background image

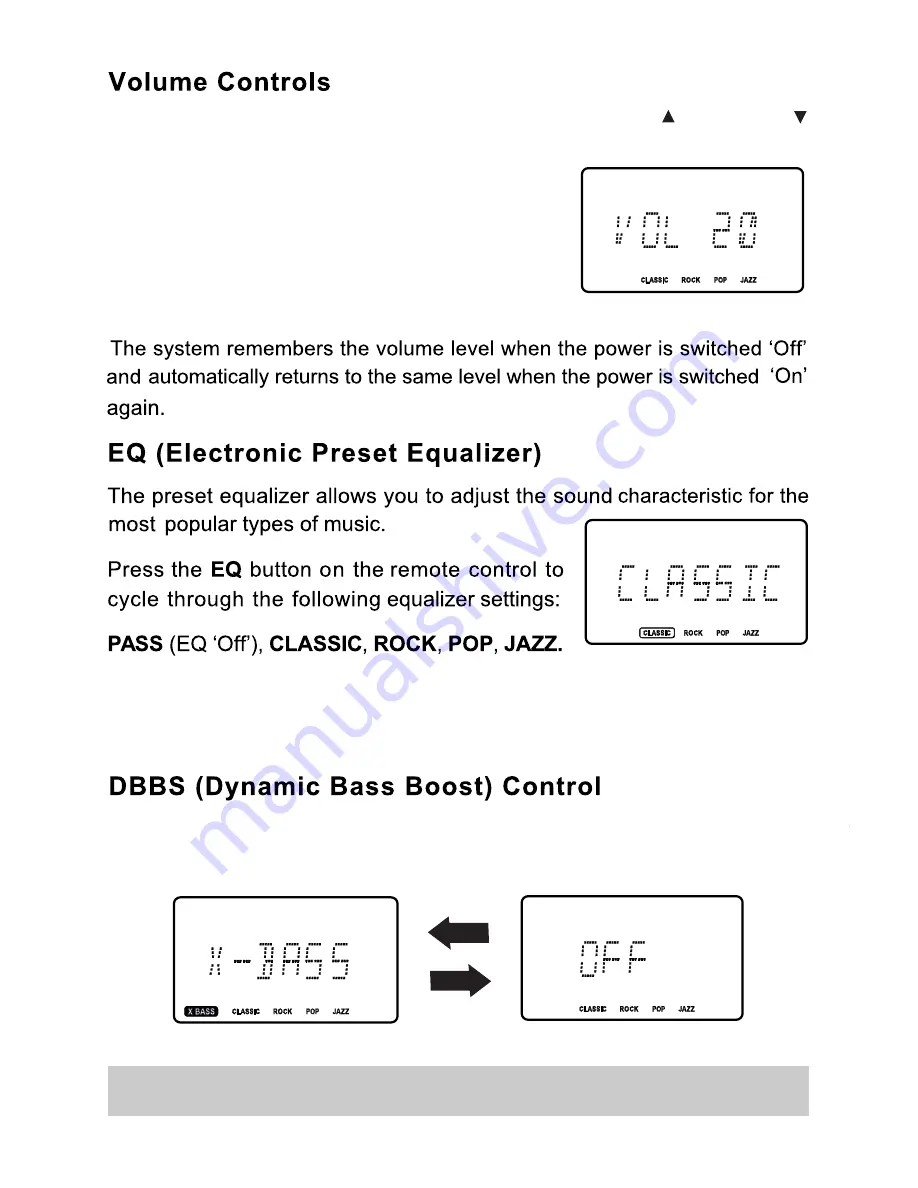
To increase or decrease the system volume press the 

VOLUME    or VOLUME

buttons on the remote control or VOLUME Control on the front panel.

The Volume Level Indicator will appear on the
display when you change the volume level.

The level indicator ranges from 

“00”

 (Minimum)

to

“30”

 (Maximum).

The appropriate EQ indicator briefly appears in the display to confirm your selection.

Press the 

DBBS

 button on the remote control to increase the bass response.

Press again to cancel the Bass Boost function.

The system remembers the EQ setting when the power is switched ‘Off’ and 
returns to the same setting when the power is switched ‘On’ again.

10

Summary of Contents for CDS2600iP

Page 1: ...The Gold Technical Support Line 1902 215 259 Personal Product Support Charges will apply at 2 95 per minute CDS2600iP Music Station with Universal Dock for iPod ...

Page 2: ... engineers Your safety and the safety of others is important Please therefore ensure you read the Safety Instructions before you operate this unit Safety is important Warranty Australia Grundig Warranty 1800 509 394 New Zealand Grundig Warranty 0800 450 259 You may already be familiar with using a similar unit but please take time to read these instructions They are designed to familiarize you wit...

Page 3: ...ease be sure to read this Owner s Manual completely to make sure you are getting the maximum benefit from each feature This product was manufactured using the highest quality components and standards of workmanship It was tested by inspectors and found to be in perfect working order before it left our factory However there is always the chance that some problem may occur because of rough handling ...

Page 4: ...ld still fail to fit contact your electrician to replace your obsolete outlet Do not defeat the safety purpose of the polarized plug 12 POWER CORD PROTECTION Power supply cords should be routed so that they are not likely to be walked on or pinched by items placed upon or against them paying particular attention to cords at plugs convenience receptacles and the point where exit from the product 13...

Page 5: ...eep the disc away from direct sunlight or heat sources Store the disc in a disc case after playback CLEANING DISC Before playback wipe the disc outwards from the center with clean cloth Do not use any type of solvent such as thinner benzine commercially available cleaners or anti static spray SECURITY Before operation check if the voltage of the unit is in line with the local voltage Hold the plug...

Page 6: ...properly installed Store your CDs in a cool area to avoid damage from heat When moving the set be sure to first disconnect the power cord and remove cords connected to other equipment disposal of this product you will help prevent potentially hazardous to the environment and to human health which could otherwise be caused by unsuitable waste handling of this product The recycling of materials will...

Page 7: ...0V 50Hz AC house current Connecting this system to any other power supply could result in damage to the unit which is not covered by your warranty 2 Insert the plug into any convenient 230 240V 50Hz AC outlet ENGLISH PREPARATION FOR USE 5 MW ANT ...

Page 8: ...on 11 VOLUME Button 12 POWER Button 13 Remote Sensor 14 CD Door OPEN CLOSE Button 15 STANDBY ON indicator 16 PHONES Jack 17 AUDIO IN Jack 18 iPod USB Tray 19 AC IN Jack 20 Component Pr Jack 21 Component Y Jack 22 Component Pb Jack 23 VIDEO OUT Jack 24 S VIDEO OUT Jack 25 FM ANT Jack 26 MW ANT Jack 16 17 18 19 20 21 22 23 25 24 26 6 ENGLISH LOCATION OF CONTROLS AND INDICATOR MW ANT ...

Page 9: ...E Button 14 VOLUME Button 15 AUX Button 16 TIMER Button 17 SLEEP Button 18 PROG CLK Button 19 PRESET ALBUM MEMU Button 20 SKIP TUNING Button 21 BAND Button 22 VOLUME Button 23 FUNCTION Button TIMER STANDBY ON EQ DBB S S LEEP PROG CLK MUTE VOLUME PRESET ALBUM MENU MENU INTRO P AUSE SELECT PLAY BAND STOP AUX FUNCTION ST ESP ID3 FIND REPEAT VIDEO OUT RANDOM 1 2 3 4 5 6 7 8 9 10 11 12 13 14 15 16 17 1...

Page 10: ...e b n w o h s s a s n o i t c e n n o c e h t e t e l p m o C d e d u l c n i t o n e l b a c O E D I V n a s e r i u q e r n o i t c e n n o c O E D I V d e d u l c n i t o n e l b a c O E D I V S n a s e r i u q e r n o i t c e n n o c O E D I V S Pr Y Pb connection requires an component cable not included To Component input of TV 8 ENGLISH CONNECTING EXTERNAL DEVICES MW ANT ...

Page 11: ...emote handset or by the top panel controls this will be clearly indicated in the instructions When operating this system with the remote control handset make sure that the IR Infrared transmitter on the front of the remote handset is pointed at the remote sensor on the front panel of the main unit The effective operating range of the remote control is approximately 15 feet Please note that bright ...

Page 12: ...olume level The level indicator ranges from 00 Minimum to 30 Maximum The appropriate EQ indicator briefly appears in the display to confirm your selection Press the DBBS button on the remote control to increase the bass response Press again to cancel the Bass Boost function The system remembers the EQ setting when the power is switched Off and returns to the same setting when the power is switched...

Page 13: ...e control to shut off the speakers temporarily for example to answer the telephone The sound stops and the MUTE indicator flashes in the display The mute function will also be canceled automatically by pressing the VOLUME or VOLUME buttons ...

Page 14: ...remote control 24 HOUR flashes on display Press the Press the SKIP TUNING or buttons to set the display to the correct minutes SKIP TUNING or buttons to set the display to the correct hour 12 ...

Page 15: ... SKIP TUNING or buttons the display begins to move then release the buttons The Tuner will search up or down the band for the next strong signal and stop on that station Repeat this procedure until the tuner stops on your desired station 4 If you tuned to an FM Stereo station the ST indicator will appear in the display If FM Stereo reception is noisy or weak press the ST ESP ID3 FIND button on the...

Page 16: ...y the direction of this antenna until you find the position that provides the best reception FM ANT MW ANT MW Insert the wire of loop aerial into the MW AERIAL connector on the unit Adjust the position of the loop aerial until you find the position that provides the best reception for your favorite MW stations FM ANT 14 MW ANT MW ANT ...

Page 17: ...play shows PRG and the channel number 01 indicator flashes Repeat Step 3 until you have stored up to 30 stations on the FM band then press the BAND button to switch to the MW band and follow the same procedure to enter up to 10 MW station in the tuner memory 15 13 ...

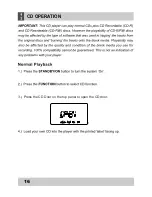
Page 18: ...3 Press the CD Door on the top panel to open the CD door 16 ENGLISH CD OPERATION ...

Page 19: ...by pressing the ST ESP ID3 FIND button on the 17 ...

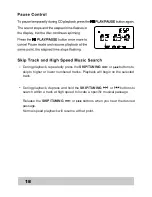
Page 20: ...tracks Playback will begin on the selected track During playback depress and hold the SKIP TUNING or buttons to search within a track at high speed to locate a specific musical passage Release the SKIP TUNING or buttons when you hear the desired passage Normal speed playback will resume at that point ...

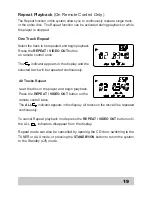
Page 21: ...display All tracks on the disc will be repeated continuously To cancel Repeat playback mode press the REPEAT VIDEO OUT button until the ALL indicators disappear from the display Repeat mode can also be cancelled by opening the CD door switching to the TUNER or AUX mode or pressing the STANDBY ON button to return the system to the Standby Off mode Repeat Playback On Remote Control Only The Repeat f...

Page 22: ...playback will resume from that point 20 The Random playback feature allows you play all the tracks on the disc in random order You can select random playback while the disc is playing or when the player is stopped The RNDM indicator appears in the display The player will randomly select a track from the disc and begin playback Random playback will continue until all tracks have played once then th...

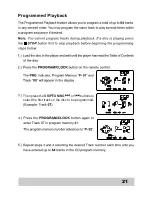
Page 23: ...21 Then press the SKIP TUNING or buttons to select the first track on the disc to be programmed ...

Page 24: ...Then press the REPEAT VIDEO OUT button on the remote control twice 22 ...

Page 25: ...icator for a minute or more before playback begins This is normal and note an indication f any problem with your player Most of the normal CD operations described in this manual also apple to MP3 WMA CDs However there are a few differences in MP3 WMA CD playback functions and these are described on the following pages MP3 WMA CD Reading Time And Display Information As mentioned above because MP3 W...

Page 26: ...o scroll through the ID3 text Press and hold the ST ESP ID3 FIND button again to return to Track and Play time display 24 The PLAY PAUSE SKIP TUNING SKIP TUNING and STOP controls have the same functions for MP3 WMA CDs as they do for normal CDs ...

Page 27: ...s the REPEAT VIDEO OUT button on the remote control once Begin playback as usual then press the REPEAT VIDEO OUT button twice Press the REPEAT VIDEO OUT button 3 times To cancel Repeat Playback press the REPEAT VIDEO OUT button until the ALL ALBUM indicators disappear 25 ...

Page 28: ...Press the RANDOM button the RNDM indicator appears in the display MP3 WMA ID3 Support information Display 26 ...

Page 29: ...When programming the tracks on an MP3 WMA CD you must also select the Directory Number of the tracks being programmed 27 ...

Page 30: ...yer reads the Table of Contents on the disc and shows the total number of Albums Directories and Tracks Files on the disc For example in the illustration the disc contains 9 Albums and 56 Tracks Press the ST ESP ID3 FIND button on the remote control once 28 ...

Page 31: ...earch Album symbol ALBUM will appear in the display and the player will enter the Album Search mode beginning with Album 01 The display will show the name the Album Press the SKIP TUNING button repeatedly to scroll through all the Albums on the disc in numberical order When you see the desired Album name on the display press the PLAY PAUSE button to begin immediate playback of the first track in t...

Page 32: ...nly be connected one way usually with the printed side facing up If you have trouble connecting your USB storage device to the USB port do not force it This may damage the connector Instead turn the device ver and try connecting it again 4 The player will read the information on the external device and the display will show the total number of tracks or files on the device 5 Press the PLAY PAUSE b...

Page 33: ...ter for iPod nano is already installed in the dock To place a dock adapter 1 Refer to the compatibility table below and select the correct dock adapter for the iPod 2 Place the proper adapter into the dock and press it into position The adapter will only go in one way The iPod dock connector should fit through the opening in the bottom of the adapter 3 Carefully align and then gently insert the iP...

Page 34: ...iew images and video stored on your iPod on a TV T o play video from iPod 1 Refer to your iPod documentation to be sure it is video capable 2 Ensure the video output on your iPod is turned on 3 Make sure the unit and TV are connected using an S VIDEO or composite video connection Video Settings TV out On ...

Page 35: ... iPod or start a slideshow Video will play on your TV and audio through the unit s speakers Playing Music and Video From Your iPod Press PLAY on the iPod main unit or remote The music playback will start You can control all of the iPod s functions including menu navigation from the remote control and to select tracks play pause and stop and from the main unit CHOOSING THE CORRECT ADAPTER Charging ...

Page 36: ...s the SKIP TUNING or buttons to set the display to the desired turn On hour Press the TIMER button The Minute digits begin flashing set the display to the desired turn On minute Press the TIMER button again Press the TIMER button The Minute digits begin flashing the display to the desired turn Off hour The OFF appears in the display the Hour digits begins flashing 34 ENGLISH SPECIAL FUNCTIONS Pres...

Page 37: ...er remains set and will turn the unit on again at the same time on the following day The volume increases gradually to the preset level It will sound until the turn Off time is reached and the power shut off automatically VOL 13 flashes in the display indicating you may now adjust the turn On Volume level set the turn On Volume level as desired Press the TIMER button again to confirm The display w...

Page 38: ...ng Then repeat the steps 2 11 on pages 34 35 Notes If the unit truns on to CD function it will only play until the end of the disc and then stop If your CD is only 45 minutes the unit will only play for 45 minutes but the power will remain On until turn Off time is reached The indicator disappears in the display Press the TIMER button again to reactivate the Timer the indicator resappears ...

Page 39: ...button to decrease the amount of sleep timer operation Each time you press the SLEEP button you subtract 10 minutes to the sleep timer The minimum sleep timer operation is 10 minutes The display will show SLEEP 90 indicating that the sleep timer will shut the power off after 90 minutes Adjust the VOLUME control to the desired level Remember that the level you select for the sleep to music function...

Page 40: ...fer to page 8 for connection information Press the FUNCTION button or AUX button on remote control to select the Aux function The AUX indicator appears in the display Operate the external device as you would normally When you hear the music from your external source adjust the VOLUME EQ and DBBS controls of this system as desired ...

Page 41: ...line from the inside to the outside of the disc ASmall dust particles and light stains will have absoultely no effect on reproduction quality Clean the disc periodically with a soft lint free dry cloth Never use detergents or abrasive cleaners to clean the disc If necessary use a CD cleaning kit Never write on or affix labels to the surface of compact discs CARE OF THE CABINET If the cabinet becom...

Page 42: ...ss FUNCTION button to select USB function Wipe disc with cloth or use another disc Compact Disc Player USB will not play No sound from on the unit speaker system Function is not set to USB USB DEVICE is not installed or installed incorrectly Playback using any USB DEVICE cannot be guaranteed please try another USB DEVICE Increase the volume level on the audio source device Insert USB DEVICE in to ...

Page 43: ...d This guarantee is in addition to and does not diminish your statutory or legal rights In the unlikely event that your product fails to work normally please contact the Grundig Helpline 1800 509 394 Australia or 0800 450 259 New Zealand and have your receipt of purchase on hand PO BOX 6287 Silverwater NSW 1811 www grundig net au It is only valid within boundaries of the country of purchase The ma...

Reviews: