background image

ENGLISH

19

ENGLISH

SETTINGS

____________________________________________________________________________________

Manual station search

1

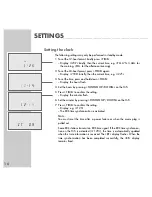
To move the frequency forward in steps, briefly press »

TUNING

UP/DOWN

« on the HiFi system several times.

– The frequency changes in steps of 50 kHz.

Saving stations on channel positions

1

Select the frequency band (FM or MW) by pressing the »

TUNER/BAND

«

button.

2

Press »

TUNING UP/DOWN

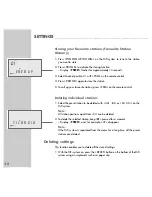
« to tune to the station you want to store.

3

Briefly press »

PROGR

« to activate the storing function.

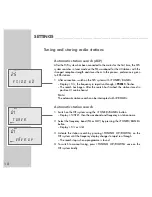
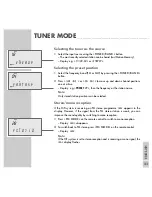
– Display: the next free channel position, e.g. »

02

«, »

PRESET

« flashes for

approximately 10 seconds.

4

Press »

5a §

« or »

ss s6

« to select the channel position desired.

Note:

If stations are already stored on the station positions, they are overwritten
when new stations are stored. 

5

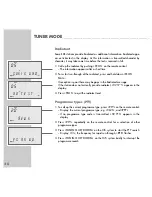
Press »

PROGR

« again to store the station.

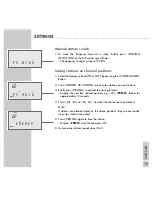
– Display: »

PRESET

« and, for example, »

02

«.

6

To store more stations repeat steps 

2

to 

5

.

f

PRESET

F M

9 0 1 0

.

!

MHz

02

f

PRESET

E N E R

Y

.

!

02

F M

8 7 6 5

.

MHz

G

Summary of Contents for Cirflexx UMS 4110 Piano

Page 1: ...HIFI STEREO MICRO SYSTEM Cirflexx UMS 4110 Piano DEUTSCH ENGLISH FRAN AIS ITALIANO PORTUGU S...

Page 2: ...The remote control 14 Connection and preparation 16 Settings Setting the clock Tuning and storing radio stations Deleting settings 21 General functions 23 Tuner mode RDS station service 28 CD mode Bas...

Page 3: ...______________________________________ 38 Timer mode Switch on timer Recording timer Sleep timer 42 Information Cleaning the CD unit Cleaning the tape drive Technical data Additional information for u...

Page 4: ...as rain or water splashes Do not place the HiFi system close to heating units or in direct sunlight as this will impair cooling Do not place any vessels such as vases on the HiFi system Do not insert...

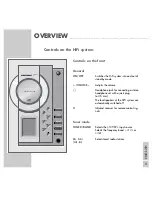
Page 5: ...the volume 0 Headphone jack for connecting a stereo headphone set with a jack plug 3 5 mm The loudspeakers of the HiFi system are automatically switched off O Infrared receiver for remote control sig...

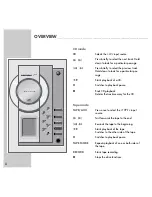
Page 6: ...a CD II Switches to playback pause Ends CD playback Deletes the track memory for the CD Tape mode TAPE AUX Press once to select the TAPE input source s s s 6 Fast forwards the tape to the end 5 a Rew...

Page 7: ...g the bass DSC Selects the various sound settings SLEEP For setting the sleep timer INTRO REPEAT For setting the switch on timer TIMER PROGR RANDOM For setting the time manually TIME Tuner mode TUNING...

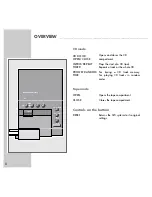
Page 8: ...IMER Repeats a track or the whole CD PROGR RANDOM For storing a CD track memory TIME For playing CD tracks in random order Tape mode OPEN Opens the tape compartment CLOSE Closes the tape compartment C...

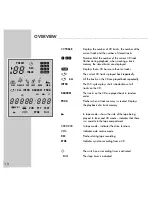
Page 9: ...Hz Frequency display MW CT The RDS time synchronization is activated f An RDS station is being received q The Traffic function is activated An RDS station with traffic news is being received EON The T...

Page 10: ...plays short introductions of all tracks on the CD RANDOM The tracks on the CD are played back in random order PROG Flashes when a track memory is created Displays the playback of a track memory 4 In t...

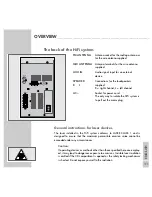
Page 11: ...right channel L left channel AC Socket for power cord The only way to isolate the HiFi system is to pull out the mains plug General instructions for laser devices The laser installed in the HiFi syst...

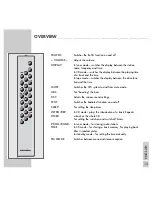
Page 12: ...pe II In CD and tape mode pauses playback In tuner mode deletes individual preset stations In CD mode ends playback of the CD In tape mode stops the drive functions s s s 6 In tuner mode select stored...

Page 13: ...mute mode UBS For boosting the bass DSC Selects the various sound settings TEXT Switches the Radiotext function on and off SLEEP For setting the sleep timer INTRO REP In CD mode plays the introduction...

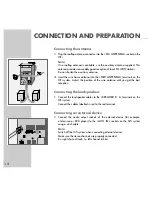
Page 14: ...shorten the auxiliary antenna 2 Insert the wire frame antenna into the MW ANTENNA terminals on the HiFi system Adjust the position of the wire antenna until you get the best reception Connecting the...

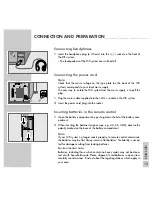
Page 15: ...he power cord plug into the socket Inserting batteries in the remote control 1 Open the battery compartment by pushing down the lid of the battery com partment 2 When inserting the batteries mignon ty...

Page 16: ...Set the hours by pressing TUNING UP DOWN on the HiFi 5 Press TIME to confirm the setting Display the minutes flash 6 Set the minutes by pressing TUNING UP DOWN on the HiFi 7 Press TIME to confirm the...

Page 17: ...lways activated when the HiFi is switched from standby to tuner mode and receives a suitable RDS station 8 If you wish you can switch off the RDS time synchronisation by pressing TUNING UP DOWN Displa...

Page 18: ...lashes The search has begun After the search has finished the station stored in position 01 can be heard Note The automatic station search can be interrupted with PROGR Automatic station search 1 Swit...

Page 19: ...D button 2 Press TUNING UP DOWN to tune to the station you want to store 3 Briefly press PROGR to activate the storing function Display the next free channel position e g 02 PRESET flashes for approxi...

Page 20: ...rite station press FSM on the remote control Deleting individual stations 1 Select the preset station to be deleted with 5 a or s s s 6 on the HiFi system Note All station positions apart from 01 can...

Page 21: ...itch the HiFi system to stand by mode Display GOOD BYE briefly then the current time Note The only way to separate the HiFi system from the mains supply is to pull the plug Selecting the input source...

Page 22: ...ect between FLAT CLASSIC POP JAZZ and ROCK according to the type of music you are listening to The basic setting is FLAT 1 Select the sound setting by pressing DSC Display FLAT N CLASSIC X POP C JAZZ...

Page 23: ...y e g PRESET 04 then the frequency or the station name Note Only stored station positions can be selected Stereo mono reception If the HiFi system is receiving an FM stereo programme appears in the di...

Page 24: ...tic station search you can delete all the existing preset stations and at the same time allocate new radio stations to them 1 Start the automatic search in tuner mode by pressing and holding down PROG...

Page 25: ...s 6 until an RDS station is received and f appears in the display After a short time the station name appears if the reception strength is sufficient Calling up RDS information If an RDS station is be...

Page 26: ...Radiotext message If the station does not currently provide radiotext NO TEXT appears in the display 3 Press TEXT to quit the radiotext level Programme types PTY 1 To call up the current programme typ...

Page 27: ...RAFFIC on the remote control Display q If there are no traffic bulletins being broadcast NO TA appears in the display q flashes during traffic news and the volume is slightly increased If the station...

Page 28: ...the CD itself Should such pro blems arise contact the customer services of your CD burner software manu facturer or search for information about this on the Internet for example When you are making a...

Page 29: ...1 Press to start playback Playback begins with the first track Display the current track number and the elapsed playing time of the title The current track number flashes in the number field Playback...

Page 30: ...ing the introductions of tracks on the CD 1 Press INTRO when the CD is in the STOP position Display INTRO 2 To quit the function press INTRO until INTRO disappears from the display The current file or...

Page 31: ...rack is repeated 4 To end this function press REPEAT twice Display M1 disappears Repeating all tracks Repeat All 1 Press I to start playback 2 Select the repeat function by pressing REPEAT twice Displ...

Page 32: ...PROGR to select the function Display CD P 01 and 00 TRACK PROG flashes 3 Select the track you want to hear by pressing 5 a or s s s 6 Display e g 03 for the first track and P 0I memory position 4 Pres...

Page 33: ...pressing PROGR until its number appears in the display 2 Select the new track number with 5 a or s s s 6 3 Press PROGR to store the new track Deleting the track memory 1 Press CD DOOR OPEN CLOSE on th...

Page 34: ...utton Display 4 and TAPE and after a short while STOP If there is no cassette in the tape compartment NO TAPE appears in the display Inserting a tape 1 To open the tape compartment press OPEN on the t...

Page 35: ...e direction of the tape and Playing back the tape in reverse mode 1 To play both sides of the cassette once keep pressing TAPE MODE until l appears in the display 2 To play both sides of the cassette...

Page 36: ...s 6 or 5 a to find the correct position on the tape 2 Select the input source from which you want to record TUNER or AUX by pressing TUNER BAND or TAPE AUX 3 Press RECORD to prepare recording Display...

Page 37: ...compartment and use s s s 6 or 5 a to find the correct position on the tape 3 Place the CD in the CD compartment 4 Press RECORD to start recording Recording begins with the first CD track Display SYNC...

Page 38: ...seconds the system will end the process automatically You then have to start again at the beginning During setting the display can be illuminated for approximately 8 seconds by pressing any of the bu...

Page 39: ...using VOLUME 12 Quit settings with TIMER Deactivating the switch on timer 1 To deactivate the switch on timer press TIMER briefly in stand by mode Display w disappears The switch on timer for the nex...

Page 40: ...y flashes 5 Set the minutes for the switch on time using TUNING UP DOWN on the HiFi system 6 Press TIMER Display w and OFF the hours display flashes 7 To enter the switch off time repeat steps 2 to 4...

Page 41: ...nction Display 90 MIN and 3 Enter the required time in 10 minute intervals from 90 to 10 minutes by pressing SLEEP Display e g 30 MIN and The HiFi system switches off after the selected time Ending th...

Page 42: ...cleaning tape Technical data 1 2 1 3 This device is noise suppressed accor ding to the applicable EC directives This product fulfils the European directi ves 89 336 EEC 73 23 EEC and 93 68 EEC This d...

Page 43: ...stribution board If this type of plug becomes defective ensure that the fuse is removed befo re disposal to eliminate potential shock hazard If it is necessary to change the fuse in the non rewireable...

Page 44: ...The headphones are plugged in disconnect the head phones The power cord is incorrectly connected Connect it properly Mute is activated Static electrical discharge Switch off the device disconnect the...

Page 45: ...s Cara a 17 P 1495 Cruz Quebrada Lisboa 3 51 2 14 15 67 05 GRUNDIG ESPA A S A Solson s 2 planta baja B3 Edificio Muntadas Mas Blau 1 E 08820 El Prat De Llobre gat Barcelona 34 93 4 79 92 00 GRUNDIG NO...

Page 46: ...Grundig AG Beuthener Str 41 D 90471 N rnberg http www grundig com 72011 403 2500...

Reviews: