GRUNDIG Service
Fine Arts Audion
1 - 6
e
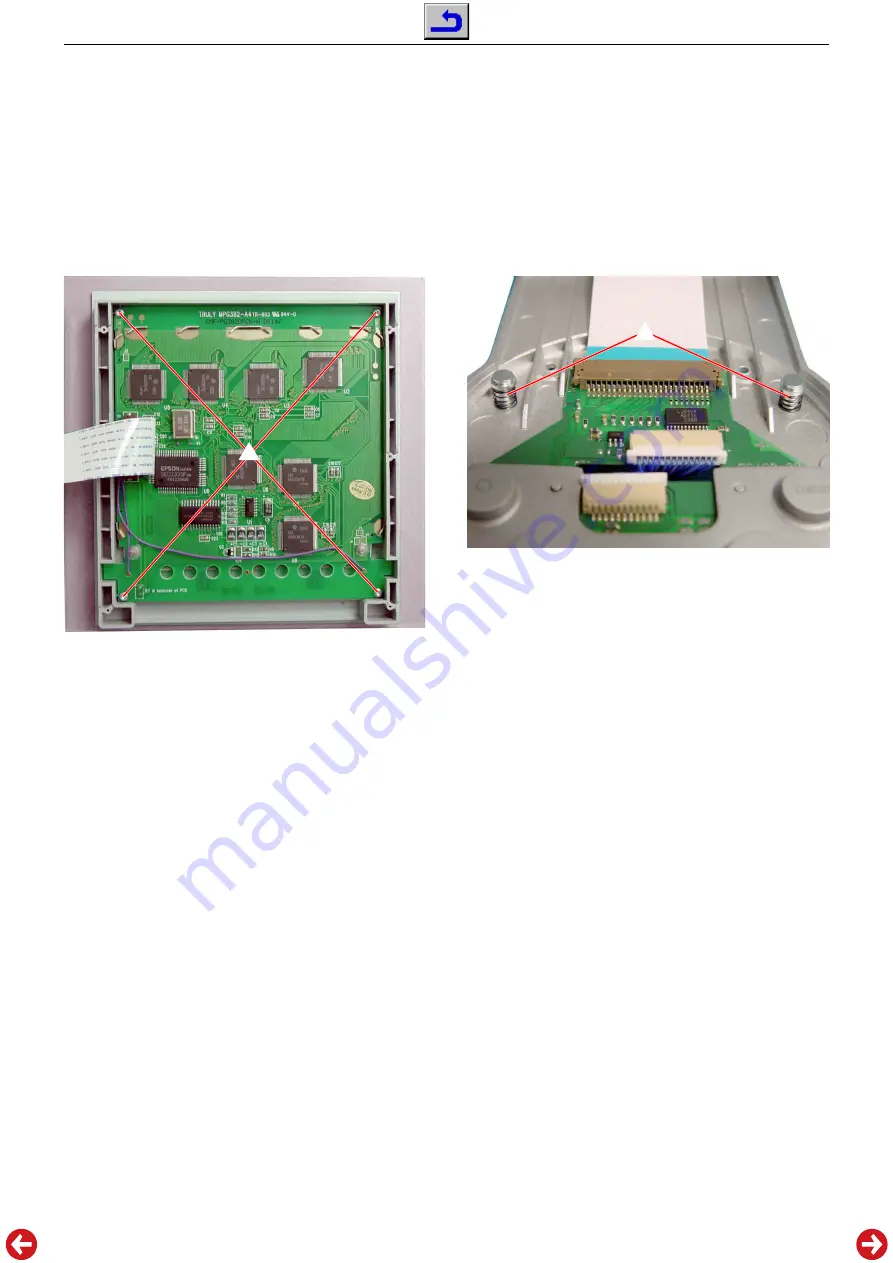
Fig. 13
11. Display zerlegen
- Display ausbauen (Pkt. 10).
- 6 Schrauben
d
(Fig. 12) herausschrauben und das Display-
Gehäuse öffnen (Steckverbinder bei Bedarf öffnen).
- 4 Schrauben
e
(Fig. 13) herausschrauben und Display-Leiter-
platte entnehmen.
12. Tastatur zerlegen
- Display ausbauen (Pkt. 10).
- 5 Schrauben
f
(Fig. 12) herausschrauben und das Tastatur-
Gehäuse öffnen (
Achtung
auf die beiden Bolzen mit Federn
g
(Fig. 14); Steckverbinder bei Bedarf öffnen).
Fig. 14
11. Disassembling the Display
- Remove the Display (para 10).
- Undo 6 screws
d
(Fig. 12) and open the display housing (open
connectors if necessary).
- Undo 4 screws
e
(Fig. 13) and remove the Display PCB.
11. Disassembling the Keyboard
- Remove the Display (para 10).
- Undo 5 screws
f
(Fig. 12) and open the keyboard housing (
watch
out
for the 2 bolts with springs
g
(Fig. 14); open connectors if
necessary).
g


