8
3. Installation
3.1 Right place for installation
Contact the Authorized Service for
the product's installation. To ready
the product for installation, see the
information in the user guide and
make sure the electric and water
utilities are as required. If not,
call an electrician and plumber to
arrange the utilities as necessary.
B
WARNING:
The
manufacturer assumes
no responsibility for
any damage caused by
the work carried out by
unauthorized persons.
B
WARNING:
The
product’s power cable
must be unplugged
during installation.
Failure to do so may
result in death or
serious injuries!
A
WARNING:
If the door
span is too narrow
for the product to
pass, remove the door
and turn the product
sideways; if this does
not work, contact the
authorized service.
3.2 Attaching the plastic wedges
Plastic wedges are used to create
the distance for the air circulation
between the product and the rear
wall.
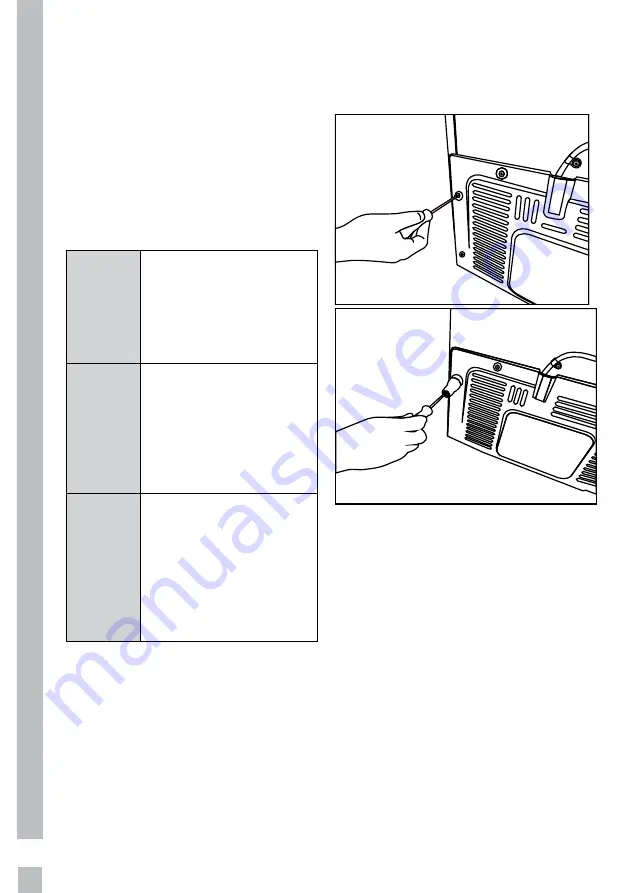
1.
To install the wedges, remove
the screws on the product and
use the screws supplied toget
-
her with the wedges.
2.
Insert the 2 plastic wedges
onto the rear ventilation cover
as illustrated in the figure.
3.3 Electrical connection
Connect the product to a grounded
outlet protected by a fuse
complying with the values in the
rating plate. Our company shall
not be liable for any damages that
will arise when the product is used
without grounding in accordance
with the local regulations.
•
Electrical connection
must comply with national
regulations.
•
Power cable plug must be within
easy reach after installation.
•
The voltage and allowed fuse or
breaker protection are specified
in the Rating Plate which is
affixed to interior of the product.
Summary of Contents for GQN21235XN
Page 2: ......
Page 84: ...GWN21210X GQN22220X GQN21235XN Chłodziarka Instrukcja użytkowania 58 0774 0000 AC 2 2 PL PL ...
Page 85: ......
Page 129: ...Notes ...
Page 130: ...Notes ...


