background image

16

A

Hose connection should 

be made in a safe manner. 

Your drain house will be 

flooded if the hose comes 

out of its housing during 

water discharge.

C

Water drain hose should 

be attached to a height of 

maximum 80 cm.

C

Make sure that the water 

drain hose is not stepped 

on and it is not folded 

between the drain and the 

machine.

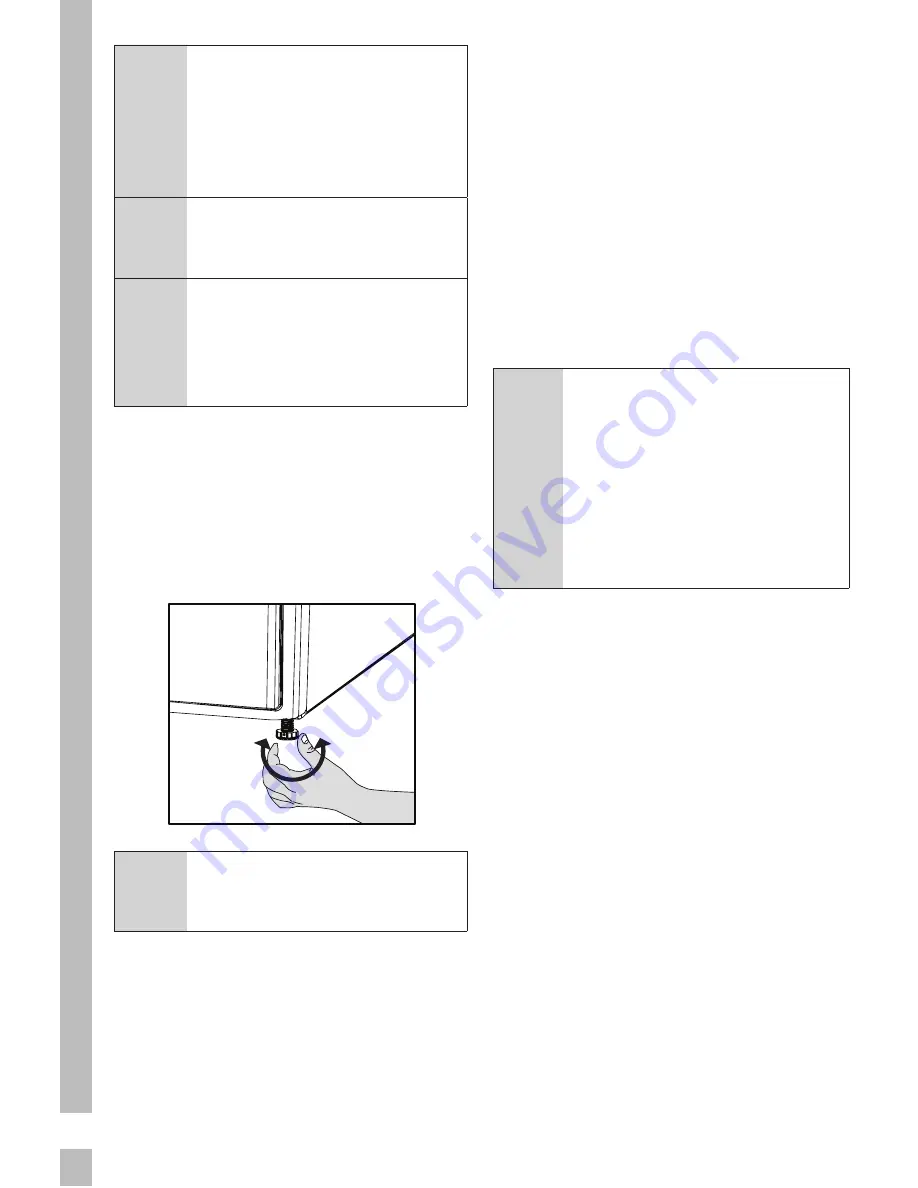
4.5 Adjusting the feet

In order to ensure that the dryer 

operates more silently and vibration-

free, it must stand level and balanced 

on its feet. Balance the machine by 

adjusting the feet.

Turn the feet to left or right until the 

dryer stands level and firmly.

C

Never unscrew the 

adjustable feet from their 

housings.

4.6 Electrical connection

For specific instructions for 

electrical connection required during 

installation 

(see 2.1.1 Electrical 

Safety)

4.7 Transporation of the dryer

•  Unplug the dryer before 

transporting it.

•   Drain all water that has 

remained in the dryer.

If direct water drain connection 

is made, then remove the hose 

connections.

A

We recommend carrying 

the dryer in upright 

position. If it is not possible 

to carry the machine in 

the upright position, we 

recommend carrying it by 

tilting towards the right 

side when looked from the 

front. 

Summary of Contents for GTN 38267 GCW

Page 1: ...EN www grundig com DRYER USER INSTRUCTIONS GTN 38267 GCW ...

Page 2: ......

Page 3: ... for drying in the dryer 18 5 2 Laundry not suitable for drying in the dryer 18 5 3 Preparing laundry for drying 18 5 4 Things to be done for energy saving18 5 5 Correct load capacity 19 6 Operating the product 20 6 1 Control panel 20 6 2 Display Symbols 20 6 3 Preparing the machine 21 6 4 Programme selection 21 6 5 Main programmes 21 6 6 Additional programmes 22 6 7 Program selection and consumpt...

Page 4: ...instructions given therein Remember that this user manual is also applicable for several other models Differences between models will be identified in the manual Explanation of symbols Throughout this user manual the following symbols are used C Important information or useful hints about usage A Warning for hazardous situations with regard to life and property B Warning against electric shock War...

Page 5: ...t brings out Children should not play with the product Cleaning and maintenance works should not be performed by children unless they are supervised by someone Children of less than 3 years should be kept away unless continously supervised Adjustable feet should not be removed The gap between the dryer and the floor should not be reduced with materials such as carpet wood and tape This will cause ...

Page 6: ...e voltage specified on the type label must be equal to your mains voltage Unplug the dryer when it is not in use Unplug the dryer from the mains during installation maintenance cleaning and repair works Do not touch the plug with wet hands Never unplug by pulling on the cable always pull out by grabbing the plug Do not use extension cords multi plugs or adaptors to connect the dryer to power suppl...

Page 7: ...gent before being dried in the dryer For this reason especially the items containing the above specified stains must be washed very well to do this use adequate detergent and choose a high washing temperature Below specified laundry or items must not be dried in the dryer due to the fire hazard Garments or pillows bolstered with rubber foam latex foam shower bonnets water resistant textiles materi...

Page 8: ...ir the dryer by yourself Do not perform any repair or replacement procedures on the product even if you know or have the ability to perform the required procedure unless it is clearly suggested in the operating instructions or the published service manual Otherwise you will be putting your life and others lives in danger There must not be a lockable sliding or hinged door that may block the openin...

Page 9: ...gs during the installation on your washing machine Installation Table for Washing Machine and Dryer Dryer Depth Washing Machine Depth 62 cm 60 cm 54 cm 50 cm 49 cm 45 cm 40 cm 54 cm Can be stacked Can be stacked Cannot be stacked 60 cm Can be stacked Cannot be stacked 2 3 Intended use Dryer has been designed for domestic use It is not suitable for commercial use and it must not be used out of its ...

Page 10: ...s been manufactured with high quality parts and materials which can be reused and are suitable for recycling Do not dispose of the waste product with normal domestic and other wastes at the end of its service life Take it to the collection center for the recycling of electrical and electronic equipment Please consult your local authorities to learn about these collection centers 2 6 Compliance wit...

Page 11: ...ures in this manual are schematic and may not match the product exactly C Values stated on markers on the dryer or in the other published documentation accompanying with the dryer are obtained in laboratory in accordance with the relevant standards Depending on operational and environmental conditions of the dryer these values may vary EN Height Min Max 84 6 cm 86 6 cm Width 59 5 cm Depth 59 8 cm ...

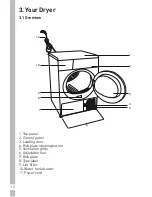
Page 12: ... 1 Overview 1 8 7 6 11 4 9 2 3 10 5 1 Top panel 2 Control panel 3 Loading door 4 Kick plate opening button 5 Ventilation grids 6 Adjustable feet 7 Kick plate 8 Type label 9 Lint filter 10 Water tank drawer 11 Power cord ...

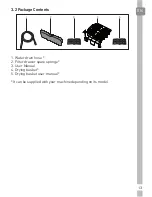
Page 13: ...13 EN 3 2 Package Contents 1 2 3 5 4 1 Water drain hose 2 Filter drawer spare sponge 3 User Manual 4 Drying basket 5 Drying basket user manual It can be supplied with your machine depending on its model ...

Page 14: ... dryer and the surface should not be reduced by the materials such as carpet wood and tape Do not cover the ventilation grills of the dryer There must not be a lockable sliding or hinged door that may block the opening of the loading door in the place where your dryer is to be installed Once the dryer is installed it should stay at the same place where its connections have been made When installin...

Page 15: ... countertop drying durations can extend 4 4 Connecting to the drain In products equipped with condenser unit water accumulates in the water tank during the drying cycle You should drain accumulated water after each drying cycle You can directly drain accumulated water through the water drain hose supplied with the product instead of periodically draining the water collected in the water tank Conne...

Page 16: ...ine by adjusting the feet Turn the feet to left or right until the dryer stands level and firmly C Never unscrew the adjustable feet from their housings 4 6 Electrical connection For specific instructions for electrical connection required during installation see 2 1 1 Electrical Safety 4 7 Transporation of the dryer Unplug the dryer before transporting it Drain all water that has remained in the ...

Page 17: ...case an illumination lamp is used in your laundry dryer To change the Bulb LED used for illumination of your tumble dryer call your Authorized Service The lamp s used in this appliance is not suitable for household room illumination The intended purpose of this lamp is to assist the user to place laundry in the tumble dryer in a comfortable way The lamps used in this appliance have to withstand ex...

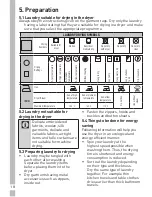
Page 18: ... Do not dry clean 5 2 Laundry not suitable for drying in the dryer C Delicate embroidered fabrics woolen silk garments delicate and valuable fabrics airtight items and tulle curtains are not suitable for machine drying 5 3 Preparing laundry for drying Laundry may be tangled with each other after washing Separate the laundry items before placing them into the dryer Dry garments having metal accesso...

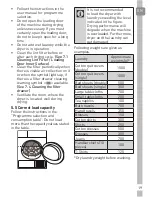
Page 19: ...er is located well during drying 5 5 Correct load capacity Follow the instructions in the Programme selection and consumption table Do not load more than the capacity values stated in the table C It is not recommended to load the dryer with laundry exceeding the level indicated in the figure Drying performance will degrade when the machine is overloaded Furthermore dryer and the laundry can get da...

Page 20: ...d Time Symbol Start Pause symbol Programme progress bar Time that appears on display indicates the remaining time until the end of the programme and changes according to the dampness level of the laundry and model of the dryer 1 On Off Cancel 2 Programme number display 3 Display 4 Start Pause 5 Time delay 6 Alarm sound volume child safety lock 7 Express dry Selection of timer programmes 8 Programm...

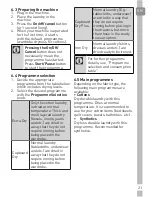
Page 21: ...a way that they do not require ironing before being placed in the wardrobe Cupboard Dry Normal laundry tablecloths underwear and etc are dried in a way that they do not require ironing before being placed in the wardrobe Cupboard Dry Plus Normal laundry E g tablecloths underwear are dried in a way that they do not require ironing before placing in the drawers but more than those in the ready to we...

Page 22: ...rogramme is used to dry cottons and synthetics daily and lasts for 100 minutes Night Silent In this programme the level of noise emitted to the environment will be the lowest Volume level will be fifty percent lower with respect to the wardrobe dry for cottons programme Bedding Dry fiber quilts with machine dryable label only Make sure you are loading the quilt in the correct way to avoid damages ...

Page 23: ...dry which is advised to be hand washed at a lower temperature C It is recommended to use a cloth bag to avoid certain delicate garments and laundry from getting creased or damaged Take your laundry immediately out of the dryer and hang them after the programme ends in order to prevent them being creased Freshen Up Only ventilation is performed for 10 minutes without blowing hot air You can air the...

Page 24: ... Dry Cottons Coloreds A Extra dry 8 1000 60 165 130 A Cupboard dry 8 1000 60 152 115 A Iron dry 8 1000 60 124 95 Shirts 1 5 1200 50 50 35 Jeans 4 1200 50 117 85 Bedding 2 5 1000 50 120 Sportswear 4 1000 60 105 70 Daily 4 1200 50 100 65 Cottons Cupboard Dry Night 8 1000 60 240 Delicates 2 600 40 50 Wool Protect 1 5 600 50 146 Synthetics B Cupboard dry 4 800 40 75 50 B Iron dry 4 800 40 59 34 Energy...

Page 25: ...e the laundry out after the programme has come to an end This programme rotates the laundry in 10 minute intervals without heat to prevent creasing 6 10 Warning symbols C Warning symbols may differ according to the model of your machine Lint filter cleaning When the programme is completed a warning symbol will appear to remind that the filter needs to be cleaned C If the Filter Cleaning symbol in ...

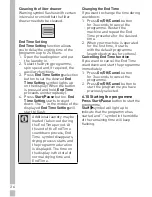
Page 26: ...me will keep flashing Cleaning the filter drawer Warning symbol flashes with certain intervals to remind that the filter drawer needs to be cleaned End Time Setting End Time Setting function allows you to delay the ending time of the programme up to 24 hours 1 Open the loading door and put the laundry in 2 Select the drying programme spin speed and if required the auxiliary functions 3 Press End T...

Page 27: ...the position of the Programme Selection knob while the machine is running the machine stops and new programme information is displayed 6 12 Changing the programme after it has started After the machine starts you can change the selected programme and dry your laundry in a different programme 1 If you want to select Extra Dry programme instead of Iron Dry programme for instance press the Start Paus...

Page 28: ... stop drying and cancel the programme for any reason after the machine has started to run press and hold the On Off Cancel button for 3 seconds A CAUTION As the inside of the machine will be excessively hot when you cancel the programme while the machine is running activate the ventilation programme to cool it down 6 14 End of programme Lint Filter Cleaning and Water Tank warning symbols light up ...

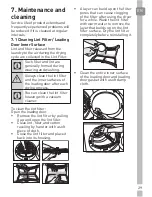
Page 29: ... process C You can clean the lint filter housing with a vacuum cleaner To clean the lint filter Open the loading door Remove the lint filter by pulling it up and open the lint filter Clean lint fiber and cotton raveling by hand or with a soft piece of cloth Close the lint filter and place it back into its housing A layer can build up on the filter pores that can cause clogging of the filter after ...

Page 30: ...plosion 7 3 Draining the water tank Dampness of the laundry is removed and condensed during drying process and the water that arise accumulates in the water tank Drain the water tank after each drying cycle A Condensed water is not drinkable A Never remove the water tank when the program is running If you forget to drain the water tank the machine will stop during the subsequent drying cycles when...

Page 31: ...n the kick plate Remove the filter drawer cover by turning it in the direction of arrow Pull out the filter drawer Open the filter drawer by pressing the red button Take out the filter drawer sponge Clean lint fiber and cotton raveling on the filter cloth by hand or with a soft piece of cloth When you notice a layer that may lead clogging on the filter cloth please clean the layer by washing in wa...

Page 32: ...out the filter drawer sponge in place will damage the machine C A dirty lint filter and filter drawer will cause longer drying periods and higher energy consumption 7 5 Cleaning the evaporator Clean the lint accumulated on the fins of the evaporator located behind the filter drawer with a vacuum cleaner A You can also clean by hand provided that you wear protective gloves Do not attempt to clean w...

Page 33: ...s out wet at the end of drying A programme suitable for the laundry type might have not been used Check the garment tag and select a programme suitable for the fabric type or use the timer programmes additionally Pores of the lint filter are clogged Wash the lint filter with warm water Filter drawer is clogged Clean the sponge and the filter cloth in the filter drawer Excessive laundry might have ...

Page 34: ... on the inner surfaces of the loading door and on the surfaces of the loading door gasket Clean the inner surfaces of the loading door and the surfaces of the loading door gasket Loading door opens spontaneously The loading door might not be closed securely Push the loading door to close until you hear a locking sound Water Tank warning symbol is on flashing Water tank may be full Drain the water ...

Page 35: ...ver In the event of losing the fuse cover the plug must not be used until a replacement fuse cover has been fitted Colour of the replacement fuse cover must be the same colour as that visible on the pin face of the plug Fuse covers are available from any good electrical store In order to avoid hazards damaged supply cord should be replaced by the manufacturer its service agent or similarly qualifi...

Page 36: ...nce is often included within your household contents insurance policy or may be available separately from your retailer Important notes Your Grundig product is designed and built for domestic household use only The guarantee will be void if the product is installed or used in commercial or non residential domestic household premises The product must be correctly installed located and operated in a...

Page 37: ...603 1234 Gas Dual Fuel Cookers 0845 603 1234 Washing Machines 0845 603 1234 Dishwashers Before requesting service please check the trouble shooting guide in the Operating Instructions as a charge may be levied where no fault is found even though your product may still be under guarantee Service once the manufacturers guarantee has expired If you have purchased an extended guarantee please refer to...

Page 38: ......

Page 39: ......

Page 40: ...www grundig com 2960311308_KM 180516 0931 Document Number ...

Reviews: