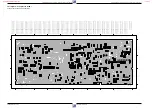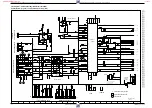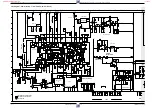
Abgleichvorschriften / Adjustment Procedures
3 - 6
GRUNDIG Service-Technik
2.4 Family Board – Standard Sound / Audio Linear (AL)
Test equipment / aids: AF Millivoltmeter, AF Generator, branded Video Cassette.
Service work after replacing the Family Board or the RP-Head: Adjustment no. 1, 2
Adjustment
Preparation
Adjustment Procedure
1. Bias (70kHz)
1.1 Frequency
Response Test
2. Playback Level
Set the voltage drop across R3600 with R3618 (BIAS) to
12mV
rms
.
Check the frequency response.
The voltage ratio of 400Hz to 8kHz must not be greater
than 1:0.7 or 0.7:1 (
±
3dB). If the voltage ratio exceeds
these limits, the bias must be altered:
To increase the playback voltage at 8kHz: Reduce bias (VM).
To reduce the playback voltage at 8kHz: Increase bias (VM).
Set output voltage with R3606 (AUDIO-PB LEVEL) to
0.5V
rms
.
AF millivoltmeter: ................................................... R3600
Record.
– Feed in a CCVS signal via EURO-AV socket, contact 20.
– Feed an audio signal of 200mV
rms
(480mV
pp
) from the AF
generator to the EURO-AV socket, contact 2 or 6.
– Make a recording of 400Hz and 8kHz each of 1 min at
least. Afterwards play back these recordings.
– Connect an AF millivoltmeter (oscilloscope) to EURO AV
socket pins 1 or 3.
AF generator (1kHz / 0.7V
rms
):
..................................... EURO-AV socket, contact 2 or 6
AF millivoltmeter: ......... EURO-AV socket, contact 1 or 3
Record (NormalPlay).
Play back this recording.
4. Keyboard Control Unit (MDCG1 / MDCB1)
Test equipment: Frequency Counter
Service work after replacing the Keyboard Control Unit: –
1. Clock
Set period with C2005 to 47.36328ms
±
75ns.
Frequency Counter: ...................................... IC7101-(80)
Press and hold the buttons "
wÊ
", "
Ê qÊ
" and "
eÊ
" on the
video recorder while connecting it to the mains.
With the earthing cable touch the plug contact DC1-3 (SCL)
repeatedly until no segments are active in the display.
Adjustment
Preparation
Adjustment Procedure
www.freeservicemanuals.info
It`s Free


