background image

r

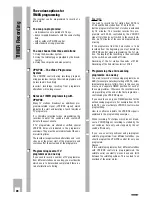
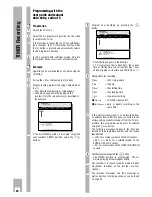
Recorder messages

These indicate various operating states and errors.
The messages appear on the TV screen or in the
display on the recorder.

Remaining playing time

Dispaly: » Rest « »

REST

« and the remaining play-

ing time of the cassette.
If the » Rest « is negative (–) and marked in red, a
cassette with insufficient playing time was inserted,
or the sum of all TIMER recording times is too high.

Record length

Display: » Record length « »

REST –:––

«.

The cassette playing time was not recognized.

No Cassette

Display: » No Cassette « »

NO CASSETTE

«.

There is no cassette in the recorder.

Cassette Protected

Display: » Cassette Protected « »

PROTECTED

«.

The cassette is protected against re-recording. It is
ejected automatically.

Collision

Display: » Collision « »

COLL

«.

The affected TIMER positions are marked in red.
The recording times of the TIMER positions 
overlap.
Change the entered data of one of the TIMER 
positions.

Code error

Display: » Code Error! « »

CODE ERROR

«.

This indicates an incomplete entry, or the
ShowView number in the TV magazine is incorrect.

ED error

Display: » ED-ERROR « »

ED ERROR

«.

A daily recording was selected for a Saturday or
Sunday; this is not possible.

Record begins soon

If you program additional recordings or work with
the info tables, the message » Record begins soon «
will appear ten minutes before recording is to
begin.

Record start time has passed

If » Record start time has passed « appears, you
should exit the » Record Programming « or other
info tables so that the recorder can start the 
recording.
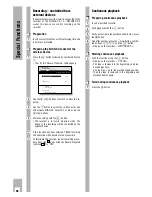
For this purpose, press the 

¢

TIMER ON/OFF

button.

r

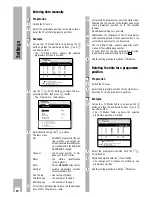
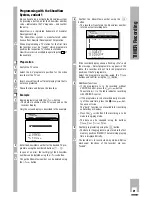
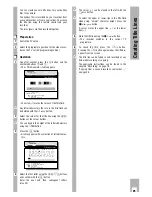
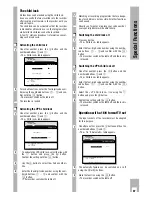
Checking the occupied TIMER positions

Press the 

¢

SET/CHECK

button.

– The » Record Programming « table appears.

Ń

!

After a short time the recorder switches the table off
automatically and returns to record stand-by mode.

r

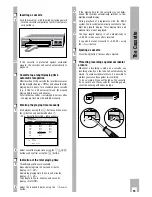
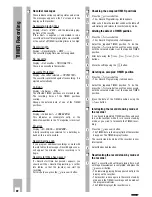
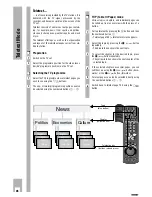
Altering the data of a TIMER position

Press the 

¢

SET/CHECK

button.

– The » Record Programming « table appears

Select the required TIMER position. To do this,
press the 

¢

SET/CHECK

button as often as necessary,

until the coloured marker is at the required TIMER
position.

Alter data using the 

B

PROG.

B

DAY

,

B

START

B

STOP

buttons.

Store the setting using the 

G

button.

r

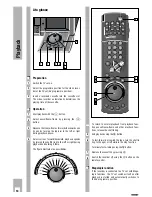
Deleting an occupied TIMER position

Press the 

¢

SET/CHECK

button.

– The » Record Programming « table appears.

Select the required TIMER position. To do this,
press the 

¢

SET/CHECK

button as often as necessary,

until the coloured marker is at the required TIMER
position.

Erase the data of the TIMER position using the 

¢

CLEAR

button.

r

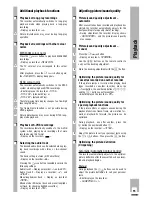
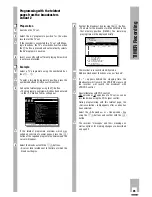
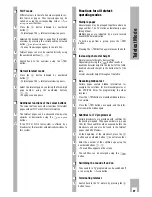
Interrupting the record stand-by mode of
the recorder

If you have programmed TIMER positions and wish
to use the recorder while it is in record stand-by
mode, or you wish to terminate the TIMER recor-
ding:

Press the 

¢

TIMER ON/OFF

button.

– The TIMER data in the display field of the recorder

disappear. The TIMER display flashes.

Ń

!

The record stand-by mode of the recorder is now
interrupted.

Select the desired function.

r

Reactivating the record stand-by mode of
the recorder

Insert a cassette with sufficient playing time, wait
until tape measurement is completed, and press the

¢

TIMER ON/OFF

button.

– The remaining playing time appears briefly in the

display on the recorder.

– The recorder is once again in the record stand-by

mode and the TIMER recordings will be made at
the programmed times.

– The TIMER display at the recorder is on.

1

2

1

3

2

1

4

3

2

1

1

22

TIMER Recording

·

·

Summary of Contents for GV 560 HiFi

Page 1: ...VIDEORECORDER GV 560 HiFi...

Page 2: ...options 20 Programming with the ShowView system variant 1 21 Recorder messages 22 Checking the occupied TIMER positions 22 Altering the data of a TIMER position 22 Deleting an occupied TIMER position...

Page 3: ...ooms If you wish to operate it in the open air make abso lutely sure that it is protected against moisture rain splashes of water Do not place any object filled with water vases or the like on the rec...

Page 4: ...serve the adjustment instruc tions on page 37 With aerial cable Insert the aerial cable supplied with your recorder into the socket on the recorder and the aerial socket on the TV set 3 2 1 3 Connecti...

Page 5: ...you need for essential operating func tions are located on the upper level The buttons you need for convenience functions are located on the level under the cover flap 3 6 5 2 1 4 STOP TIP INS DUB PAL...

Page 6: ...the tracking function 5 The Remote Control r Buttons under the cover flap Calls up the time of day Switches the recorder off stand by Selects page 100 Overview in tele text mode Shows hidden informati...

Page 7: ...resentation in Function remote control the info table and the dialogue lines r h i Calls up the info table and switches back to the TV picture r 1 2 9 0 0 9 For selecting various functions from the in...

Page 8: ...will transmit the test pattern Display on recorder TEST Search and store the recorder test pattern at the TV set between channels 30 and 40 2 channels in the UHF band Follow the instructions in the T...

Page 9: ...on the TV screen Re insert the aerial cable into the socket II on the recorder Terminate setting by pressing the button A 7 6 L H L H 5 4 3 2 1 r Switching the recorder s transmitter off and on If yo...

Page 10: ...t pages of the TV stations For this type of TIMER programming you take the data for the broadcast for example programme date switch on and switch off times from the pro gramme overviews that certain T...

Page 11: ...plus Deutsch Portugu se Espa ol Svenska Fran ais Norsk English Dansk Italiano Suomi Nederlands W hlen OK Best tigen i Zur ck zum INFO Men Sprachwahl GRUNDIG ATS euro plus Prog Channel Ident VPT 11 06...

Page 12: ...ELECT TV PO I Select programme position 1 at the TV set Press the G button on the remote control of the recorder Display on recorder PLEASE WAIT and The recorder searches for the data of the first pro...

Page 13: ...umber To enter data for the next programme position repeat the procedure starting from step End the setting procedure with the button Deleting the data for a programme position r Preparation Switch th...

Page 14: ...display L I 35 Tape length in hours minutes and seconds display 0 00 00 Select the desired display using the COUNTER button 2 1 2 1 TIMER ON OFF 1 If the playing time for the cassette was not deter m...

Page 15: ...1 Slow Normal F a s t Freeze S ea r c h Slow Normal F a s t S e a rc h Playback forward Playback reverse 3 times 4 3 2 1 3 2 1 To return to normal playback from playback func tion pause freeze frame...

Page 16: ...track and mono longitudi nal track for checking dubbed cassettes Display on recorder MIX Adjusting picture sound quality r Picture sound quality adjustment automatic After a cassette has been inserte...

Page 17: ...a tape position The starting point is the current tape position The search can be carried out up to 9 preceding or 9 succeeding marks Press the INDEX button Use the numbered buttons 1 9 for marks 1 to...

Page 18: ...ton Select recording pause using the W button Resume recording with the K button Terminate recording with the H button Fast forward or rewind tape by turning the shuttle ring to the left or right whil...

Page 19: ...record a title line See page 25 for instructions on how to create one Before starting to record or while recording press the TIP button The title line will be recorded Press the TIP button to make the...

Page 20: ...with immediate recordings and TIMER recordings automatic selection You can set the recorder to record the subtitles offered by the broadcasters Prerequisite for this is that the numbers of the sub ti...

Page 21: ...and the 2nd station from 21 50 to 22 30 But the programme from the 1st station is extended by 15 minutes The recorder records this pro gramme until 22 00 controlled by the VPS PDC signal Only then doe...

Page 22: ...ton The recorder transforms the ShowView number into the actual recording data If the recorder display shows a flashing A2 and the message Select programme appears in the table the recorder did not fi...

Page 23: ...d TIMER positions Press the SET CHECK button The Record Programming table appears After a short time the recorder switches the table off automatically and returns to record stand by mode r Altering th...

Page 24: ...Serie 316 21 30 Robot Reich 317 22 00 Mary 318 22 30 n Tagesthemen 315 23 00 Legen hinter Masken Spielfilm Hongkong 1988 319 00 50 Tagesschau 00 55 Z E N bis 01 00 Uhr anschlie end Videotext f r alle...

Page 25: ...the date B START the starting time B STOP the stopping time LP long play recording Z VPS red VPS PDC signal on off Z ED EW green daily or weekly recording at the same time If the picture sound signal...

Page 26: ...ton Enter the next and then subsequent letters max 30 4 3 2 1 2 1 The cursor can be moved to the left with the CLEAR button To select the upper or lower line in the title field when using normal chara...

Page 27: ...p from an overview with the press of a button Call up teletext by pressing the h button and then the numbered button 3 Teletext page 100 teletext overview appears Select the topic by pressing the Z C...

Page 28: ...e TV station automatically pages through them Multiple pages are indicated by a mark located beneath the time indication To hold a page from a group press the s button Pressing the s button again rele...

Page 29: ...recording Select the programme position for the camrecorder by pressing the e button repeatedly until CV appears in the display of the recorder that is recor ding When copying MESECAM colour broadcast...

Page 30: ...REC The new pictures will be inserted between the marked tape positions Then the recorder will switch to playback pause Terminate the insert function using the H button 7 6 5 4 3 2 1 You can insert ne...

Page 31: ...rder switches to playback pause Terminate the insert function using the H button r Insert Copy function In playback picture search mode locate the tape position at which the recording to be inserted s...

Page 32: ...e scene is too early press the C button if it is too late press the D button The preset time can be selected again using the CLEAR button Store the setting using the G button 3 2 1 7 6 5 4 3 2 1 This...

Page 33: ...and selecting the desired audio track with button AUDIO on the remote control 2 1 3 2 1 Your recorder offers two different systems for recording and playing back the sound The hifi helical track for...

Page 34: ...er If the recorder is connected to an audio mixer you can mix the HiFi original sound of the video cas sette with the sound from external sound sources 4 3 2 1 A new audio track can be added to the re...

Page 35: ...If you wish to deactivate this function again press the CODE button the numbered buttons 8 5 1 3 and the G button 4 3 2 1 L H L H EURO AV 1 AUDIO R L R L DECODER A2 EURO AV PAY TV 1 If the recorder r...

Page 36: ...ing appropriate cable Insert the aerial plug from the house aerial into the II socket on the recorder Connect the socket on the recorder and the socket aerial using the aerial cable provided Reinsert...

Page 37: ...ER recording and operation with a decoder are not possible To terminate this function repeat the setting proce dure from step and switch the Record Prepared see step to OFF 2 1 4 3 2 1 1 36 Continuous...

Page 38: ...misplace your code number your specialty dealer will be able to help r Switching the child lock off Press any button The Child lock table appears Enter the four digit code number using the numbe red b...

Page 39: ...order is separated from the mains the time is not displayed r Automatic adjustment The clock is automatically adjusted during teletext operation with programme position 1 r Manual adjustment r Prepara...

Page 40: ...2 TV SP LP ON OFF CLEAR K TIMER SV V STOP ART 9 3 6 2 2 1 3 2 1 Remote control of the TV set This video remote control enables you to operate GRUNDIG colour TV sets that use remote control model TP 5...

Page 41: ...y receiving the station Recording not possible The cassette is protected against Tape over the opening on the back re recording of the cassette Timer record programming Timer was programmed incorrectl...

Page 42: ...ial Input sockets coaxial B input 75 DIN 45325 Aerial Output sockets coaxial S output 75 DIN 45325 Audio sockets R L 2 phono R L 2 phono Satellite control sockets 3 5 mm Headphones socket 3 5 mm Headp...

Page 43: ...olna 00 46 8 6 29 85 30 GRUNDIG DANMARK A S Lejrvej 19 V rl se 00 45 44 48 68 22 SF 02271 GRUNDIG NORGE A S Glynitveien 25 Postboks 234 Ski 00 47 64 87 82 00 GRUNDIG BELUX N V Deltapark Weihoek 3 Unit...

Reviews: