background image

ENGLISH

21

FM PRESET SETTINGS

_______________________________________________________________

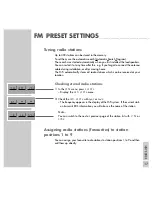
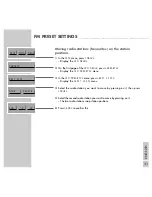
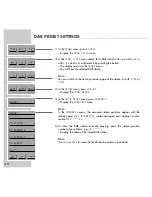
Moving radio stations (favourites) on the station 
positions

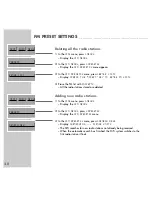
1

In the »

FM

« menu, press »

MENU

«.

– Display: the »

FM MENU

«.

2

On the first page of the »

FM MENU

«, press »

PRESETS

«.

– Display: the »

FM PRESETS

« menu.

3

In the »

FM PRESETS

« menu, press »

EDIT LIST

«.

– Display: the »

EDIT LIST

« menu.

4

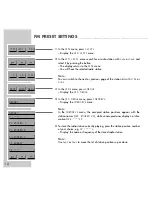
Select the radio station you want to move by pressing on it, then press
»

MOVE

«.

5

Select the second radio station you want to move by pressing on it.
– The two radio stations swap station positions.

6

Press »

END

« to confirm this.

MENU

INFO

TEXT

+5

-5

END

PRESETS

EDIT LIST

DELETE

MOVE

Summary of Contents for RCD8300

Page 1: ...FINE ARTS AUDION WIRELESS HIFI SYSTEM Operating manual ENGLISH 55404 941 1200...

Page 2: ...ntrol 15 The remote control menu system Dear customers This operating manual assumes that your authorised dealer has provided you with your FineArts Audion system in an assembled state connected and r...

Page 3: ...19 Organising the HiFi system display 20 Volume and tone 20 Adjusting the volume 20 Adjusting the treble bass balance and fader 21 Sound setting 22 Switching loudness on and off 22 Muting the HiFi sy...

Page 4: ...ck tracks in a selected order creating a track memory 48 Sleep timer mode 49 Multi room mode 49 Operating pairs of speakers in additional rooms 49 Switching the remote control to a pair of speakers in...

Page 5: ...ion of your HiFi system and for operation in combination with other individual Grundig components These options are explained on the following page S VHS Video in Slider Volume Program Audioin L R LSP...

Page 6: ...of loudspeakers in room 1 The HiFi system operates additional pairs of loudspeakers in other rooms one pair of speakers per room In multi room mode two different input sources can be set for differen...

Page 7: ...control and audio signals to the loudspeakers All its components communicate without wires even through walls The CD player has a CD text function This means that if CD text is provided by a CD the Hi...

Page 8: ...remote control with three 1 5 V mignon type batteries Wall bracket with cable channel DAB module DAB antenna Ask your specialist dealer about these modification options FINE ARTS AUDION FINE ARTS AUDI...

Page 9: ...for at least two hours before you insert a CD The HiFi system is designed for use in dry rooms If you do use it in the open please ensure that it is protected from moisture such as rain or water splas...

Page 10: ...ximately 100 m This range is restricted inside buildings depen ding on the construction materials used Avoid placing the system near metal objects such as radiators or electrical devi ces which use ra...

Page 11: ...tem in room 1 to and from standby mode The CD compartment lighting is also for indicating standby and operation Note The buttons on the HiFi system are only designed for emergency operation In normal...

Page 12: ...ly isolate the HiFi system from the mains supply is to pull the plug out Cover for the flash plug Only for dealers for upda ting the system software bottom of device Threaded connection F plug connect...

Page 13: ...nds the display switches off automatically To switch it on again press the OK key hard key on the remote control Audio Selects the HiFi mode FineArts Audion Switches the remote con trol on with the AU...

Page 14: ...relevant room d Switches the loudspeakers to and from mute mode R Switches the lighting for the remote control display on and off z Not used w For displaying the current time In standby mode switches...

Page 15: ...the relevant system components are present The Audio main menu Display and key Meaning and function AUDIO Audio mode has been selected The remote control is effective in room 1 for multi room operati...

Page 16: ...y changing the settings entered in the SETUP menu The PIN number is 1 5 9 0 SERVICE Service menu for the authorised dealer INSTALLATION Selects the INSTALLATION menu LANGUAGE Selects the language opti...

Page 17: ...omatically returns to standby when you then press the mains switch again The only way to isolate the HiFi system and the loudspeakers from the mains supply is to pull the mains plugs Switching off 1 F...

Page 18: ...m on from standby mode by pressing 9 This automatically switches on the loudspeakers You hear the last input source that was selected with the input source buttons 1 Call up the Audio menu with Audio...

Page 19: ...rs on the loudspeakers light up orange The CD compartment lighting on the HiFi system is also a standby indica tor which adjusts its brightness to the surrounding brightness in two steps The switching...

Page 20: ...the HiFi system this only affects the loudspeakers in room 1 Adjusting the treble bass balance and fader Note The TREBLE and BASS settings are only available if you previously selected the USER user d...

Page 21: ...ording to the type of music you are listening to 1 Call up the SOUND menu by pressing the F blue button 2 In the SOUND menu press DSC to call up the FLAT USER or VOC setting Modifying the USER sound s...

Page 22: ...ON 3 Press LOUDNESS again to switch it off The display changes from ON to OFF Muting the HiFi system 1 To mute the HiFi press d The display on the HiFi and on the remote control d 2 Press d to end the...

Page 23: ...s 1 to 9 You will find instructions on how to allocate radio stations to station positions 1 to 9 in the installation manual in the section Allocating radio stations favourites to station positions 1...

Page 24: ...tation by pressing the name or frequency of the station Display the name or frequency of the selected radio station The selected radio station is played Selecting radio stations by name 1 In the FM me...

Page 25: ...to add new radio stations to the existing ones or how to store a new station list after moving house for example in the instal lation manual for the FineArts Audion on pages 19 to 21 Stereo mono rece...

Page 26: ...he information transmitted by the stati on You must be tuned to the RDS station for several minutes before the time information can be transmitted 1 Call up the AUDIO menu by pressing Audio Display th...

Page 27: ...ditional information about the station and its programmes As the station transmits this information character by character it may take some time before the text is displayed in full 1 In the FM menu p...

Page 28: ...ews AFFAIRS Current affairs INFORMATION Information SPORT Sport EDUCATION Education DRAMA Drama CULTURE Culture SCIENCE Science VARIED Varied POP MUSIC Pop music ROCK MUSIC Rock music EASY LISTENING E...

Page 29: ...CHING FOR and POP The HiFi searches for a radio station with the code for the type of program me you select If a radio station is found the FM menu appears with the programme name and you hear the pro...

Page 30: ...ed into your HiFi Ask your specialist dealer Preparation Selecting the DAB input source 1 Call up the AUDIO menu by pressing Audio 2 In the AUDIO menu press DAB TUNER Display the DAB menu with the sta...

Page 31: ...ion list shows the DAB stations stored on station positions 1 to 9 as well as all the received DAB stations 1 In the DAB menu press LIST Display the DAB LIST Note Only DAB stations appear in the DAB L...

Page 32: ...h additional letter entered the list of DAB stations displayed is narrowed down 3 Use c or x to select a DAB station from the list created 4 Call up the DAB station with END The display returns to the...

Page 33: ...L menu Note If Dynamic Label is not provided by the selected DAB station the TEXT button soft key does not appear in the DAB menu 2 Search for the passage you want using c or x Calling up DAB informat...

Page 34: ...If they are provided by the current DAB station the following news catego ries are available 3 In the ANNOUNCE menu press x to select a news category and press the relevant button soft key to switch i...

Page 35: ...Switch on Dynamic Range Control by pressing DRC on the second page of the DAB MENU The display changes from OFF to ON 4 Switch the Dynamic Range Control off by pressing DRC again The display changes...

Page 36: ...ed programme type is found the message NO STATION FOUND IN THIS CATEGORY appears briefly PTY SEARCH NO STATION FOUND IN THIS CATEGORY PTY SEARCH x c DRAMA EDUCATION SPORT INFORMATION AFFAIRS NEWS NO P...

Page 37: ...olvents or scouring agents When burning CD R and CD RWs with audio files various problems may arise which could lead to interference in playback This can be caused by faulty soft ware or hardware sett...

Page 38: ...the HiFi to close the CD compartment The CD compartment closes The display on the HiFi CLOSING The HiFi reads the contents of the CD The display on the HiFi READING CD If the CD provides CD text the n...

Page 39: ...ess INFO to call up further information 2 Use II to switch to playback pause Display II pause changes to R playback Press R to resume playback 3 Press 5 to end playback Calling up CD text information...

Page 40: ...he STOP position and during playback e g TRACKS 19 number of tracks on CD e g LENGTH 77 38 total playing time of the CD During playback e g T LENGTH 3 47 playing time of the current track e g T 17 1 3...

Page 41: ...election 2 Select the track with 0 to 9 and confirm it with END Playback of the selected track starts Selecting tracks from the track list You can only select a track by the track name if the CD provi...

Page 42: ...s in the STOP position press MENU in the CD menu Display the CD MENU 2 In the CD MENU menu press SHUFFLE The display changes from OFF to ON s appears to indicate SHUFFLE 3 Press to return to the CD me...

Page 43: ...menu press MENU Display the CD MENU 2 In the CD MENU menu press REPEAT Display the CD REPEAT menu 3 Press the button to select a function REPEAT ALL r appears in the display to indicate REPEAT The en...

Page 44: ...racks 1 In the CD menu press MENU Display the CD MENU 2 In the CD MENU press CD PROGRAM Display the CD PROGRAM menu 3 Select the desired track using or and press MEM to store it Display the stored tra...

Page 45: ...e CD PROGRAM menu press R The current track to be stored is played back whereby you do not leave the programming mode The display changes from R playback to 5 stop 2 End the track playback with 5 Note...

Page 46: ...t Display the currently stored track number Adding more tracks 1 In the CD menu press CD PROGRAM Display the CD PROGRAM menu 2 Select the desired track using or and press MEM to store it Display the c...

Page 47: ..._______ Deleting the track memory 1 In the CD menu press MENU Display the CD MENU 2 In the CD MENU press CD PROGRAM Display the CD PROGRAM menu 3 To delete the track memory press CLR Display CD PROGRA...

Page 48: ...s with or If you do not press any button for more than 5 seconds the remote control display returns to the previous menu At the switch off time selected the loudspeakers in the room selected switch to...

Page 49: ...adio station this selection also applies to all the other rooms in which the FM input source is active The same applies if for example you select another track in CD mode Switching the remote control...

Page 50: ...he remote control Display the AUDIO menu 2 In the AUDIO menu press M ROOM Display the M ROOM menu 3 In the M ROOM menu for example use ROOM 5 to switch between CD DAB FM and OFF The input source selec...

Page 51: ...tment by pressing on the catch at the back of the remote control and removing the cover of the battery compartment 2 When inserting the three batteries 3 x 1 5 V alkaline mignon type LR6 AA AM3 adhere...

Page 52: ...dio button hard key The remote control in TV mode 9 Switches the television into and out of standby mode Display Display of the remote control and digital keypad touchpad If the keypad is not used for...

Page 53: ...p the SOUND SETTINGS menu Display and buttons in TV mode standard Display and key Meaning and function TV Television mode is selected no button FOR Changes the picture format PIP Switches the PIP func...

Page 54: ...ction TV Television mode is selected no button DVD Switches to the DVD buttons FOR Changes the picture format TXT Switches between the videotext and TV modes PIP Switches the PIP function picture in p...

Page 55: ...stop playback 8 Starts playback If playback was interrupted 7 pressed only once it is resumed from the point at which it was interrupted Q W Switch to forwards or backwards frame search at various spe...

Page 56: ...DVD DVD mode is selected no button i Calls up the DVD player main menu OSD For displaying and hiding the menu line SUBTITLE Selects the language of the subtitles ANGLE Adjusts the camera angle AUDIO S...

Page 57: ...DVD player extended Display and key Meaning and function AUX AUX mode is selected no button ZOOM Activates the zoom function SUBT Selects the language of the subtitles ANG Adjusts the camera angle TI...

Page 58: ...VDs and video CDs Pause for audio CDs REP For the repeated playback of sections from DVDs and video CDs and tracks on audio CDs 5 6 Select the next previous title or section during playback BOOKM To s...

Page 59: ...FOR Selects the format TV function PIP Not used TIMER Switches the recording timer on and off Q W Wind the video cassette backwards or forwards Start recording onto video cassette 5 Stops playback 8 S...

Page 60: ...p help information INFO Info 8 Starts playback 5 Stops playback Q W Fast forward and rewind II Pauses playback Calls up the recording function I Starts recording REP Starts repeating the last section...

Page 61: ...ostatic discharge Switch off the loudspea kers and the HiFi using the mains switch then switch them on again No sound Check the volume setting Check the mains plug and the mains switch of the loudspea...

Page 62: ...ot properly inserted Playback does not work The CD is dirty scratched or upside down A sudden temperature change has caused condensation on the laser lens system This will dry off by itself after a sh...

Page 63: ...r supply Operating voltage 230 V Mains frequency 50 60 Hz Max power consumption 29 W Power consumption in standby 3 W Dimensions and weight Device dimensions W x H x L 310 x 100 x 325 mm Weight 4 8 kg...

Page 64: ...7 P 1495 Cruz Quebrada Lisboa 3 51 2 14 15 67 05 GRUNDIG ESPA A S A Solson s 2 planta baja B3 Edificio Muntadas Mas Blau 1 E 08820 El Prat De Llobre gat Barcelona 34 93 4 79 92 00 GRUNDIG NORGE A S Po...

Page 65: ...FINE ARTS AUDION WIRELESS HIFI SYSTEM Installation manual ENGLISH X...

Page 66: ...system 8 Additional information for units sold in the UK 9 Installation 9 Different installation examples 11 Connecting and installing the active loudspeakers 16 Selecting the HiFi antenna setting 17...

Page 67: ...s of loudspeakers 38 Deleting pairs of loudspeakers 39 Installing additional remote controls 40 Checking the identification number of the remote control 41 Deleting additional remote controls 41 Repla...

Page 68: ...speakers If the WT2 wireless module is integrated into your Grundig television FineArts Vision FineArts Planavision or Lenaro it controls the same active loudspeakers as your HiFi system If you want t...

Page 69: ...fted up manually Then you can turn it to the left or right by pressing buttons on the remote control You can thus easily read the information on the display When the HiFi is mounted vertically you hav...

Page 70: ...s to the wall below the position intended for the HiFi system 6 Attach the bracket to the bottom of the HiFi system 7 Connect the mains cable the FM antenna cable and the DAB antenna cable if there is...

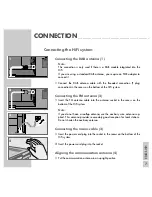
Page 71: ...ottom of the HiFi system Connecting the FM antenna 2 1 Insert the FM antenna cable into the antenna socket in the recess on the bottom of the HiFi system Note If you do not have a rooftop antenna use...

Page 72: ...board If this type of plug becomes defective ensure that the fuse is removed before disposal to eliminate potential shock hazard If it is necessary to change the fuse in the non rewireable plug the c...

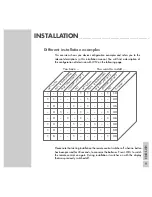
Page 73: ...the configuration of television with WT2 on the following page S e e p a g e P R 1 F A V F A P w i t h W T 2 D i g i 1 0 0 w i t h W T 2 P a i r s o f l o u d s p e a k e r s H i F i s y s t e m P R...

Page 74: ...is the not the case with Basic 3 and other similar chassis These differences influence the procedure for installing the WT2 wireless module on the RCD 8300 HiFi system Therefore the following is a li...

Page 75: ...on range of approximately 100 m This range is restricted inside buildings depen ding on the construction materials used The illustrations in the examples show the LSP2 active loudspeakers The positio...

Page 76: ...tors do not flash press the RESET button on the bottom of the loudspeaker casing LSP2 or on the back LSP3 with an implement such as a paper clip You can press RESET for a longer period of time if the...

Page 77: ...hen press OK on the remote control holding it down for 2 seconds The touchpad display on the remote control switches on The display shows the languages installed e g INSTALLATION LANGUAGE ENGLISH DEUT...

Page 78: ...indicators of both loudspeakers light up green The right loudspeaker has been detected The remote control display reads INSTALL SECOND PAIR OF SPEAKERS 7 To install a second pair of loudspeakers in ro...

Page 79: ...on trol display PLEASE CONNECT ANTENNA THEN PRESS CONTI NUE You can only continue if you press CONTINUE If no antenna has been connected the system will work without it However you now have to start t...

Page 80: ...he ANTENNA setting 1 Call up the AUDIO menu by pressing Audio on the remote control Display the AUDIO menu 2 In the AUDIO menu select the FM TUNER input source Display the FM menu 3 In the FM menu pre...

Page 81: ...iFi automatically stores all radio stations which can be received at your location Checking stored radio stations 1 In the FM menu press LIST Display the FM LIST menu 2 Check the FM LIST with c or x T...

Page 82: ...5 3 In the FM menu press MENU Display the FM MENU 4 In the FM MENU menu press MEMORY Display the MEMORY menu Note In the MEMORY menu the occupied station positions appear with the station names P2 BA...

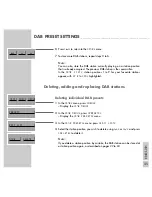
Page 83: ...rite stations appe ar with P1 to P9 highlighted Deleting adding and replacing radio stations Deleting individual radio stations 1 In the FM menu press MENU Display the FM MENU 2 In the FM MENU press P...

Page 84: ...ST 4 Erase the FM list with ACCEPT All the radio stations stored are deleted Adding new radio stations 1 In the FM menu press MENU Display the FM MENU 2 In the FM MENU press PRESETS Display the FM PRE...

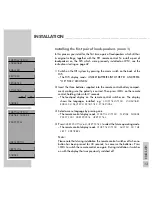
Page 85: ...first page of the FM MENU press PRESETS Display the FM PRESETS menu 3 In the FM PRESETS menu press EDIT LIST Display the EDIT LIST menu 4 Select the radio station you want to move by pressing on it th...

Page 86: ...he first page of the FM MENU press PRESETS Display the FM PRESETS menu 5 In the FM PRESETS menu press ATS SEARCH Display ATTENTION START WILL DELETE OLD LIST 6 To start the search press START The auto...

Page 87: ...The following settings are only possible if there is a DAB module integrated into the HiFi To install the DAB module see the installation manual included with the module Checking stored DAB stations 1...

Page 88: ...list with 5 or 5 3 In the DAB menu press MENU Display the DAB MENU 4 In the DAB MENU menu press MEMORY Display the MEMORY menu Note In the MEMORY menu the occupied station positions appear with the s...

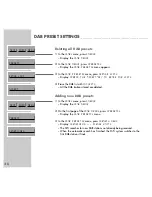
Page 89: ...or your favourite stations appear with P1 to P9 highlighted Deleting adding and replacing DAB stations Deleting individual DAB presets 1 In the DAB menu press MENU Display the DAB MENU 2 In the DAB ME...

Page 90: ...he DAB list with ACCEPT All the DAB stations stored are deleted Adding new DAB presets 1 In the DAB menu press MENU Display the DAB MENU 2 On the first page of the DAB MENU press PRESETS Display the D...

Page 91: ...first page of the DAB MENU press PRESETS Display the DAB PRESETS menu 3 In the DAB PRESETS menu press EDIT LIST Display the EDIT LIST menu 4 Select the DAB station you want to move by pressing on it t...

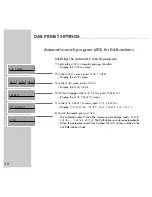
Page 92: ...u press MENU Display the DAB MENU 4 On the first page of the DAB MENU press PRESETS Display the DAB PRESETS menu 5 In the DAB PRESETS menu press ATS SEARCH Display ATTENTION START WILL DELETE OLD LIST...

Page 93: ...h the HiFi system and the loudspeakers on from standby mode 2 Call up the AUDIO menu by pressing Audio on the remote control Display the AUDIO menu 3 In the AUDIO menu press SETUP Display the SETUP me...

Page 94: ...e SETUP menu press INSTALLATION Display the INSTALLATION menu 5 In the INSTALLATION menu press POSITION Display the INSTALLATION Position menu 6 In the INSTALLATION Position menu press HORIZONTAL or V...

Page 95: ...iFi system Setting the time and date 1 Switch the HiFi system and the loudspeakers on from standby mode 2 Call up the AUDIO menu by pressing Audio on the remote control Display the AUDIO menu 3 In the...

Page 96: ...re are 16 channels available When you first set up the system Channel 2 is selected by default If you are also operating WT2 make sure that the HiFi system and the wireless module are always set to th...

Page 97: ...ns switches 2 Switch the HiFi system and the existing loudspeakers on from standby mode 3 Call up the AUDIO menu by pressing Audio on the remote control Display the AUDIO menu 4 In the AUDIO menu pres...

Page 98: ...ight loudspeaker has been detected Display briefly INSTALLATION OF SPEAKERS IN CURRENT ROOM COMPLETED Deleting a pair of loudspeakers room 1 The HiFi system must be switched on for the data transmissi...

Page 99: ...__________________ 6 In the DELETE LSP menu press ROOM 1 Display the DELETE LSP menu 7 To delete the front speakers press FRONT LSP Display FRONT REAR LSP DELETED or To delete the rear speakers press...

Page 100: ...In this case pressing 9 on a remote control only switches the speakers in the applicable room to standby Installing additional pairs of loudspeakers 1 Insert the mains plug of the new active loudspea...

Page 101: ...ly press the RESET button 10 Turn on the right loudspeaker with the mains switch The operation indicator of the loudspeaker first flashes orange then the indicators of both loudspeakers light up green...

Page 102: ...u 3 In the SETUP menu press INSTALLATION Display the INSTALLATION menu 4 In the INSTALLATION menu press LSP Display the LSP menu 5 In the LSP menu press DELETE LSP Display the DELETE LSP menu with ROO...

Page 103: ...DIO menu press SETUP and enter the PIN Display the SETUP menu 4 In the SETUP menu press INSTALLATION Display the INSTALLATION menu 5 In the INSTALLATION menu press PR1 Display the PR1 menu 6 In the PR...

Page 104: ...t know your identification number see next section We recommend that you make a note of the identifi cation number on the inside of the battery compartment cover 1 Call up the AUDIO menu by pressing A...

Page 105: ...isplay the SETUP menu 3 In the SETUP menu press INSTALLATION Display the INSTALLATION menu 4 In the INSTALLATION menu press PR1 Display the PR1 menu 5 In the PR1 menu press DELETE PR1 Display the DELE...

Page 106: ...splay the REPLACE LSP menu and the existing loudspeakers 7 In the REPLACE LSP menu select the left loudspeaker for example by pressing LEFT 8 Switch on the new left loudspeaker with the mains switch T...

Page 107: ...d at least one pair of loudspeakers must be installed on the WT2 For this reason the description applies to two cases 1 You are operating the WT2 and are installing the HiFi system at a later date 2 Y...

Page 108: ...ne The remote control display reads INSTALLATION PLEASE CHOOSE POSITION HORIZONTAL VERTICAL 6 Press HORIZONTAL or VERTICAL to select the future operating mode The remote control display reads INSTALLA...

Page 109: ...press NO on the remote control The remote control display reads INSTALLATION OF LSP IN CUR RENT ROOM COMPLETED The remote control display then reads INSTALL WT2 MODULE 10 To install the WT2 wireless...

Page 110: ...reads INSTALLATION OF WT2 COMPLE TED The HiFi has meanwhile started the automatic station search ATS After the search is complete the first DAB station found is played If there is no DAB module integ...

Page 111: ...e loudspeakers on WT2 see the relevant section in the WT2 operating manual pages 38 to 40 1 Insert the power cord plug of the HiFi into the socket Note The mains switch of the HiFi must be turned off...

Page 112: ...R please ignore this message 8 Press the RESET button on the right speaker until the indicator flashes orange The indicators on both speakers switch to green The right loudspeaker has been detected Th...

Page 113: ...ed by the HiFi system you will not hear the television sound when you switch on the television 12 Proceed with the preset settings as described on page 16 at a later date in configuration with Digi 10...

Page 114: ...and set it to Yes Then confirm it with OK if there are no surround speakers installed set it to No with P or P 5 Select the Start installation line with P or P and confirm it with OK The Start install...

Page 115: ...indicator flashes orange The indicators on both speakers switch to green The right loudspeaker has been detected The display on the television switches to Installed The message Installation completed...

Page 116: ...ALLATION menu 15 In the INSTALLATION menu press WT2 Display the WT2 menu 16 In the WT2 menu press INSTALL WT2 Display PLEASE REFER TO THE INSTALLATION MANUAL then the message INSTALLATION OF WT2 COMPL...

Page 117: ...r the sound from the HiFi Note To connect the WT2 to the FineArts Vision and Planavision televisions see page 9 of the WT2 operating manual 2 Switch on the television with the mains switch 3 Plug the...

Page 118: ...ator chan ges from green to orange The INSTALL and A indicators on the WT2 switch off and the 9 indicator lights up red The right loudspeaker has been detected The indicators on both loudspeakers ligh...

Page 119: ...TO THE INSTALLATION MANUAL 13 Press the INSTALL button on WT2 until the INSTALL indicator on the WT2 flashes orange This starts the installation of the WT2 When the orange INSTALL indicator on the WT2...

Page 120: ...ons with Digi 100 and for other Digi 100 televisions the infrared code must be adjusted 1 Call up the AUDIO menu by pressing Audio on the remote control Display the AUDIO menu 2 In the AUDIO menu pres...

Page 121: ...irst pair of loudspeakers room 1 starting on page 12 Resetting the remote control If the entire system is reset all the remote controls must be reset individually 1 Call up the AUDIO menu by pressing...

Page 122: ...m this Display after 2 to 3 seconds COMPLETED HIFI SYSTEM NOW IN DELI VERY STATUS 4 Switch off the HiFi system by pressing the mains switch on the back of the HiFi Resetting the active loudspeakers 1...

Page 123: ...____________________________________________________________ Updating the system software and the foreign languages of the user menu Updates can only be carried out by an authorised dealer in conjunct...

Page 124: ...Grundig AG Beuthener Str 41 D 90471 N rnberg http www grundig com 55404 942 1200...

Page 125: ...FINE ARTS AUDION WIRELESS HIFI SYSTEM RCD Tower X...

Page 126: ..._____________________________________________________ 1 Fasten bracket A accessories to the RCD 8300 HiFi system with the screws supplied 2 Remove cover B by lifting it upwards Caution Handle the glas...

Page 127: ...ead them down through the cable duct Use the auxiliary cord included to feed the cables through 4 Connect the mains and antenna cables to the HiFi system The sockets provided for this purpose are desc...

Page 128: ...Grundig AG Beuthener Str 41 D 90471 N rnberg http www grundig com 72011 403 0500...

Reviews: