background image

TÜRKÇE

   15

ÇALIŞTIRMA 

___________________________________________

Sinyal sesi ile uyandırma

1

Cihazı »

ON/OFF

« tuşuna basarak hazır bekleme durumuna (Stand-by) getiriniz.

2

Sinyal sesi ile uyandırmayı (»

e

«) etkinleştirmek için »

ALARM1

« veya

»

ALARM2

« tuşuna ekranda »

e

1

« veya »

e

2

« görünene kadar tekrar tekrar

basınız. 
– Cihaz ayarlanmış olan saatte sinyal sesi ile uyandırır (uyandırma süresi 

90 dakika).

Alarma ara verilmesi

1

Alarm çalarken »

SNOOZE

« tuşuna basınız.

– Uyandırma sinyali (radyo programı veya sinyal sesi) durur.
– Alarm 5 dakikalık aralıklarla yeniden çalmaya başlar (toplam alarm süresi 

90 dakika).

Alarmın bir gün için durdurulması

1

Alarm çalarken »

ON/OFF

« tuşuna basınız.

– Alarm sinyali (radyo programı veya sinyal sesi) kapanır, alarm ertesi gün için

ayarlanan saatte yeniden etkinleşir.

Alarmın kapatılması/açılması

1

Uyandırma işlevini devre dışı bırakmak için, ekrandaki »

ɷ

1

« veya »

ɷ

2

« ya

da »

e

1

« veya »

e

2

« silinene kadar »

ALARM1

« veya »

ALARM2

« tuşuna

basınız.
– Ayarlanmış olan alarm saati silinmez.

2

Uyandırma işlevini etkinleştirmek için, ekranda »

ɷ

1

« veya »

ɷ

2

« ya da 

»

e

1

« veya »

e

2

« görünene kadar »

ALARM1

« veya »

ALARM2

« tuşuna

basınız.

12_Sonoclock660PLL_tr  20.12.2007  11:07 Uhr  Seite 205

Summary of Contents for SC- 660 PLL

Page 1: ...ALARM SAATLİ RADYO KULLANIM KILAVUZU SONOCLOCK SC 660 PLL tr en ...

Page 2: ...___________________________________________________________ ...

Page 3: ...an bir toplama noktasına verilmelidir Bu durum ürün üzerinde kullanım kılavuzunda veya ambalajda bulunan yanda görünen sembol ile be lirtilir Bu toplama yerlerini lütfen bulunduğunuz yöredeki yerel yönetime sorunuz Eski cihazları geri kazanıma vererek çevre korumasına önemli bir katkıda bu lunursunuz Yasaklı Madde Kullanımının Kısıtlanmasına Uyum EEE Yönetmeliğine Uygundur Aldığınız ürün T C Çevre...

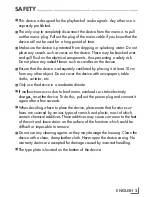
Page 4: ...ılmasını sağlayınız Cihazın önünü gazete masa örtüsü perde vb şeylerle kapatmayınız 7 Cihazı sadece normal iklim koşullarında çalıştırınız 7 Kısa süreli aşırı gerilim veya elektrostatik yüklenme gibi nedenlerden işlev hataları oluştuğunda cihaz resetlenmelidir Bunun için şebeke fişini çıkartıp birkaç saniye bekledikten sonra yeniden takınız 7 Cihazın yerleştirildiği mobilyaların üst yüzeylerinin ç...

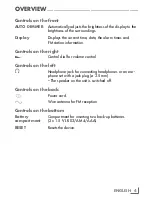
Page 5: ...ma zamanlayıcısı ayarını etkinleştirir DISPLAY Göstergeyi frekans veya program adı ve saat ile gün arasında değiştirir DIMMER Göstergenin parlaklığını üç kademede değiştirir fon ışığını kapatır ɶ TUNING ʺ FM programlarını elle ayarlamak için otomatik program aramayı başlatır P Geriye doğru program yeri seçer ALARM1 Alarm 1 ayarını etkinleştirir ALARM2 Alarm 2 ayarını etkinleştirir MEM TIME FM prog...

Page 6: ...gram bilgilerini gösterir Sağ taraftaki kullanma elemanları g Ses seviyesini değiştirmek için döner düğme Sol taraftaki kullanma elemanları y Kulaklık soketi jack fişli ø 3 5 mm bir başlık seti ya da kulaklık takmak için Cihazın hoparlörü kapanır Arka yüzdeki kullanma elemanları Ü Şebeke kablosu y FM anteni Cihazın altındaki kullanma elemanları Pil yuvası İki tampon pili yerleştirmek için 2 x 1 5 ...

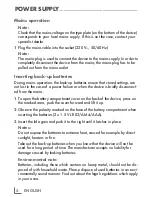
Page 7: ...sa bir süre için prizden çıkartıldığında tampon piller ayarların silinmemesini sağlar 1 Cihazın altında bulunan pil yuvasını açmak için işaretle gösterilen yere basıp kapağı sola doğru kaydırarak alınız 2 Pilleri 2 x 1 5 V LR 03 AM 4 AAA yerleştirirken pil yuvasının tabanındaki kutup işaretlerine dikkat ediniz 3 Kapağı tekrar yerleştirip yerine oturana kadar sağa doğru sürünüz Uyarılar Pilleri gün...

Page 8: ...ması durumunda cihaz otomatik program aramayı başlatıp otomatik saat gün ayarı yapamazsa bu ayarlar elle yapılmalı veya başka bir program seçilmelidir Radyo programlarının ayarlanması ve kaydedilmesi Program yerlerine maksimum 20 program kaydedilebilir Otomatik program arama 1 Cihazı ON OFF ile hazır bekleme Stand by konumundan açınız Gösterge Dalga aralığı ve frekans veya program adı 2 Program ar...

Page 9: ...lırken silinir 4 Programı kaydetmek için tekrar MEM TIME tuşuna basınız Gösterge MEMORY ve örn 2 5 Diğer programları da kaydetmek için 2 ile 5 arasındaki adımları tekrarlayınız Uyarı Cihaz şebekeden ayrıldığında içinde tampon pil yoksa kayıtlı olan programların tümü silinir Saat ayarı 1 Cihazı ON OFF tuşuna basarak hazır bekleme durumuna Stand by getiriniz 2 MEM TIME tuşuna ekranda saatler yanıp s...

Page 10: ... basınız Gösterge CT OFF 3 RDS saat senkronizasyonu için kısaca MEM TIME tuşuna basınız Gösterge CT ON Bir RDS zaman sinyali alındığında cihaz açıldıktan sonra saat ve gün güncelleşir Uyandırma saatlerinin ayarlanması İki farklı uyandırma saati ayarlayabilirsiniz İsteğe bağlı olarak radyo ya da sinyal sesi ile uyandırılırsınız 1 Ayarı etkinleştirmek için ALARM1 veya ALARM2 tuşuna basıp basılı olar...

Page 11: ...ataları oluştuğunda cihaz resetlenmelidir O ana kadar kaydedilen değişiklikler silinmez 1 Cihaz açık durumda iken örneğin bir ataşman ile cihazın altındaki RESET e bastırınız Uyarı Kaydedilen ayarları silmek istiyorsanız şebeke kablosunu çekip tampon pilleri çıkartınız Şebeke kablosunu kısa bir süre sonra tekrar taktığınızda kaydedilmiş olan tüm ayarlar silinmiştir ...

Page 12: ...uşuna tekrar tekrar basarak göstergenin parlaklığını değiştiriniz 3 kademede ya da fon ışığını kapatınız Uyarı Bu işleve ek olarak AUTO DIMMER ile göstergenin aydınlığı otomatik olarak ortam ışığına göre ayarlanır Göstergelerin fon ışığı renginin seçilmesi 1 COLOUR tuşuna tekrar tekrar basarak fon ışığının rengini 8 renk seçiniz Kulaklıkla dinlenmesi 1 Birlikte verilen kulaklığın kablosunun fişini...

Page 13: ...ramını P veya P ile seçiniz Göstergenin değiştirilmesi 1 Radyo modunda göstergeyi DISPLAY ile saat ve gün ile frekans veya program adı arasında değiştirebilirsiniz RDS program servisi RDS Radio Data System çoğu FM UKW yayın istasyonları tarafından yayınlanan bir bilgi sistemidir Cihaz RDS yayınlayan bir programı alıyorsa göstergede kısa bir süre için program adı örneğin FANTASY ve sürekli olarak d...

Page 14: ... by konumundan radyo moduna getirildiğinde ve bir RDS programı alındığında daima güncelleşir Radyo metni Radyo metni bir RDS bilgisidir 1 Radyo metnine bakmak için RDS WEC tuşuna basınız Ekranda kayan yazı olarak radyo metni TEXT görünür Program tarafından o an bir radyo metni sunulmuyorsa ekranda NO TEXT görünür Güncel program tipinin ekrana getirilmesi 1 Güncel programın tipine bakmak için iki d...

Page 15: ...yeye erişen dinamik bir ses tonu mevcuttur Uyandırma saatlerinin gösterilmesi 1 Hazır beklemede Stand by DISPLAY tuşuna birkaç kez basınız Gösterge Arka arkaya Alarm 1 Alarm 2 ve tekrar saat ile gün Radyo yayını ile uyandırma 1 Cihazı ON OFF ile hazır bekleme Stand by konumundan açınız 2 İstenen radyo programını P veya P ile ayarlayınız 3 g ile cihazın sağ tarafında istenen alarm sesi seviyesini s...

Page 16: ...dırma sinyali radyo programı veya sinyal sesi durur Alarm 5 dakikalık aralıklarla yeniden çalmaya başlar toplam alarm süresi 90 dakika Alarmın bir gün için durdurulması 1 Alarm çalarken ON OFF tuşuna basınız Alarm sinyali radyo programı veya sinyal sesi kapanır alarm ertesi gün için ayarlanan saatte yeniden etkinleşir Alarmın kapatılması açılması 1 Uyandırma işlevini devre dışı bırakmak için ekran...

Page 17: ...r süre sonunda kapatan Sleep Timer işlevi mevcuttur Kapanma süresi 90 ile 10 dakika arasında ayarlanabilir Sleep Timer ın etkinleştirilmesi 1 SLEEP NAP ile istenen kapanma zamanını ardışık olarak basılı tutun ya da adım adım tekrar tekrar basın ayarlayınız Gösterge љ Ayarlanmış olan kapanma süresi sonunda cihaz otomatik olarak kapanır 2 Kalan kapanma süresini SLEEP NAP tuşu ile görebilirsiniz Slee...

Page 18: ...eştirilmesi 1 Cihazı ON OFF tuşuna basarak hazır bekleme durumuna Stand by getiriniz 2 SLEEP NAP ile istenen hatırlatma zamanını ardışık olarak basılı tutun ya da adım adım tekrar tekrar basın ayarlayınız Gösterge NAP Cihaz önceden ayarlanmış bir süre sonunda sinyal sesi ile hatırlatma yapar 3 Sinyal sesini ON OFF ile kapatınız Uyarılar Kalan hatırlatma süresi SLEEP NAP ile ekrana getirilebilir Bu...

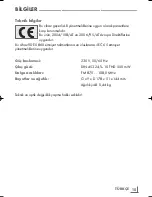
Page 19: ...ün 2004 108 AT ve 2006 95 AT Avrupa Direktiflerine uygundur Bu cihaz VDE 0860 emniyet talimatlarına ve uluslararası IEC 65 emniyet yönetmeliklerine uygundur Güç beslemesi 230 V 50 60 Hz Çıkış gücü DIN 45324 10 THD 500 mW Dalga aralıkları FM 87 5 108 0 MHz Boyutlar ve ağırlık G x Y x D 178 x 51 x 144 mm Ağırlık yakl 0 44 kg Teknik ve optik değişiklik yapma hakkı saklıdır ...

Page 20: ... least 10 cm from any other object Do not cover the device with newspapers table cloths curtains etc 7 Only use the device in a moderate climate 7 If malfunctions occur due to brief mains overloads or static electricity charges reset the device To do this pull out the power plug and connect it again after a few seconds 7 When deciding where to place the device please note that furniture sur faces ...

Page 21: ...the reminder timer DISPLAY Switches the display between frequency or station name and time with week day DIMMER Adjusts the brightness of the display to one of three levels switches off the backlight for the display ɶ TUNING ʺ For setting FM stations manually starts the automatic station search P Selects the next preset down ALARM1 Activates the setting for alarm time 1 ALARM2 Activates the settin...

Page 22: ...es and FM station information Controls on the right g Control dial for volume control Controls on the left y Headphone jack for connecting headphones or an ear phone set with a jack plug ø 3 5 mm The speaker on the unit is switched off Controls on the back Ü Power cord y Wire antenna for FM reception Controls on the bottom Battery Compartment for inserting two back up batteries compartment 2 x 1 5...

Page 23: ...ed from the mains 1 To open the battery compartment cover on the back of the device press on the marked area push the cover forward and lift it up 2 Observe the polarity marked on the base of the battery compartment when inserting the batteries 2 x 1 5 V LR 03 AM 4 AAA 3 Insert the lid again and push it to the right until it latches in place Notes Do not expose the batteries to extreme heat caused...

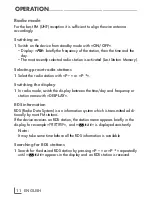
Page 24: ...e the automatic station search as well as the automatic time week day setting due to poor reception conditions for exam ple you have to make the settings manually or select a different station Tuning and storing stations A maximum of 20 stations can be stored on the presets Automatic station search 1 Press ON OFF to switch on the device from standby mode Display the frequency band and frequency or...

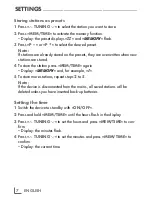
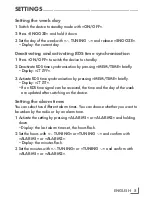
Page 25: ...tations are stored 4 To store the station press MEM TIME again Display MEMORY and for example 2 5 To store more stations repeat steps 2 to 5 Note If the device is disconnected from the mains all saved stations will be deleted unless you have inserted back up batteries Setting the time 1 Switch the device to standby with ON OFF 2 Press and hold MEM TIME until the hours flash in the display 3 Press ...

Page 26: ...FF 3 Activate RDS time synchronisation by pressing MEM TIME briefly Display CT ON If an RDS time signal can be received the time and the day of the week are updated after switching on the device Setting the alarm times You can select two different alarm times You can choose whether you want to be woken by the radio or by an alarm tone 1 Activate the setting by pressing ALARM1 or ALARM2 and holding...

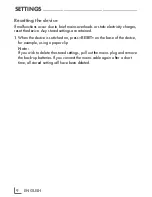
Page 27: ...charges reset the device Any stored settings are retained 1 When the device is switched on press RESET on the base of the device for example using a paper clip Note If you wish to delete the stored settings pull out the mains plug and remove the back up batteries If you connect the mains cable again after a short time all stored setting will have been deleted ...

Page 28: ...Repeatedly press DIMMER to change the brightness of the display 3 levels or of the backlight Note In addition to this function the AUTO DIMMER ensures that the bright ness of the display is adjusted to suit the brightness of the surroundings Setting the colour of the display backlight 1 Select the backlight colour 8 colours by repeatedly pressing COLOUR Listening with headphones or earphones 1 Ins...

Page 29: ...io station with P or P Switching the display 1 In radio mode switch the display between the time day and frequency or station name with DISPLAY RDS information RDS Radio Data System is an information system which is transmitted addi tionally by most FM stations If the device receives an RDS station the station name appears briefly in the display for example FANTASY and f is displayed constantly No...

Page 30: ...from standby to radio mode and a suitable RDS station can be received Radio text The radio text is RDS information 1 To call up radio text press RDS WEC The radio text TEXT appears in the display as ticker text If no radio text is available NO TEXT appears in the display Displaying the current programme type 1 To display the current programme type press RDS WEC twice The programme type appears in ...

Page 31: ...larm sound that starts with a low volume and reaches maximum volume within a short time Viewing the alarm times 1 In standby press DISPLAY repeatedly Display in sequence alarm time 1 alarm time 2 and the the time and the day Alarm with radio station 1 Press ON OFF to switch on the device from standby mode 2 Set the radio station with P or P 3 Set the desired wake up volume with g right side of the...

Page 32: ...m signal radio station or signal tone stops The alarm goes off again at five minute intervals overall alarm duration is 90 minutes Cancelling the alarm for the day 1 Press ON OFF while the alarm is going off The alarm radio station or alarm tone stops but it retains the set time for the next day Deactivating and activating alarm standby 1 To deactivate the alarm function press ALARM1 or ALARM2 rep...

Page 33: ...t a preset time The switch off time can be set in a range between 90 and 10 minutes Activating the sleep timer 1 Set the desired switch off time progressively by pressing and holding down SLEEP NAP or in steps by pressing the button repeatedly Display љ After the selected switch off time has elapsed the device switches off automatically 2 Display the remaining time until switch off by pressing SLE...

Page 34: ...1 Press ON OFF to switch the device to standby 2 Set the desired reminder time progressively by pressing and holding down SLEEP NAP or in steps by pressing the button repeatedly Display NAP The device emits a signal tone to remind you after a set time 3 End the signal tone by pressing ON OFF Notes The remaining reminder time can be displayed with SLEEP NAP The function can be interrupted by pressi...

Page 35: ...fore do not throw the product away with normal household waste at the end of its life Take it to a collection point for recy cling electrical and electronic devices This is indicated by this symbol on the product in the operating manual and on the pack aging Please find out about collection points operated by your local authority Help protect the environment by recycling used products ...

Page 36: ...the European directives 89 336 EEC 73 23 EEC and 93 68 EEC This device conforms to the safety regulation VDE 0860 and therefore the international safety regulation IEC 65 Power supply 230 V 50 60 Hz Output DIN 45324 10 THD 500 mW Wavebands FM 87 5 108 0 MHz Dimensions and weight W x H x D 178 x 51 x 144 mm Weight approx 0 44 kg Technical and design modifications reserved ...

Page 37: ...t aşağıdaki numaradan arayabilirsiniz Grundig Hizmet Merkezi 444 9 888 Sabit telefonlardan veya cep telefonlarından alan kodu çevirmeden Diğer numara 0 216 423 22 07 Sabit telefonlardan yapılan aramalarda şehir içi arama tarifesi üzerinden cep telefonu ile yapılan aramalarda ise GSM GSM tarifesi üzerinden ücretlendirme yapılmaktadır Hizmet Merkezimize ayrıca www grundig com tr adresinden 0216 423 ...

Page 38: ...ketecinin kullanımına tahsis etmesi zorunludur Arızanın giderilmesi konusunda uygulanacak teknik yöntemlerin tespiti ile değiştirilecek parçaların saptanması tamamen firmamıza aittir Arızanın giderilmesi ürünün bulunduğu yerde veya yetkili servis atölyelerinde yapılabilir Bu konuda müşteri onayı alınması zorun ludur Ancak Ürünün teslim tarihinden itibaren garanti süresi içinde kalmak kaydıyla bir ...

Reviews: