background image

Radio Reception

• Switch the set on with the 

+

/

-

or 

PRESET

buttons.

– You will receive the last heard station (e.g. FM II)  with the volume level last set.
• Press the 

SNOOZE

button to switch the radio off.

Programming/Calling up the FM Presets

You can store in memory up to 8 FM stations. These are positioned in two levels. 
The first level with 4 preset stations is indicated by FM I - FM IIII symbolisiert. 
The second level (once more 4 preset stations) is indicated by a flashing indication >>FM I<< - >>FMIIII<<.

• The 

PRESET

button allows you to step through the preset positions FM I - FM IIII - >>FM I<< -

>>FMIIII<<. 

– After selection of a preset with the 

PRESET

button, the display shows during a short time the frequency

of this preset.

• You can now select the desired frequency (87.5 MHz - 108 MHz) with the  

TUNE-UP

TUNE-DOWN

buttons (behind the flap on the backside of the unit). 

– The actual frequency is always indicated in the lower part of the display.
• Hold 

PRESET

down for 5 seconds to store the actual frequency in the indicated position

Calling up stored stations

• Select the desired station preset FM I - FM IIII - >>FM I<< - >>FMIIII<< by repeatedly pressing the

PRESET

button.

– The respective frequency is shortly indicated on the display.

– If FM reception is disturbed, reposition the connected aerial.

Volume control

If you briefly press 

+

/

-

, the display indicates for approx. 4 seconds the

volume level adjusted before switching off (e.g. LA 32).

• Adjust the desired volume level with the 

+

/

-

buttons.

When connecting commercially available headphones (socket at the right side of the unit), the built-in
loudspeaker is disconnected. 
• For this reason, the headphone must not be connected if you wish to be woken up by a radio programme. 

Tone control

• Adjust the tone to your preferences with the 

TONE LOW/HIGH

control (behind flap in back of unit).

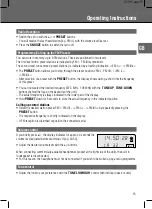
14.50

:28

FM

 II

LA

32

SC 910  page 13

Operating Instructions

13

GB

Summary of Contents for SONOCLOCK SC 910

Page 1: ...SC 910 page 1 SONOCLOCK SC 910 ...

Page 2: ...hould it be inserted into a 13 A socket elsewhere How to connect a plug The wires in the mains lead are coloured in accordance with the following code blue neutral N brown live L As these colours may not correspond with the colour markings identifying the terminals in your plug proceed as follows 1 Connect the blue wire to the terminal marked N or coloured blue or black 2 Connect the brown wire to...

Page 3: ...SC 910 page 3 3 p SONOCLOCK 910 PRESET ALARM AL MODE SLEEP ʍ 23 15 30 FM IIII AL 6 15 ɷ љ ...

Page 4: ...he local reception conditions play an important role The built in microprocessor of your alarm clock processes the received time telegrams and controls the clock fully automatically As soon as reception of the DCF time signals is possible again after an interruption the clock will immediately be synchronized In addition to the advantages of time precision and a wake up signal accurate to the secon...

Page 5: ...ments being visible If the signal strength is sufficient the 00 indication stops flashing and the seconds are count up to 60 If a correct time telegram has been received this will be indicated by the radio tower symbol at the right of the display The clock is now running exactly to the second Synchronization through DCF77 takes place permanently The radio tower symbol is switched off if no synchro...

Page 6: ...kside of the unit The actual frequency is always indicated in the lower part of the display Hold PRESET down for 5 seconds to store the actual frequency in the indicated position Calling up stored stations Select the desired station preset FM I FM IIII FM I FMIIII by repeatedly pressing the PRESET button The respective frequency is shortly indicated on the display If FM reception is disturbed repo...

Page 7: ...s repetition frequency is increased after a short pause until a continuous alarm sound is heard ʍ in display 2 Alarm mode with melody With the SNOOZE button held down the AL MODE button allows you to switch between wake up by sound signal PIEP and wake up by melody MELO You will hear a sequence of a quite large number of melodies ɷ in display Wake up by a 60 minutes radio programme You will be wok...

Page 8: ...urs after the set wake up time the selected wake up function will be made up If the mains failure lasts longer than 2 hours the wake up function for this day is lost Mains failure during a wake up function If the mains supply is recovered within 2 hours after the wake up function has started the wake up function will be started again if it was not yet running longer than 3 minutes when the mains f...

Page 9: ...If you wish to indicate e g the local time in the U K one hour earlier you have to install the time zone at 1 hour At a received time from DCF 77 of e g 17 45 SONOCLOCK 910 will now show 16 45 being the local time in the U K Please note that when the time indication seems to be wrong the time zone may have been changed accidentally Manual time setting if no time signal is received 1 Hold down the ...

Page 10: ...ZE button and then press in addition the PRESET button for more than 6 seconds All segments will be indicated one after the other in 0 5 s rythm in the display Then all segments are illuminated permanently Pressing any button then starts play of all available melodies The display indicates for example While the melodies are played you can jump at any time to the be ginning of the next or preceding...

Page 11: ...SC 910 page 74 GRUNDIG AUDIO INTERNACIONAL 0 4701 BRAGA 0 PORTUGAL 2 3 4 5 6 7 8 9 72010 746 6500 ...

Reviews: