background image

18 ENGLISH

Warming up buns

This toaster is equipped with a warming rack 

A

.

Notes

7

7

 Do not toast bread and warm up buns at the 

same time.

7

7

 Do not warm up toast slices on the warming 

rack 

A

. The toast slices hinder sufficient 

ventilation.

7

7

 If you accidentally activate the wrong mode 

(defrost instead of reheat or reheat instead 

of defrost), then the selected mode must be 

cancelled first by pressing the stop button 

G


before you can select the right mode.

1  

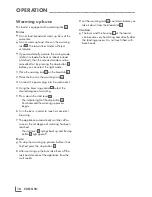
Place the warming rack 

A

 on the bread slot 

B

.

2  

Place the buns on the warming rack 

A

.

3  

Connect the power plug into the wall socket.

4  

Using the browning control 

C

 select the 

desired degree of warming.

5  

Press down the start lever 

D

.

‒  The indicator light of the stop button 

G


illuminates and the warming up process 

begins.

6  

Turn the buns in order to reach a consistent 
browning.

7  

The appliance automatically switches off as 
soon as the set degree of warming has been 
reached. 

–  The start lever 

D

 springs back up; and the stop 

button 

G

 light goes off.

Note

7

7

To stop the warming up process before it has 

finished press the stop button 

G

.

8  

After warming up the buns take them off the 
rack and disconnect the appliance from the 
wall socket.

9  

Let the warming rack 

A

 cool down before you 

take it down from the bread slot 

B

.

Caution

7

7

The buns and the housing 

I

 of the toaster 

can become very hot during and directly after 

the toasting process. Do not touch them with 

bare hands.

OPERATION ________________________________

Summary of Contents for TA 5260

Page 1: ...STAINLESS STEEL TOASTER TA 5260 ENGLISH...

Page 2: ......

Page 3: ...3 ________________________________________________________ I C B A E F G D H...

Page 4: ...sharp edges in order to prevent any damage Keep the cord away from hot surfaces and open flames 7 7 Do not use an extension cord with the appliance 7 7 Never use the appliance if the power cord or th...

Page 5: ...mote control system 7 7 When using for the first time smoke can develop due to production residues However this does not mean the appliance is defective The first time you switch it on use the applian...

Page 6: ...rnal employees and suppliers as well as on the efficient use of raw materials with continual waste reduction of several tonnes of plastic each year and availability of at least 5 years for all accesso...

Page 7: ...f browning of one slice is darker than two slices although the browning control C is set to the same level 4 Press the start lever D down until it automatically snaps into place The toasting process b...

Page 8: ...the toaster as the metal parts of the toaster and also the bread can become very hot 4 Disconnect the appliance from the wall socket Warming up already toasted bread 1 Follow the steps from 1 to 4 at...

Page 9: ...ired degree of warming 5 Press down the start lever D The indicator light of the stop button G illuminates and the warming up process begins 6 Turn the buns in order to reach a consistent browning 7 T...

Page 10: ...a soft towel Storage If you do not plan to use the appliance for a long period of time please store it carefully Make sure the appliance is unplugged cooled down and completely dry Wrap the power cor...

Page 11: ...www grundig com 72011 908 3000 12 02 AUS GUTEM GRUND...

Reviews: