ENGLISH
16
Note:
7
Continue searching for TV channels with:
– point
22
for DVB-S reception;
– point
26
for DVB-C reception;
– point
31
for DVB-T reception.
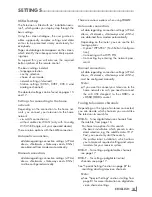
Connectingautomaticallybyentering
thenetworkpassword
Note:
7
Have you connect the WiFi USB Dongle 2
on socket »
USB1
« or »
USB2(HDD)
«?
13
Press »
V
«, the line »Change Connection
Type« is selected and press »
OK
« to con-
firm.
14
Select the option »Wireless« with »
<
« or
»
>
« and press »
OK
« to confirm.
15
Confirm the message »Do you want to turn
on Wi-Fi?« with »
« (green).
16
Select the line »Select Access Point« with
»
V
« or »
Λ
« and press »
OK
« to confirm.
– »Select Access Point« menu appears and
available wireless networks are scanned
and displayed in the menu.
17
Select the network that you want to connect
with »
V
«, »
Λ
«, »
<
« or »
>
« and press »
OK
«
to confirm.
– Wireless connection password screen is
displayed.
18
Select the required character with »
V
«,
»
Λ
«, »
<
« or »
>
« and move to the next
character with »
OK
«.
– Using »
Shift
«
➡
»
OK
«, you can switch
between uppercase letters / numbers and
lowercase letters / special characters.
– Select »
« to delete the character
entered and press »
OK
« to confirm.
19
Confirm the password with »
« (green).
– »Connecting ... Please wait« message
will be displayed, and if the connection
is established »Connection To Gateway:
Success« messages will be displayed.
20
Press »
« (green) to check the performed
settings and also if the local network and
internet connection has been established.
– »Testing ... Please wait« message will
be displayed, and if the connection is
established »Connection To Gateway:
Success«, »Internet Connection: Success«
messages will be displayed.
21
To switch to »Source Setup« menu press
»
« (blue).
Note:
7
Continue searching for TV channels with:
– point
22
for DVB-S reception;
– point
27
for DVB-C reception;
– point
32
for DVB-T reception.
Searchingtelevisionchannelswithsat-
ellitesignal(DVB-S)
22
Select the option »Satellite« with »
<
« or »
>
«
and press »
OK
« to confirm.
– The satellite Astra 19.2° East is preset.
23
Confirm the push button »Next Page« with
»
OK
«.
Notes:
7
Select the Channel Type.
Press »
<
« or »
>
« to select whether you want
to search for only digital channels (Digital) or
only radio channels (Radio) or both (Digital
+ Radio) and press »
OK
« to select and mark
or unmark the »Digital« and/or »Radio«
items.
7
Select Scan Mode.
To select whether you want to search for
only free digital television channels (Free),
only scrambled digital television channels
(Scrambled) or both (Free + Scrambled),
press »
<
« or »
>
« and press »
OK
« to select
and mark or unmark the »Free« and/or
»Scrambled« items.
24
Press »
« (red) to start searching.
– »Automatic Channel Search« menu
appears and the scan for TV channels
begins.
– The scan is complete as soon as the mes-
sage »Search is completed!« appears.
25
Select the »Channel Editor« with »
« (red).
SETTINGS
------------------------------------------------------------------------------------------------------------------
Summary of Contents for Toronto 55 CLE 6545 AL
Page 1: ...EN Toronto 55 CLE 6545 AL ...


