background image

GRUNDIG Service

VARIXX UMS 4800

1 - 3

Technische Daten

System
Spannungsversorgung:
Betriebsspannung ................................................................... 230V~
Netzfrequenz ............................................................................. 50Hz
Max. Leistungsaufnahme ........................................................... 32W
Leistungsaufnahme in Stand-by ................................................

5W

Verstärkerteil
Ausgangsleistung:
Sinusleistung .......................................................................... 2 x 5W
Musikleistung ...................................................................... 2 x 7,5W

Empfangsteil
Empfangsbereich:
FM .......................................................................... 87,5 ...108,0MHz
MW ........................................................................... 522 ... 1620kHz

CD Teil
Frequenzgang .......................................................... 100Hz ... 16kHz
Geräuschspannungsabstand (wtd.) ........................................

60dB

Abmessungen und Gewicht
Abmessungen Gerät B x H x T .......................... 195 x 115 x 242mm
Gewicht Gerät ........................................................................... 2,4kg
Abmessungen Lautsprecher B x H x T .............. 110 x 200 x 207mm
Gewicht pro Lautsprecher ....................................................... 0,75kg

Technical Data

System
Power supply:
Operating voltage .................................................................... 230V~
Mains frequency ........................................................................ 50Hz
Max. power consumption ........................................................... 32W
Power consumption in standby ..................................................

5W

Amplifier unit
Output:
Sine wave power .................................................................... 2 x 5W
Music signal power ............................................................. 2 x 7.5W

Receiver unit
Reception range:
FM .......................................................................... 87.5 ...108.0MHz
MW ........................................................................... 522 ... 1620kHz

CD unit
Frequency response ................................................ 100Hz ... 16kHz
Noise-voltage ratio (wtd.) ........................................................

60dB

Dimensions and weight
Device dimensions W x H x D ............................ 195 x 115 x 242mm
Device weight ............................................................................ 2.4kg
Loudspeaker dimensions W x H x L .................. 110 x 200 x 207mm
Weight per loudspeaker .......................................................... 0.75kg

Servicehinweise

Achtung: ESD-Vorschriften beachten 

Vor Öffnen des Gehäuses Netzstecker ziehen.

Leitungsverlegung
Bevor Sie die Leitungen und insbesondere die Masseleitungen lösen,
muss die Leitungsverlegung zu den einzelnen Baugruppen beachtet
werden.
Nach erfolgter Reparatur ist es notwendig, die Leitungsführung wieder
in den werkseitigen Zustand zu versetzen um evtl. spätere Ausfälle
oder Störungen zu vermeiden.

CD-Laufwerk 
Bei Ausbau der Lasereinheit oder der Servo-Leiterplatte muß vor
Abziehen der Steckverbindung eine Schutzlötstelle auf der Leiter-
platte der Lasereinheit angebracht werden, um eine Zerstörung der
Laserdioden durch statische Aufladung zu vermeiden.

Beim Einbau einer neuen Lasereinheit (CD-Laufwerk) muß nach
Einstecken der Steckverbinder die werkseitig angebrachte
Schutzlötstelle entfernt werden!

Service Hints

Attention: Observe the ESD safety regulations 

Disconnect the mains plug before opening the set.

Wiring
Before disconnecting any leads and especially the earth connecting
leads observe the way they are routed to the individual assemblies.
On completion of the repairs the leads must be laid out as originally
fitted at the factory to avoid later failures or disturbances.

CD Mechanism 
When removing the Laser pick-up or the Servo PCB, the Laser pick-
up PCB must be provided with a protective soldered joint before
unplugging the connectors to avoid damage to the Laser diodes by
static charges.

When inserting the new Laser pick-up (CD drive mechanism) the
soldered joint fitted at the factory must be removed after the
connectors are plugged in.

Schutzlötstelle
Protective soldered joint

Summary of Contents for VARIXX UMS 4800

Page 1: ...rvice Documents for the Complete Service Service Manual Sicherheit Safety Materialnr Part No 720108000001 HiFi Service Manual Materialnummer Part Number 720107737000 nderungen vorbehalten Subject to a...

Page 2: ...ter Isulating Transformer General Notes Before opening the cabinet disconnect the mains plug Attention Observe the ESD safety regulations Wiring Before disconnecting any leads and especially the earth...

Page 3: ...l sen muss die Leitungsverlegung zu den einzelnen Baugruppen beachtet werden Nach erfolgter Reparatur ist es notwendig die Leitungsf hrung wieder in den werkseitigen Zustand zu versetzen um evtl sp t...

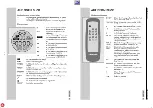
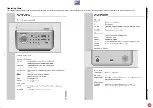
Page 4: ...800 1 4 Bedienhinweise Dieses Kapitel enth lt Ausz ge aus der Bedienungsanleitung Weitergehende Informationen entnehmen Sie bitte der ger tespezifischen Bedienungsanleitung deren Materialnummer Sie in...

Page 5: ...GRUNDIG Service VARIXX UMS 4800 1 5...

Page 6: ...0 1 6 Operating Hints This chapter contains excerpts from the operating instructions For further particulars please refer to the appropriate user instructions the part number of which is indicated in...

Page 7: ...GRUNDIG Service VARIXX UMS 4800 1 7...

Page 8: ...X UMS 4800 1 8 A B C D D C Ausbauhinweise Disassembly Hints Geh useoberteil mit CD Laufwerk Top of the cabinet together with CD Mechanism A Geh user ckteil Rear of the cabinet B Geh usevorderteil Fron...

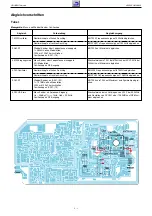
Page 9: ...chlag Abstimmknopf auf rechten Anschlag Wobbel Sender an IC201 22 f 10 7MHz ohne Modulation L203 mit 100nF kurzschlie en Oszilloskop an IC201 19 Mess Sender an Antennen Eingang Ue 25dB V fmod 1kHz Hub...

Page 10: ...knob to it s left limit stop Set the tuning knob to it s right limit stop Sweep Generator to IC201 22 f 10 7MHz no modulation short circuit L203 by a 100nF capacitor Oscilloscope to IC201 19 Signal Ge...

Page 11: ...GRUNDIG Service VARIXX UMS 4800 3 1 Platinenabbildungen und Schaltpl ne Layout of PCBs and Circuit Diagrams Blockschaltplan Block Diagram...

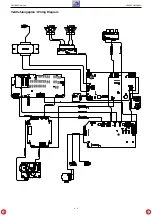
Page 12: ...GRUNDIG Service VARIXX UMS 4800 3 2 Verdrahtungsplan Wiring Diagram...

Page 13: ...V 4V 4V 4V 4V 4V 8 2V 8 2V 8 2V 4 1V 4 1V 4 1V 4 1V 4 1V 8 2V 7 7V 0V 0V 0V 0V 0V 0V 0V 14V 15 4V 15 4V 13 8V 5V 9 4V 10V 8V 0V Alle Spannungen gemessen bei FM Stereo Betrieb All voltages are measured...

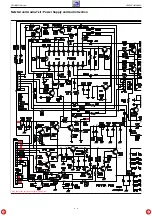
Page 14: ...GRUNDIG Service VARIXX UMS 4800 3 4 Netzteil Power Supply 8 11 10 9 13 12 4 6 5 7 3 2 1 15 14 0V 0V 0V 0V 0V 0 5V 9 3V 0 5V 0V 0V 0V 3 5V 0 7V 3 9V 0V 0V 0V 17 2V 9 3V 0V 9 3V 17 3V 17 6V 17V...

Page 15: ...X UMS 4800 3 5 Sicht auf Best ckungsseite View on Component Side F r die tats chliche Bauteilbest ckung ist das Schaltbild ma gebend The circuit diagram is relevant for the actual component assembly N...

Page 16: ...V 2 6V 2 6V 2 6V 2 6V 2 6V 2 6V 2 6V 2 6V 2 6V 2 6V 2 6V 0V 5V 2 6V 0 2V 2 6V 3 8V 2 6V 2 2V 2 6V 2 5V 2 8V 0V 2 4V 2 6V 2 4V 2 6V 2 5V 5V 2 5V 0V 3V 5V 2 6V 0V 2 7V 5V 2 2V 5V 2 3V 2 5V 2 5V 0V 2 6V...

Page 17: ...5V 1 7V 0 5V 0V 0V 1 4V 0V 5V 0V 2 2V 2 5V 0V 2 6V 2 5V 0V 2 3V 0V 0V 2 4V 2 2V 2 7V 2 3V 2 7V 0V 4 8V 1 2V 4 7V 0V 2 7V 5V 2 5V 5V 2 5V 5V 0V 2 3V 5V 2 1V 3 5V 0V 5V 0V 0V 2V 0V 0V 0V 4V 0V 2V 5V 5V...

Page 18: ...Teil CD Section F r die tats chliche Bauteilbest ckung ist das Schaltbild ma gebend The circuit diagram is relevant for the actual component assembly Sicht auf Best ckungsseite View on Component Side...

Page 19: ...4 57V 0V 0V 4 88V 4 57V 4 88V 4 71V 1 47V 0 35V 0 6V 0V 1 45V 1 26V 4 25V 4 25V 1 32V 1 31V 1 29V 1 25V 1 35V 0 31V 1 29V 1 25V 4 16V 0V 0 36V 0 45V 4 16V 2 94V 4 88V 4 57V 0V 0V 0V 0V 0V 0V 0 7V 0V...

Page 20: ...GRUNDIG Service VARIXX UMS 4800 3 10 0V 0V 0V 0V V 0 64V 0V 0V 0 64V 0V 0V 0 2V 8V 0V 0 7V 0V 5 8V 5 8V 0V 0V 0V 0V 0V 0 7V 0 7V 0V 0V 0V 0V 7 9V 1 2V 0V 0V 7 9V 1 2V 5 2V 0V 3 9V 0V 0 6V 7 8V 8 6V 8V...

Page 21: ...UMS 4800 3 11 Hauptplatte Main Board Sicht auf Best ckungsseite View on Component Side F r die tats chliche Bauteilbest ckung ist das Schaltbild ma gebend The circuit diagram is relevant for the actu...

Page 22: ...GRUNDIG Service VARIXX UMS 4800 3 12 Bedienteil Keyboard 4 9V 4 3V 4 2V 4 7V 0 8V 1 0V...

Page 23: ...GRUNDIG Service VARIXX UMS 4800 3 13 Bedienteil Keyboard 4 88V 2 15V 4 8V 4 9V 4 9V 4 9V 4 9V 4 9V 4 9V 0V 2 2V 2 6V 2 4V 0V...

Page 24: ...XX UMS 4800 3 14 F r die tats chliche Bauteilbest ckung ist das Schaltbild ma gebend The circuit diagram is relevant for the actual component assembly Sicht auf Best ckungsseite View on Component Side...

Page 25: ...VARIXX UMS 4800 3 15 F r die tats chliche Bauteilbest ckung ist das Schaltbild ma gebend The circuit diagram is relevant for the actual component assembly Sicht auf L tseite View on Solder Side Bedie...

Page 26: ...auteilbest ckung ist das Schaltbild ma gebend The circuit diagram is relevant for the actual component assembly Sicht auf Best ckungsseite View on Component Side Kopfh rerplatte Head Phone Board Line...

Page 27: ...4 1 GRUNDIG Service VARIXX UMS 4800 Explosionszeichnungen und Ersatzteilliste Exploded Views and Spare Parts List...

Page 28: ...INET LEFT 0100 000 720117136300 FERNBEDIENUNG REMOTE CONTROL P001 000 759551172200 BEDIENMODUL CONTROLBOARD P002 000 759551172300 TUNERMODUL TUNERBOARD P003 000 S 759551172400 OUTPUT NETZMODUL OUTPUT...

Reviews: