background image

ENGLISH

13

SETTINGS

____________________________________________________________________________

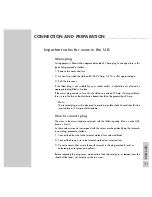
Setting the clock

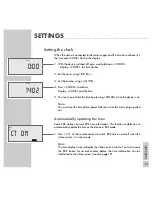
When the stereo is connected to the mains supply and the time has not been set,
the time and »CLOCK« flash in the display.

1

With the device switched off, press and hold down »

CLOCK

«.

– Display: »CLOCK«, the time flashes.

2

Set the hours using »

ıı

s6

«.

3

Set the minutes using »

5a

ľľ

«.

4

Press »

CLOCK

« to confirm.

Display: »CLOCK« and the time.

5

You can show or hide the time by pressing »

CLOCK

« when the device is on.

Note: 

You must reset the time after a power failure or when the mains plug is pulled
out.

Automatically updating the time

Some RDS stations transmit RDS time information. This function enables you to
automatically update the time on the device in RDS mode.

1

Press »

CT

« on the remote control to switch RDS time on and off when the

stereo system is in tuner mode.

Note:

The time display is transmitted by the station once a minute. You must receive
the RDS station for several minutes before the time information can be
transferred to the stereo system (see also page 19).

CLOCK

0

0 0

CLOCK

1 0

4 2

T

ST

RDS

C ON

FLAT

Summary of Contents for VERTIGA UMS 5100

Page 1: ...HIFI STEREO MICRO SYSTEM ENGLISH VERTIGA UMS 5100 72011 400 4900...

Page 2: ...12 Settings Setting the clock Tuning to radio stations Storing radio stations Deleting settings 15 General functions 17 Tuner mode RDS station service 20 CD mode Basic CD mode functions Special CD mod...

Page 3: ...s If you do use it in the open please ensure that it is protected from moisture such as rain or water splashes Do not place the stereo system close to heating units or in direct sunlight as this will...

Page 4: ...als Stand by indicator PHONES Headphone jack for connecting a stereo headphone set with a jack plug 3 5 mm The loudspeakers of the ste reo system are automatically switched off VOLUME Adjusts the volu...

Page 5: ...down to start the station search 5 a Press briefly to change the frequency in small steps NEXT PRESET Selects preset stations CD mode CD II Selects the CD input source Starts and interrupts CD playba...

Page 6: ...l AC IN Socket for power cord The only way to separate the stereo system from the mains is to pull out the mains plug General instructions for laser devices The laser installed in the device conforms...

Page 7: ...imer PROGRAM In tuner mode stores preset stations and starts the AUTO PRESET automatic search programming In CD mode stores a track memory REPEAT In tuner mode switches stereo broadcasts from stereo S...

Page 8: ...UNER Selects the input source TUNER and selects the frequency bands FM or MW 5 a In tuner mode press briefly to change the frequency s 6 in small steps Hold down to start the station search In CD mode...

Page 9: ...PEAKERS RL RL terminals on the stereo system and the INPUT terminals on the loudspeakers Connect the cables labelled in red to Connecting an external device 1 Connect the audio output sockets of the e...

Page 10: ...speakers of the stereo system are switched off Connecting the power cord Note Check that the mains voltage on the type plate on the back of the device corresponds to your local mains supply The only w...

Page 11: ...use at the distribution board should not be greater than 5 Amp Note The severed plug must be disposed to avoid a possible shock hazard should it be inserted into a 13 Amp socket elsewhere How to conne...

Page 12: ...ked on the base of the battery compartment Note If the device no longer reacts properly to remote control commands the batteries may be flat Always remove flat batteries No liability is accepted for d...

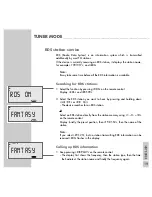
Page 13: ...e time by pressing CLOCK when the device is on Note You must reset the time after a power failure or when the mains plug is pulled out Automatically updating the time Some RDS stations transmit RDS ti...

Page 14: ...ions at positions 11 to 20 1 Press TUNER to switch on the device Display The waveband FM or MW and the frequency 2 Select the frequency band FM or MW by pressing the BAND button 3 Hold down the PROGRA...

Page 15: ...control Display MEMORY flashes along with the frequency of the station 5 Select the preset position using 1 0 10 on the remote control 6 Press PROGRAM AUTO PRESET on the remote control to store the s...

Page 16: ...N OFF on the device or 9 on the remote control to switch the stereo system to stand by mode Note The only way to separate the stereo system from the mains supply is to pull the plug Selecting the inpu...

Page 17: ...etween five different sound settings You can select between POPS ROCK CLASSIC JAZZ and FLAT according to the type of music you are listening to 1 Select the sound setting by pressing DSC Display POPS...

Page 18: ...or the name of the station or Select the preset position directly using 1 0 10 on the remote control Display briefly the preset position then FM 87 50 or the name of the station Stereo mono reception...

Page 19: ...RDS ON 2 Select the RDS station you want to hear by pressing and holding down 5 a or s 6 The device searches for an RDS station or Select an RDS station directly from the station memory using 1 0 10...

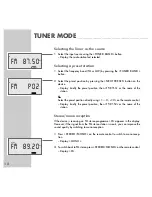
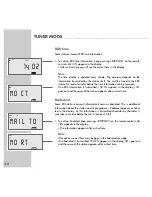
Page 20: ...lay CT goes out and the name of the station appears after a short time Radiotext Some RDS stations transmit information known as Radiotext This is additional information about the station and its prog...

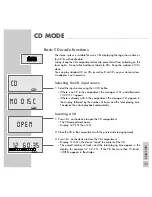
Page 21: ...D in the compartment the messages CD and afterwards NO DISC appear If there is already a CD in the compartment the message CD appears in the display followed by the number of tracks and the total play...

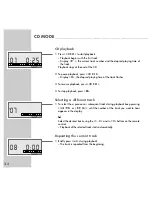
Page 22: ...ress CD II 4 To stop playback press Selecting a different track 1 To select the a previous or subsequent track during playback keep pressing 5 a or s 6 until the number of the track you want to hear a...

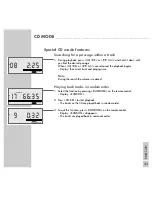
Page 23: ...laying time Note During the search the volume is reduced Playing back tracks in random order 1 Select the function by pressing RANDOM on the remote control Display RANDOM 2 Press CD II to start playba...

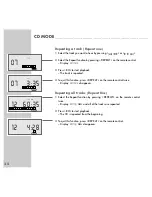
Page 24: ...To quit this function press REPEAT on the remote control twice Display r disappears Repeating all tracks Repeat Disc 1 Select the Repeat function by pressing REPEAT on the remote control twice Displa...

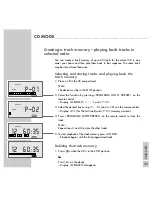
Page 25: ...he function by pressing PROGRAM AUTO PRESET on the remote control Display MEMORY and P 01 3 Select the desired track using 1 0 and 10 on the remote control Display 01 for the first track and P 0I memo...

Page 26: ...the device is on or while it is in stand by mode The clock on the device must have been set The device switches on with the input source last selected 1 Press TIMER SNOOZE Display w ON and the current...

Page 27: ...r Switch off the device by pressing ON OFF The wake up function remains activated for the next day Sleep timer Setting the sleep timer 1 Press ON OFF to switch on the device 2 Select the function with...

Page 28: ...ccording to the applicable EU directives This product fulfils the European directives 89 336 EEC 73 23 EEC and 93 68 EEC This device conforms to the safety regulation DIN EN 60065 VDE 0860 and therefo...

Page 29: ...The volume setting is too low increase the volume The headphones are plugged in disconnect the head phones The power cable is incorrectly connected connect it pro perly Mute is activated Static electr...

Page 30: ...1 11 GRUNDIG Kundendienst Mitte Dudenstra e 45 53 D 68167 Mannheim 49 6 21 33 76 70 GRUNDIG PORTUGUESA Com rcio de Artigos Electr nicos Lda Rua Bento de Jesus Cara a 17 P 1495 Cruz Quebrada Lisboa 3 5...

Reviews: